
Automate heating and air conditioning around bookings
Updated
Nowistay can heat or cool a property before your guests arrive, keep it comfortable during their stay and lower it after checkout, all from your booking calendar. No more heating an empty apartment for a week, or guests walking into a cold one.
There are two ways to use it:
- Automatic mode: a compatible thermostat or air conditioning controller is connected, and Nowistay changes its settings itself. This article explains it.
- Manual mode: no compatible device, or you prefer to adjust the equipment yourself. Nowistay sends you or your manager a reminder with the temperature to set, at the right time. See manual heating and cooling reminders.
Both modes use the same Property climate schedule. To check whether your equipment can be connected, see compatible thermostats and air conditioners.
What happens around each booking
Nowistay reads the property’s confirmed bookings and switches between three periods:
| Period | What Nowistay sets | Default |
|---|---|---|
| Preparation before arrival | Comfort temperatures, from the preparation time before check-in | 120 minutes before arrival |
| During the stay | Comfort temperatures, or night temperatures if you enable them | Heating 20 °C, cooling 25 °C. Night (optional): 22:00 to 07:00, heating 18 °C, cooling 26 °C |
| Between stays | Eco temperatures, or the equipment is turned off | Heating 15 °C, cooling 30 °C |
A few rules make the schedule follow real life:
- Arrival and departure times come from the booking, including an accepted early check-in or late checkout, then from the property’s check-in and check-out times. All times use the property’s time zone.
- Same-day turnover: if you chose to turn the equipment off between stays, the short gap between a checkout and an arrival on the same day uses the eco temperatures instead, so the property never gets too cold or too hot before the next guest.
- Cancellation during a stay: the comfort temperatures stay in place until the original checkout, so a guest still in the property is never left without heating.
- Linked properties: if the property is linked to its rooms or to the whole property, a booking on any linked unit counts.
- Only confirmed bookings count: a booking still waiting for payment, or dates you close in the calendar, keep the between-stays setting.
- Guest adjustments are respected: if a guest changes the temperature on the thermostat or in its app, their setting stays until the next scheduled change (for example checkout or the start of the night), then the schedule takes over again.
Before you start
- Your plan must include the AI assistant, and the property must be connected to Nowistay PMS (channel manager). Properties connected through a direct Airbnb or Booking.com integration or a third-party PMS (Beds24, Lodgify, Smoobu) do not appear. To switch, see how to migrate to Nowistay PMS.
- A compatible device, installed, online and visible in its brand app.
- Team members need access to the Integrations section to manage it.
Step 1: Open Heating & cooling
Go to Integrations, find the Heating & cooling card and click Manage heating & cooling. The card shows Configured once at least one property uses it.

Step 2: Connect your device account
- In the drawer, under Device accounts, click Connect an account.
- A secure connection window opens. Pick your brand (for example ecobee, tado or SmartThings) and sign in with the account you use in that brand’s app. Nowistay never sees or stores your password.
- Come back to Nowistay. If the drawer says Finish authorization with the provider, then refresh, click Refresh.
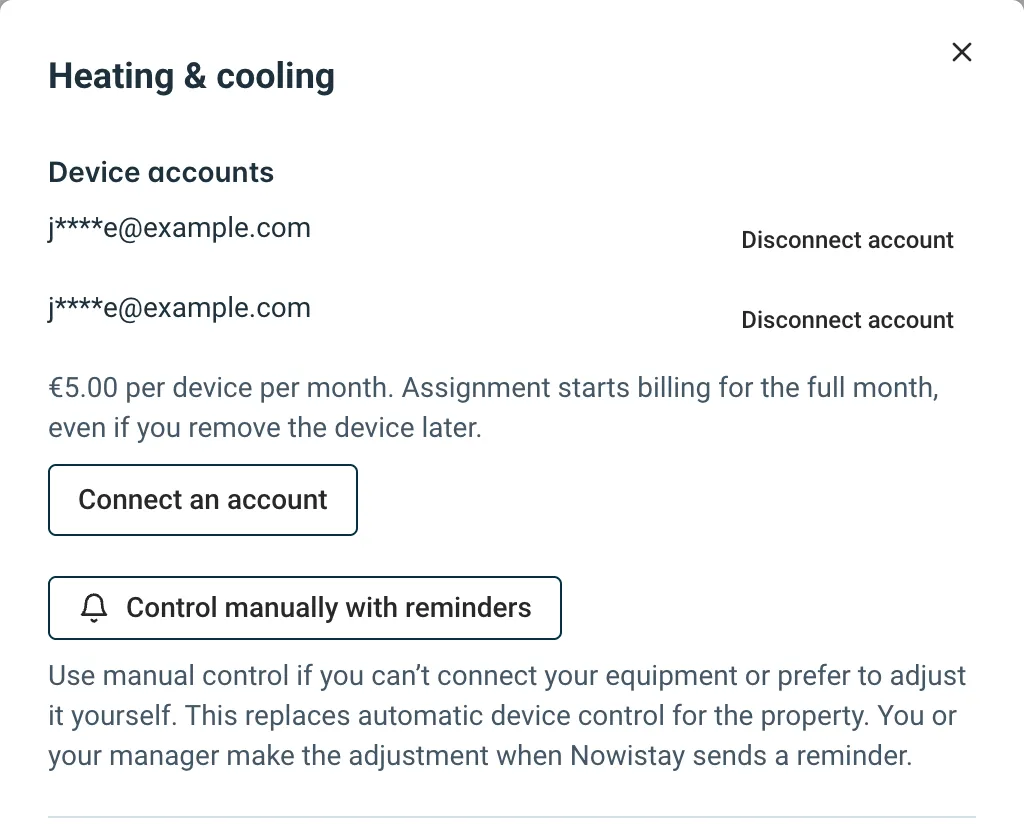
The account then appears under Device accounts. You can connect several accounts, for example a tado account for one property and a SmartThings account for another. Connecting an account is free, and the device list shows you what is compatible before you pay anything.
Step 3: Assign a device to the property
- Select the property in the Property field (type in Search for a property to filter).
- Under Assign device, open Device and Choose a device. Each entry shows its name and whether it is a Thermostat or a Sensor.
- Fill in Room or device name, for example “Living room” or “Upstairs” (up to 80 characters).
- Click Assign device and confirm the monthly price.
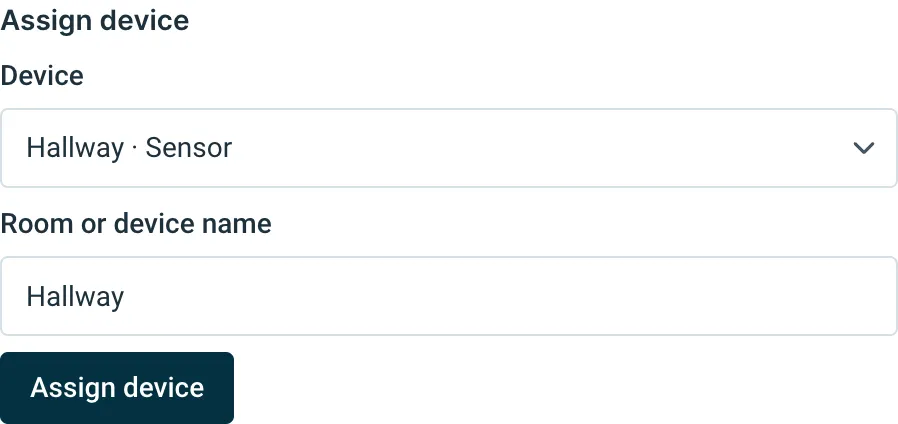
The device shows Activating device… for a moment, then its card displays the Measured temperature, the Relative humidity when the device reports it, and the Reported mode with its current targets.
A property can have several devices (one per floor or per room, for example). A device can only be assigned to one property at a time. If the list is empty, the drawer says No additional compatible devices found on your connected accounts: check that the device appears in its brand app, that it is a thermostat or an air conditioning controller, and that it is not already assigned to another property.
Step 4: Set the property climate schedule
In Property climate schedule:
- Check Automate around bookings.
- Set the Preparation time before arrival (minutes): how long before check-in the property starts heating or cooling. From 0 to 1,440 minutes (24 hours). Older buildings and underfloor heating usually need more time than an air conditioner.
- Under During a stay, set the Heating target and the Cooling target.
- Under Between stays, set the eco targets, or check Turn off between stays if the equipment can be switched off safely (frost and humidity permitting).
- To lower the temperature at night, check Night temperature and set Night starts, Night ends and the night targets.
- Click Save settings.
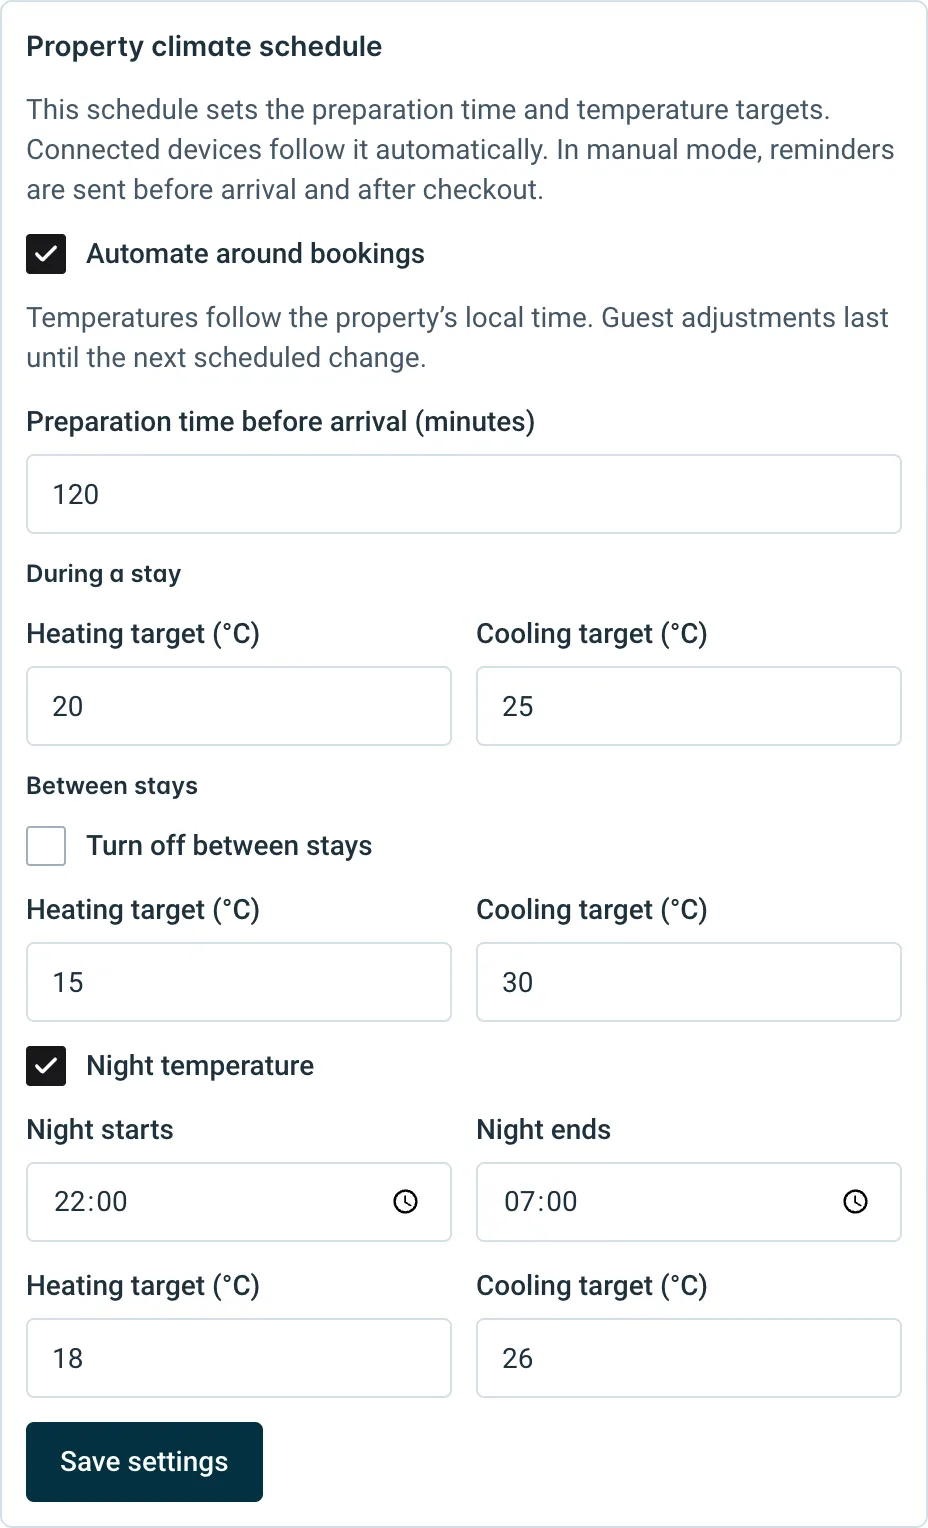
The form only shows what your equipment can do: a heating-only thermostat has no cooling targets, and a device that cannot turn off does not offer Turn off between stays. Targets go from 5 to 35 °C within the limits of the device, and each cooling target must be above its heating target by the margin the device requires. The °C / °F selector at the top of the drawer only changes the display.
Control a thermostat from Nowistay
Each thermostat card shows the Current booking setting (for example During a stay) and the Next scheduled change with its time. It also has direct controls:
- Turn on and Turn off.
- Operating mode (Automatic, Heat or Cool, depending on the device), the Heating target and Cooling target, then Set temperature.
- Resume automation, shown when Automate around bookings is on.
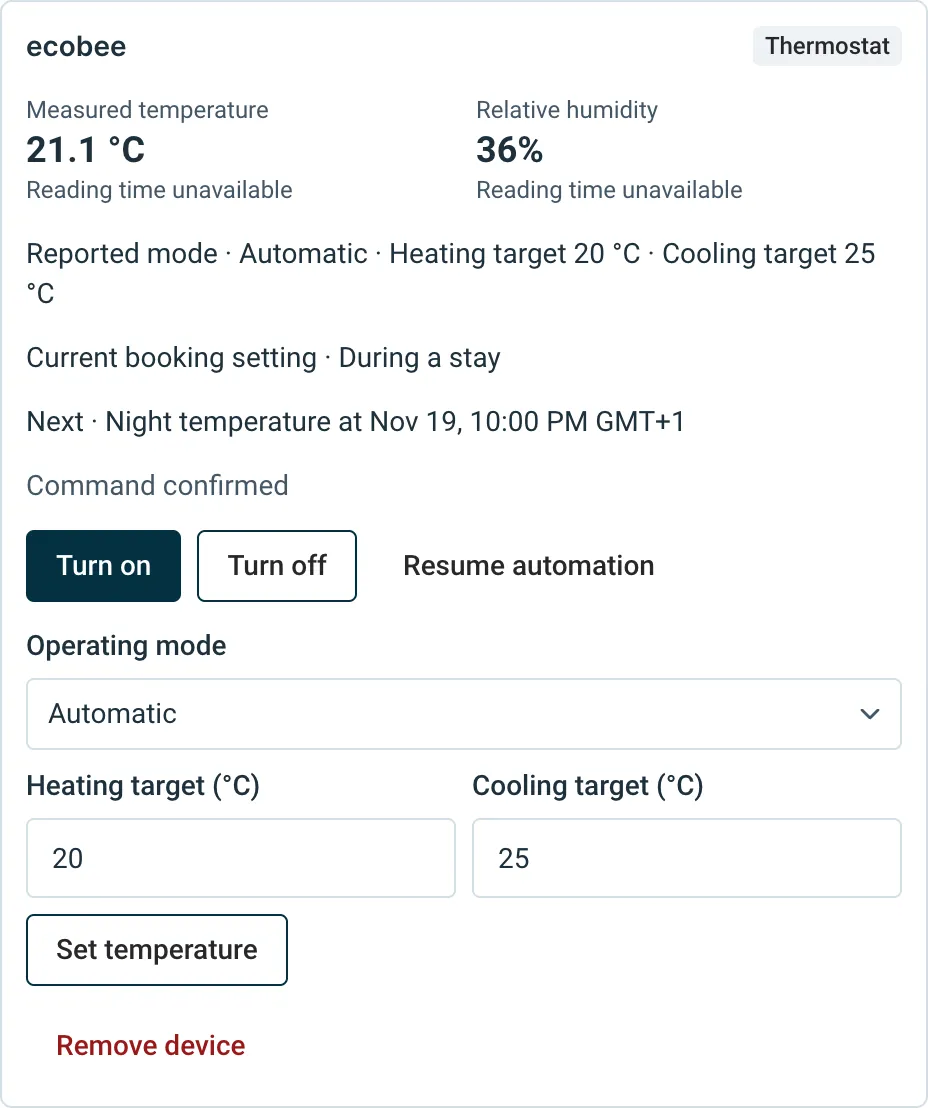
With automation on, a setting you send from Nowistay works like a guest adjustment: the card shows Manual setting until the next scheduled change, then the schedule takes over. Click Resume automation to return to the schedule right away. With automation off, your setting stays until you change it.
Each command waits for the device to confirm it (Command confirmed). If the card says Device offline, check the device’s power and internet connection, then click Refresh.
On the Properties page, properties with heating and cooling set up show a thermometer button, Heating & cooling. It opens the same controls and schedule for that property. Assigning and removing devices is done from Integrations.
Temperature sensors
A temperature and humidity sensor (for example Minut) shows its readings in the drawer, but it cannot change anything: This sensor is read-only. Use a thermostat to change the temperature.
Price
Connecting an account is free. Each device assigned to a property costs €5 per month; the drawer shows the price in your currency before you confirm. Billing starts when the device is assigned and covers the full month, even if you remove it later that month. Sensors count as devices. Manual mode has no device charge.
Remove a device or disconnect an account
- To stop using a device, open the property in Integrations > Heating & cooling and click Remove device on its card. Nowistay stops controlling it and gives control back to the thermostat’s own program, which can take a few minutes (Nowistay is returning control to the thermostat). The current month remains billable.
- To disconnect a brand account, click Disconnect account next to it under Device accounts. Remove its assigned devices first if the drawer asks you to.
- If an account shows Reconnect, its sign-in has expired: click it and sign in again in the secure window.
Can the AI co-host change the temperature for a guest?
Not yet. The AI co-host cannot read the room temperature or change the thermostat, even when a device is connected. When a guest asks for it to be warmer or cooler and cannot do it themselves, the AI files a Climate request and alerts you, or the person you chose in the request routing. You then adjust it from the thermostat card in a few seconds.
Questions such as “how does the heating work?” are answered from your welcome guide, so describe the thermostat and the air conditioning there.
Guides for hosts: read the blog.
Ready to Put Your Rental on Autopilot?