How to Connect a Yale Smart Lock

All help ressources
>
How to Connect a Yale Smart Lock

What is the Yale integration?

The Yale integration lets you connect your Yale smart lock to Nowistay so that unique keypad codes are automatically generated for every guest booking. No more meeting guests at the door, hiding lockboxes, or manually programming codes β€” Nowistay handles everything for you.

Each guest receives a temporary code that only works during their stay (from check-in to check-out), and it is automatically revoked once they leave.

Important: only one smart lock can be assigned per property. If you mix lock brands across your portfolio (Yale, Schlage, Nuki, igloohome, TTLock, Tedee), you choose one brand per property.

Prerequisites

Before connecting Yale to Nowistay, make sure you have:

  • A Yale smart lock with a keypad that supports remote keypad-code programming (Yale Assure, Yale Assure 2, and other Wi-Fi or connected models). Entry-level Bluetooth-only locks without a connected gateway are not supported.
  • A Yale Access account with the lock paired in the Yale Access app. Yale Home and Z-Wave-connected locks are supported when the lock can receive online codes; Yale Secure and Yale Connect apps are not yet supported.
  • Your properties must be configured with Nowistay PMS (channel manager). Only properties using the Nowistay PMS integration appear in the lock configuration panel. Properties connected via direct OTA integration or a third-party PMS (Beds24, Lodgify, Smoobu) are not displayed. If you currently use another PMS, see how to migrate to Nowistay PMS.

Step 1: Open the Premium smart locks panel

From your Nowistay dashboard, go to Integrations. Under the Smart locks section, find the "Premium - Schlage / Yale" card and click "Connect".

Nowistay Integrations page showing the Premium - Schlage / Yale card under Smart locks
The Integrations page β€” find the "Premium - Schlage / Yale" card under Smart locks.

The Premium smart locks drawer opens. Click "Connect Yale or Schlage".

Premium smart locks drawer with the Connect Yale or Schlage button
The Premium smart locks drawer β€” click "Connect Yale or Schlage".

Step 2: Sign in to your Yale account

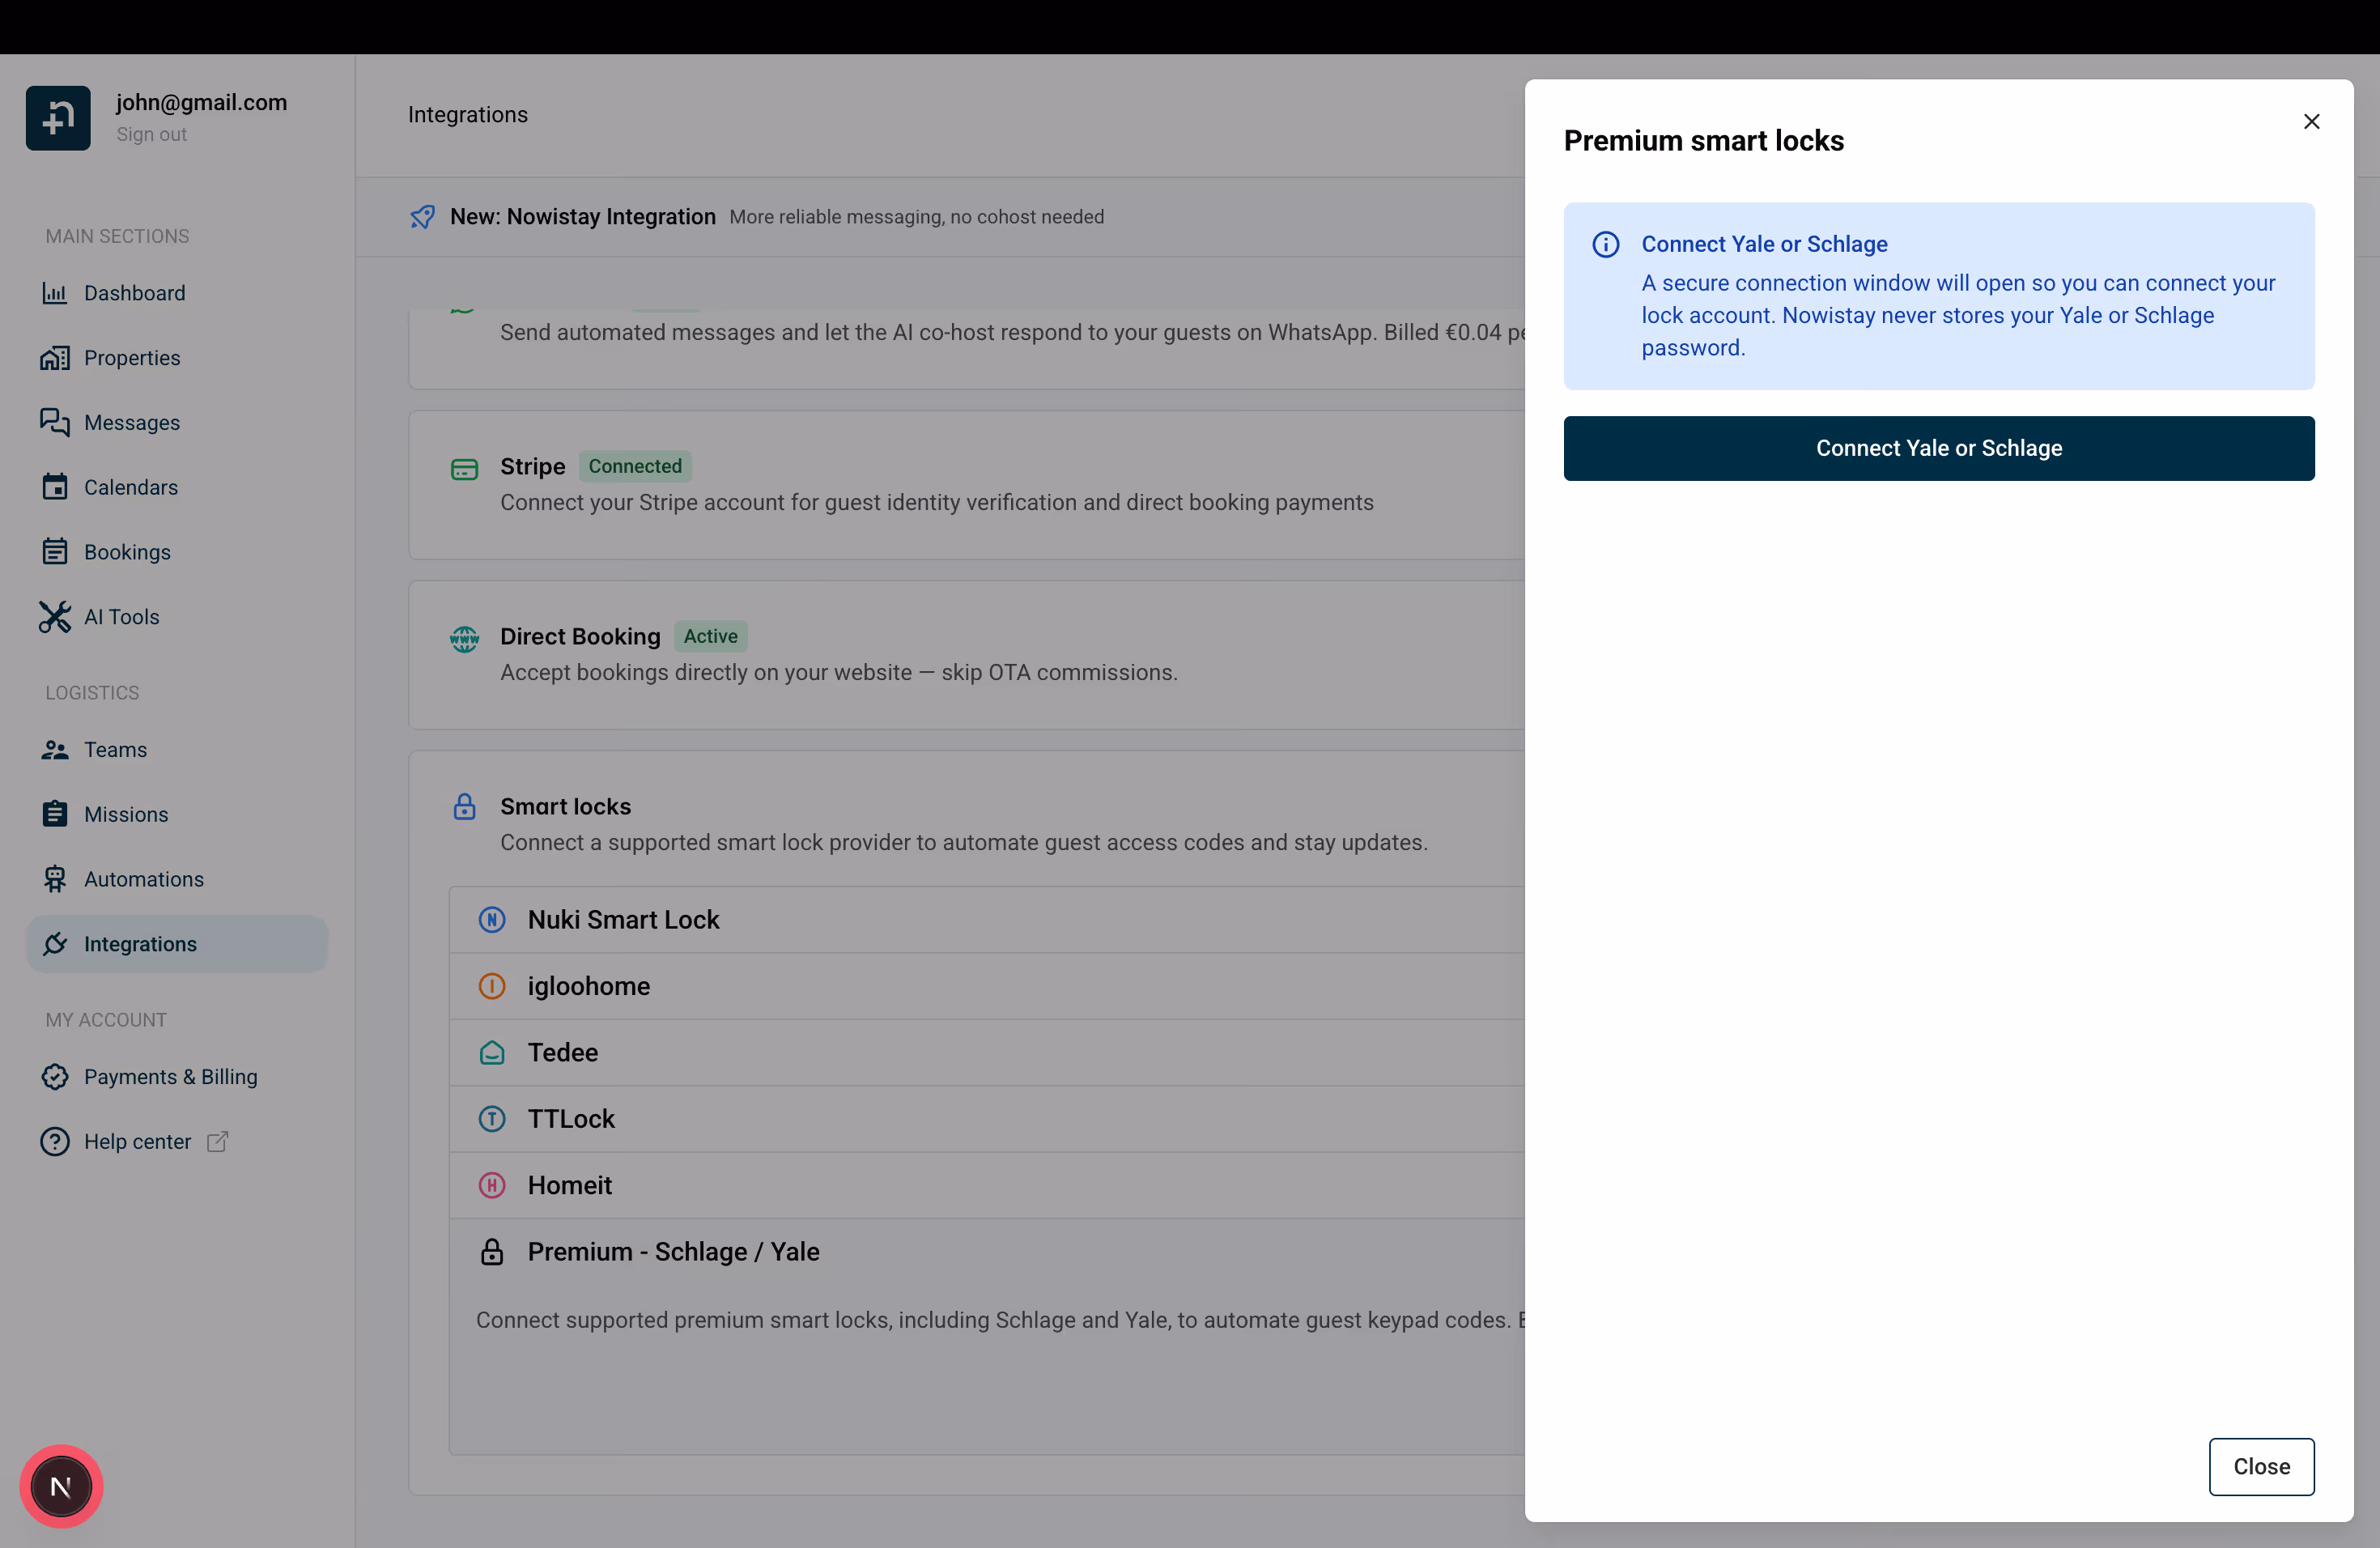
A secure connection window opens. Nowistay never sees or stores your Yale password β€” the credentials go straight from your browser to Yale.

Secure connection window introduction screen
A secure connection window opens β€” click Continue.

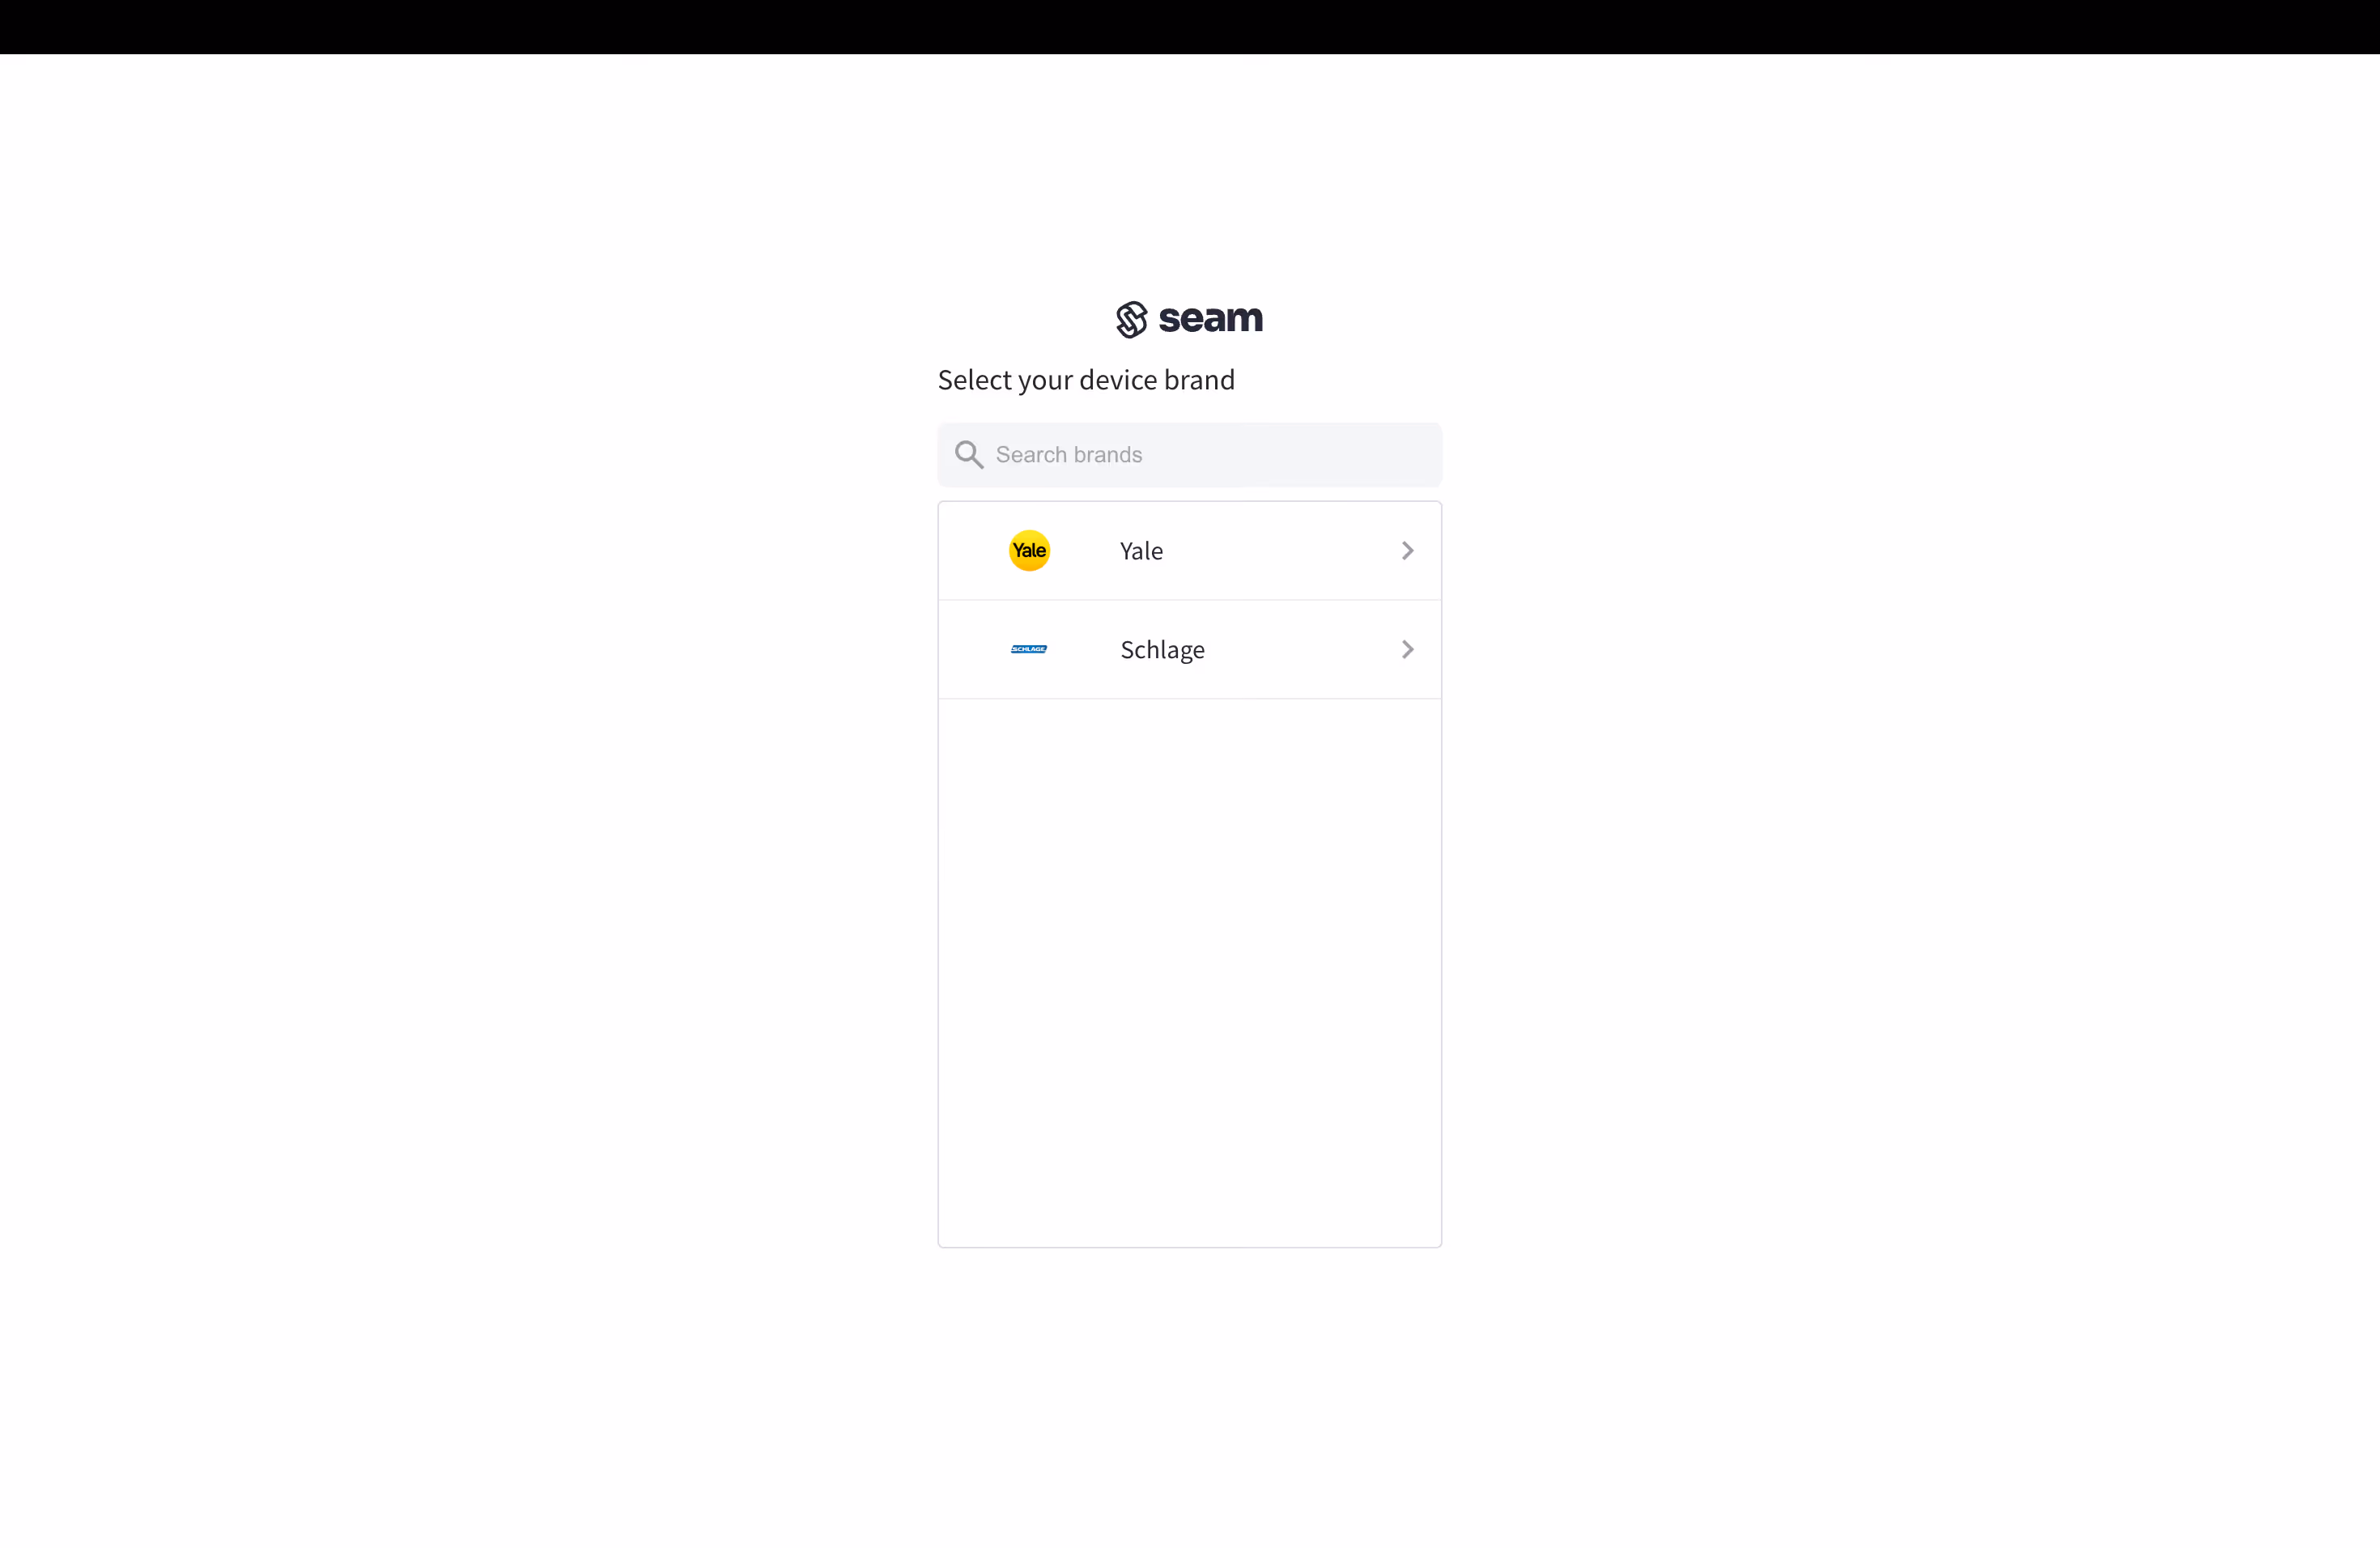
Click Continue, then pick Yale from the list of brands.

Brand selection screen with Yale highlighted
Pick "Yale" from the brand list.

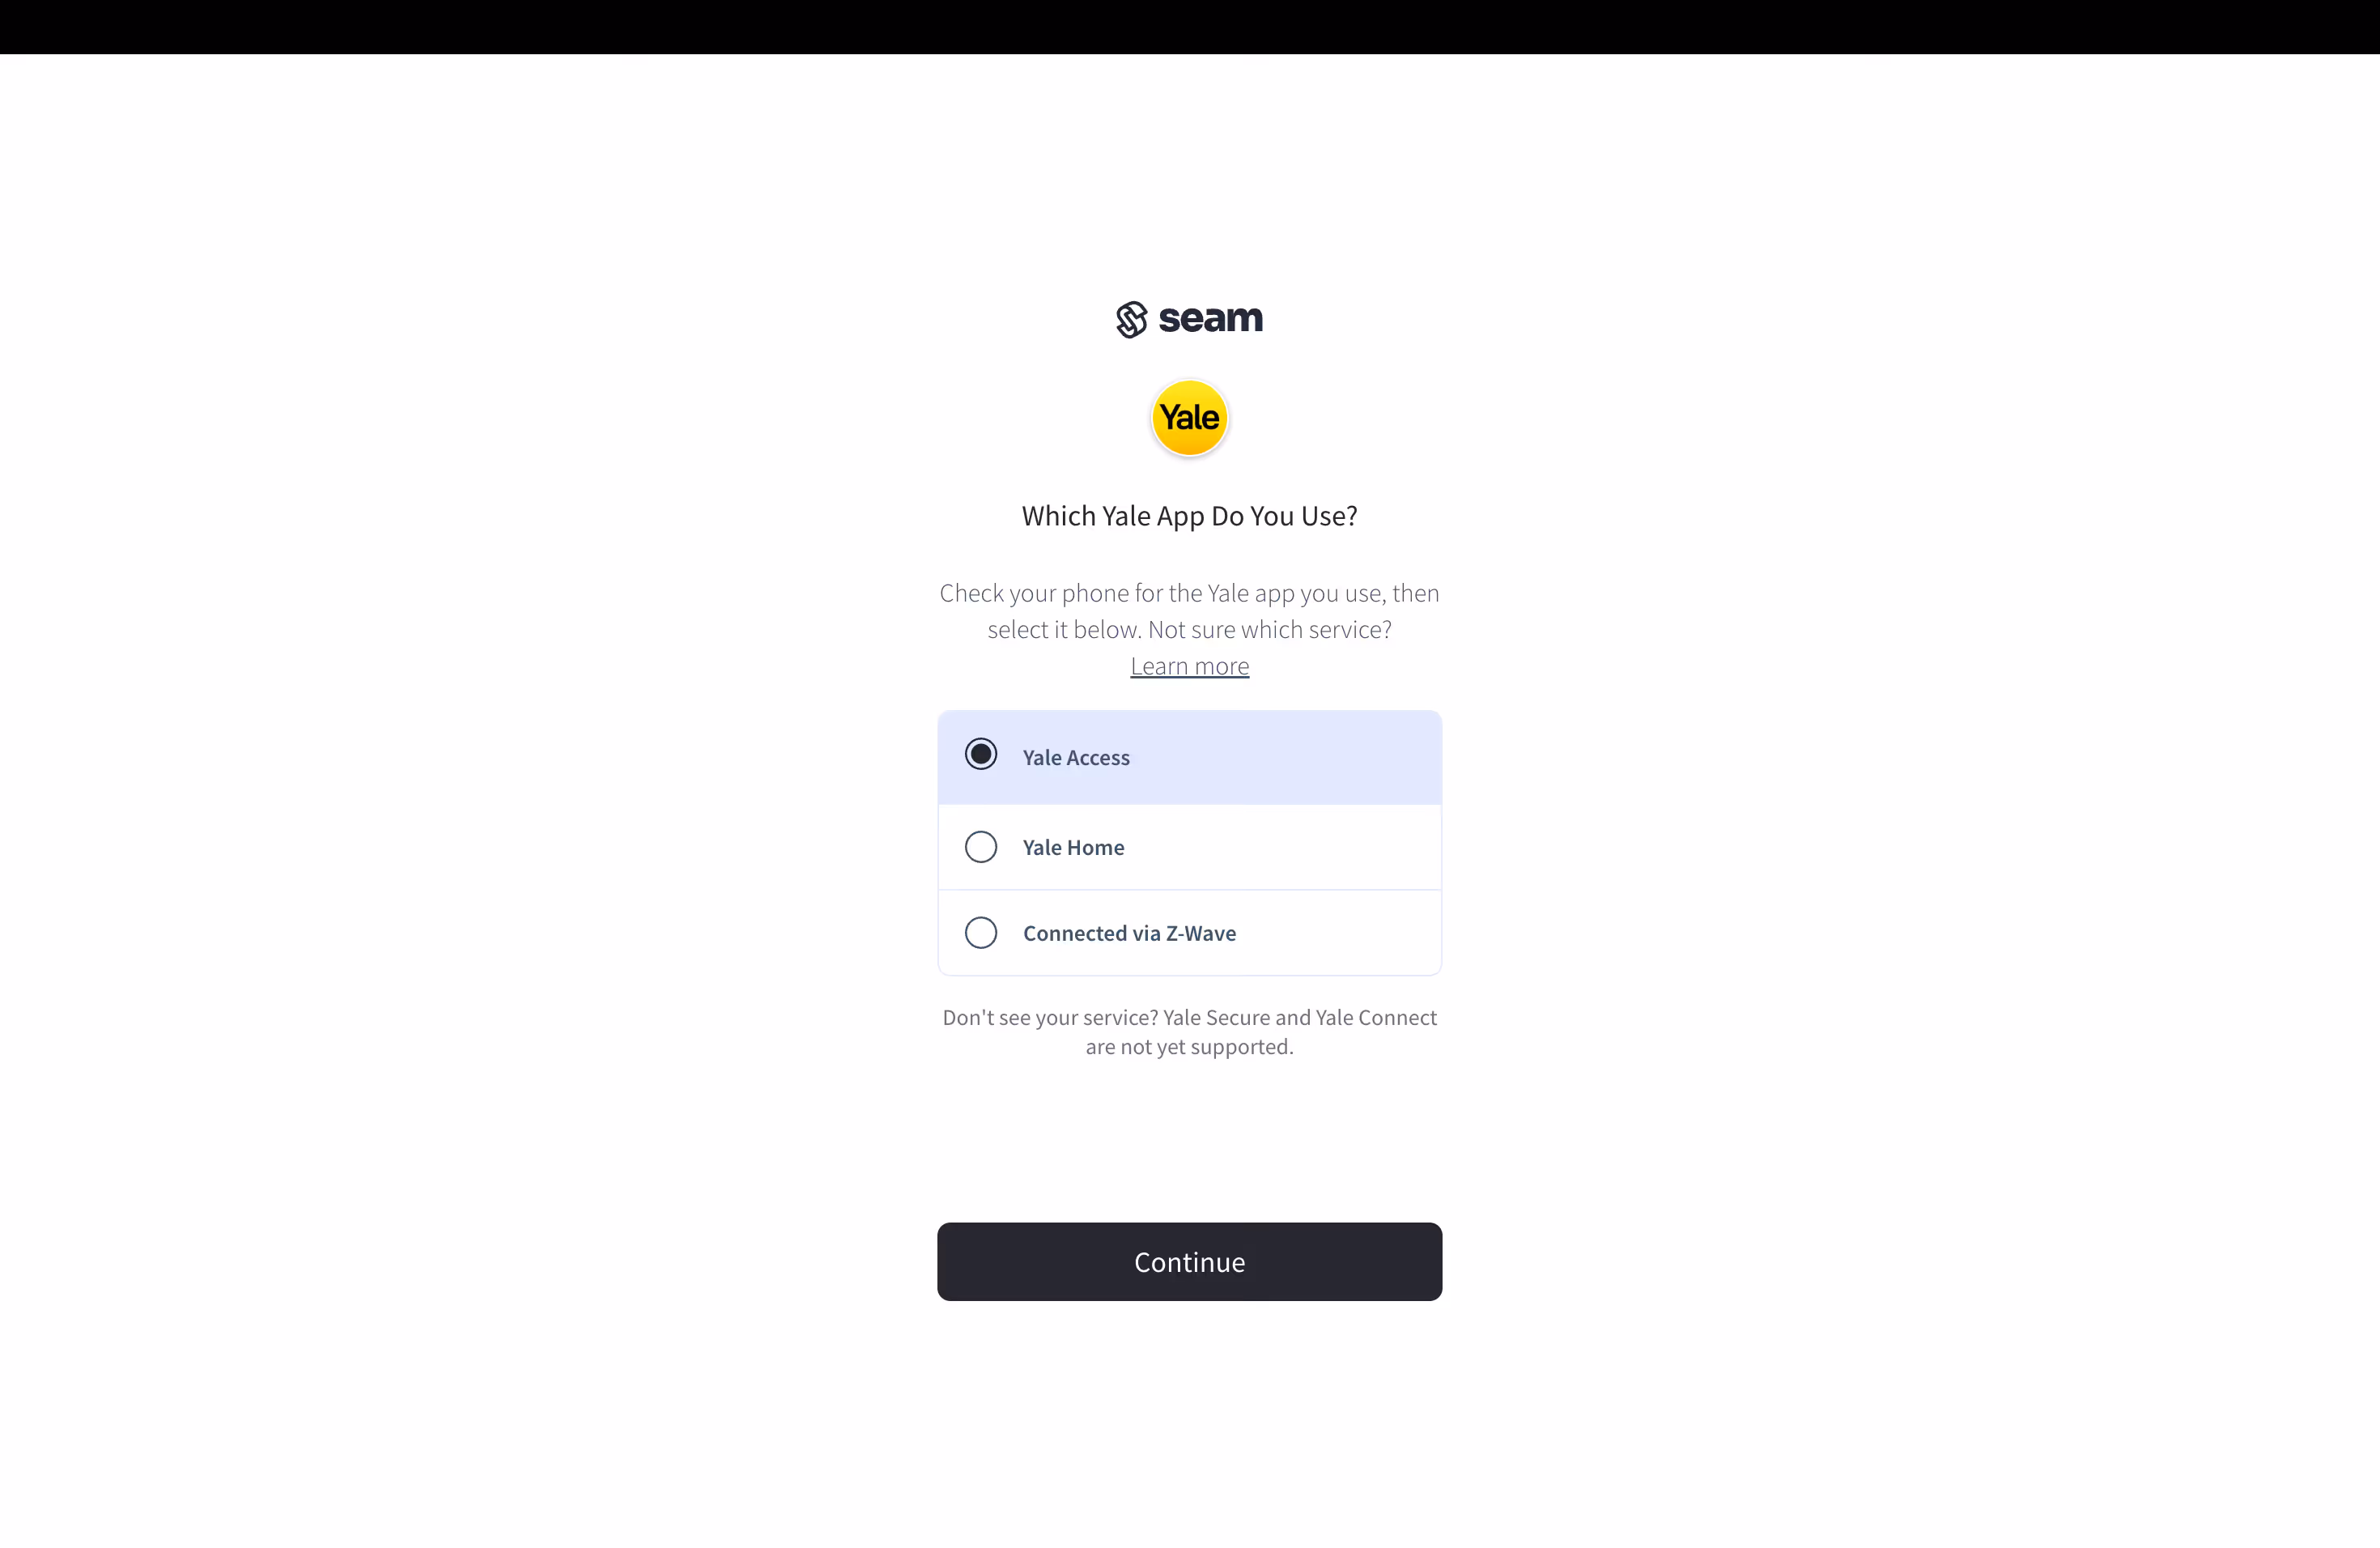
Yale will then ask which app you use to manage your lock. Pick the option that matches the app on your phone:

  • Yale Access β€” the most common choice. Use this if you set up your lock with the Yale Access app (formerly August).
  • Yale Home β€” newer Yale models in some regions.
  • Connected via Z-Wave β€” for Yale locks paired through a Z-Wave hub.

Note: Yale Secure and Yale Connect are not yet supported.

Yale app selection screen showing Yale Access, Yale Home, and Connected via Z-Wave
Choose the Yale app you actually use β€” Yale Access in most cases.

Sign in with your Yale account email and password.

Yale Access sign-in screen with email and password fields
Sign in with your Yale Access email and password.

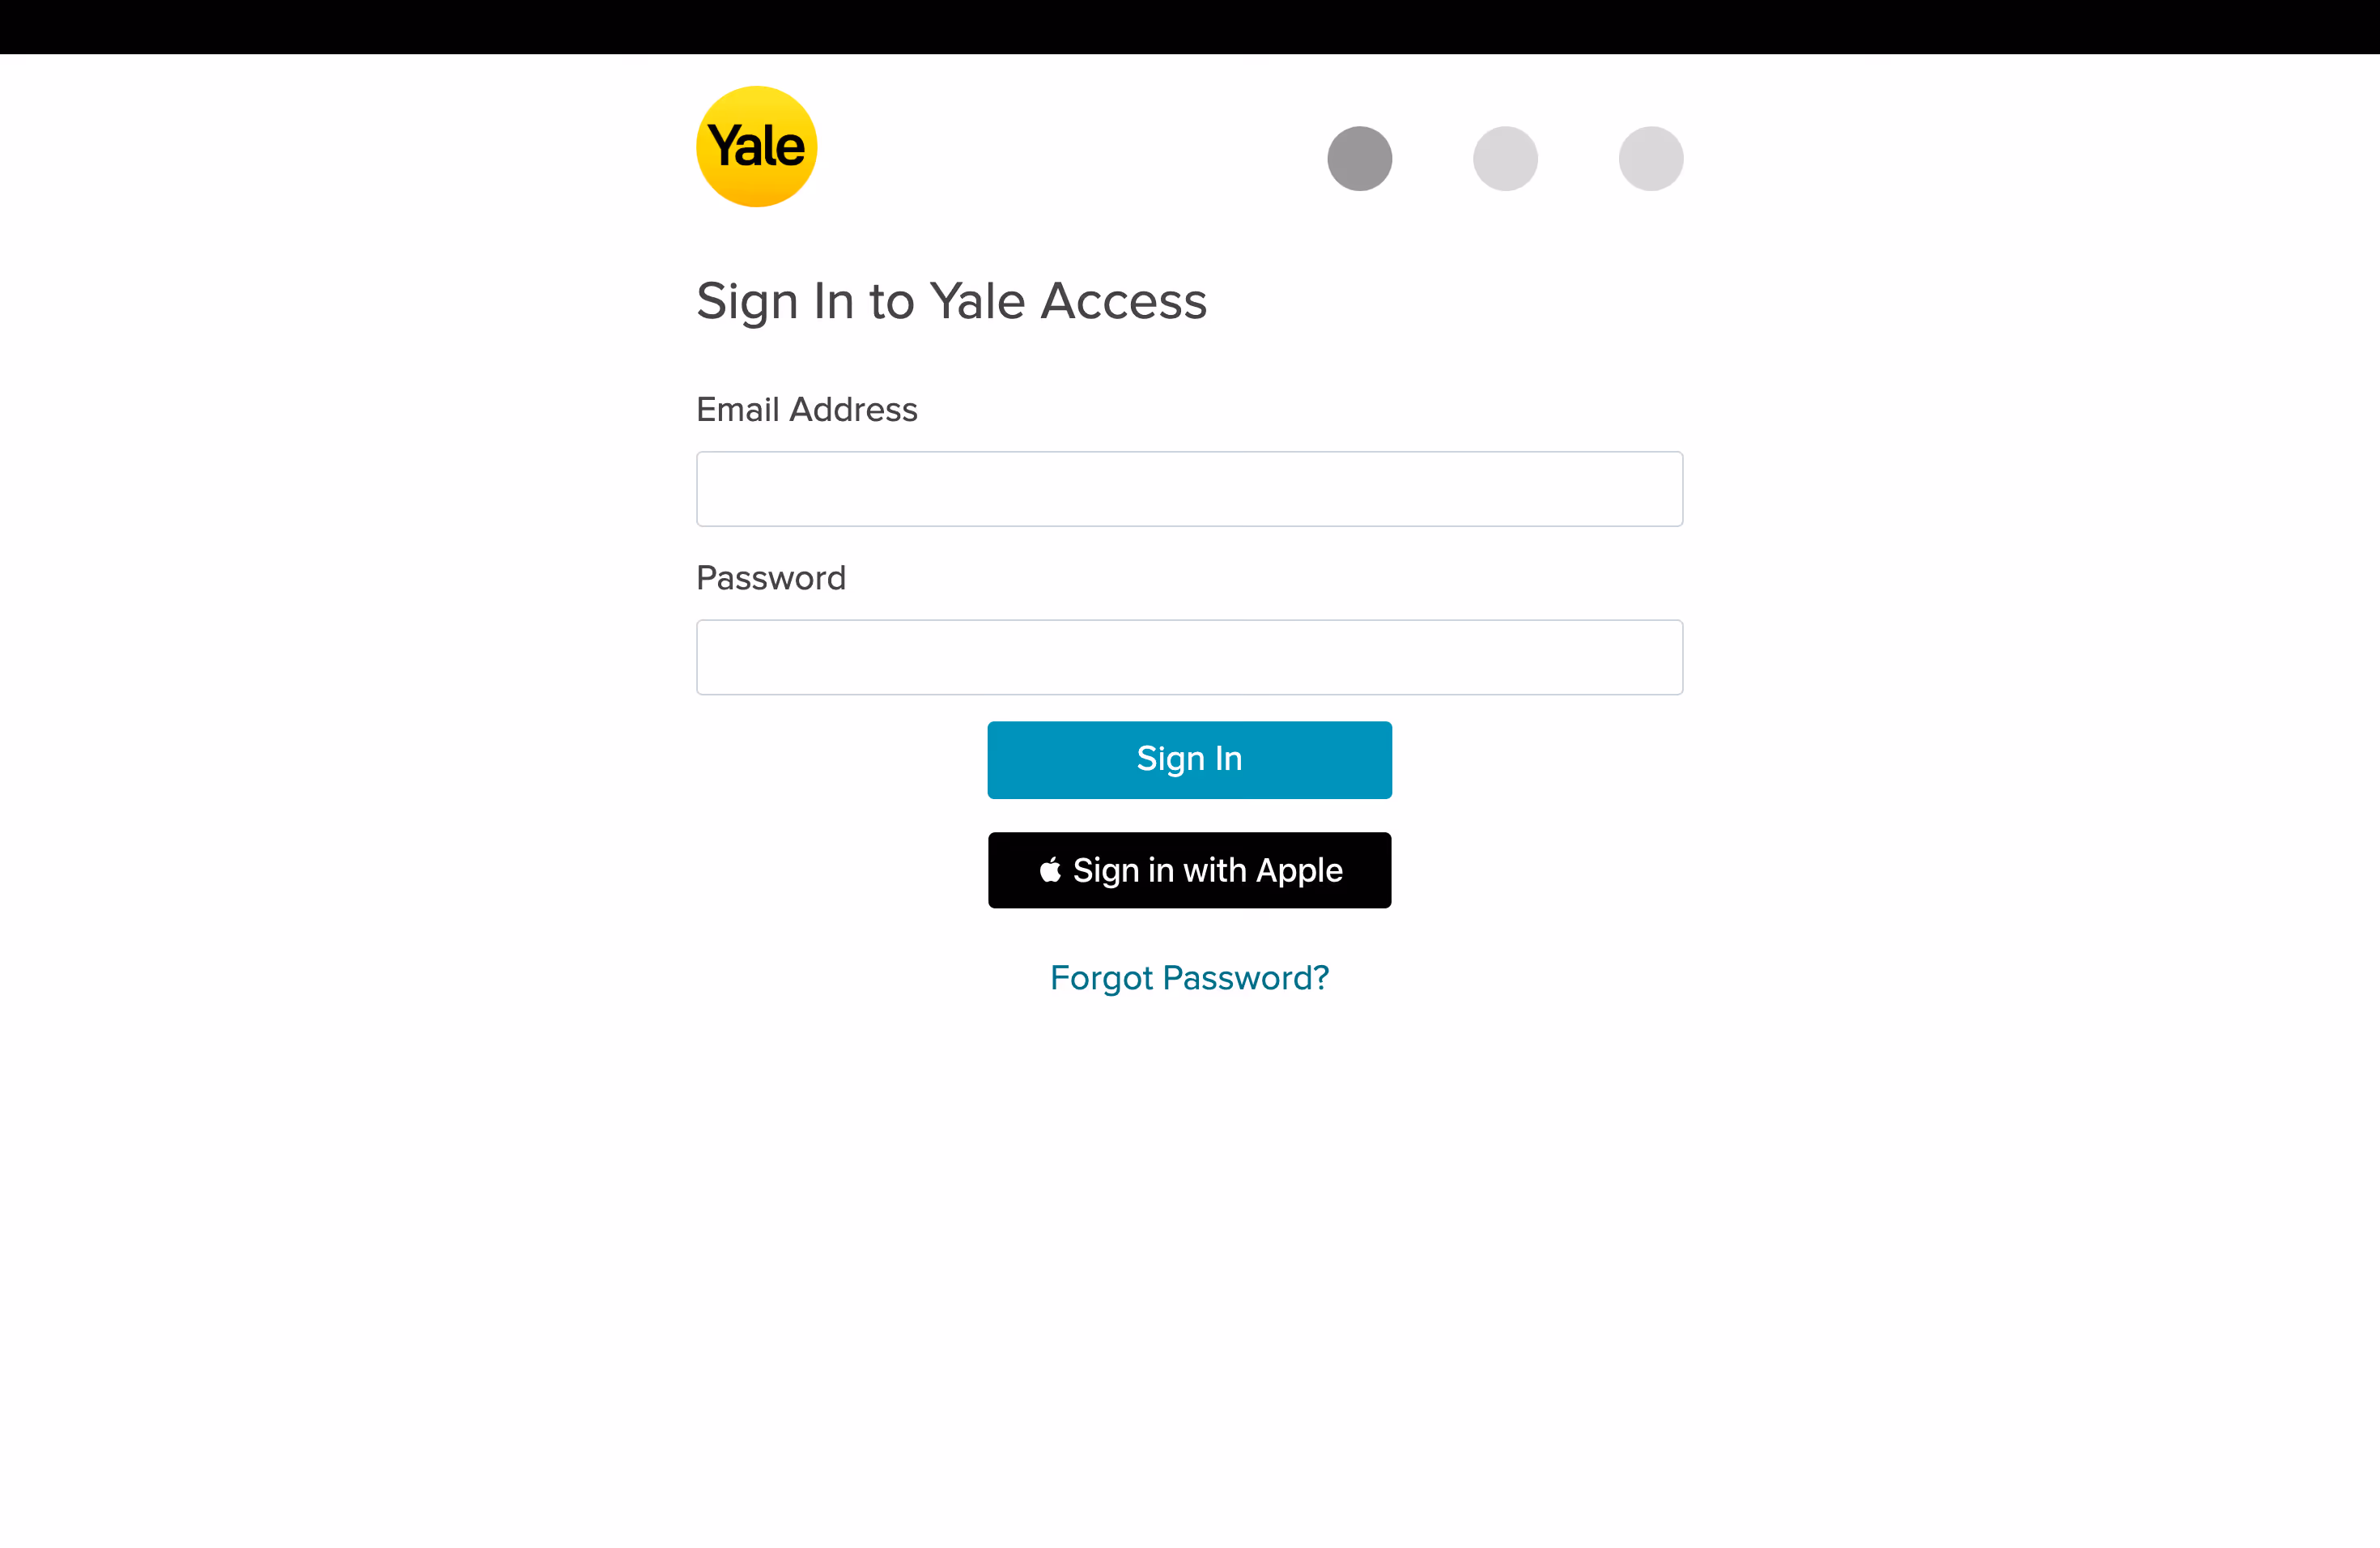
Once you sign in, the secure window closes and the Premium smart locks panel refreshes with your Yale account connected and your locks listed under Lock assignments.

Step 3: Assign locks to your properties

Once your account is connected, the panel shows your Yale locks under the "Lock assignments" section, with one row per property.

Premium smart locks drawer with a connected account and a Yale lock assigned to a property
The Premium smart locks drawer once your account is connected β€” assign a Yale lock per property, then configure timing, access margin, and code source.

For each property you want to equip with smart access:

  1. Find the property in the list (use the "Filter properties..." search box at the top).
  2. Click the "Select a Yale or Schlage lock" dropdown next to the property.
  3. Pick the Yale lock you want to assign to that property.

As soon as you select a lock, Nowistay marks it as Active and starts billing the €5/month fee for that device. Locks that are not assigned to any property stay Inactive and are not billed.

Important: each property can only have one smart lock assigned at a time, regardless of brand. If the property already has a Nuki, igloohome, TTLock, or Tedee lock assigned, you need to remove it first before assigning a Premium lock.

To change the assigned lock later, pick a different one from the dropdown. To remove the assignment entirely, use the "Remove" button β€” the lock becomes Inactive and is no longer billed from the following month onward.

If a lock does not appear in the dropdown

The dropdown only shows Yale locks that can receive online keypad codes. If one of your locks is missing:

  • Make sure the lock is online and visible in your Yale or Schlage app.
  • Confirm the lock model supports remote keypad-code programming (some entry-level models only support codes managed in person on the keypad).
  • If you see a "Some locks are hidden" notice at the top of the panel, the listed locks are not compatible with online code generation and cannot be used with Nowistay.

Pricing: how the integration is billed

The Premium smart locks integration uses a per-device monthly fee on top of your Nowistay subscription. The pricing rules are simple:

  • Connecting your account is free. You can browse all your locks before deciding which ones to use with Nowistay.
  • A lock is only billed once it is assigned to a property. Connected but unassigned locks stay inactive and free.
  • As soon as you assign a lock to a property, Nowistay activates it and charges €5 for the full month for that device, even if you remove the assignment later in the same month.
  • Only the locks actually mapped to a property are billed β€” not every lock visible in your account.

Example: if you have 3 locks in your account and assign 2 of them to your properties on March 5, you will be billed €10 for March. The third lock stays free until you assign it.

Connecting multiple accounts

If your locks are spread across several Yale or Schlage accounts (for example, one account per building, per co-host, or per region), you can connect all of them to Nowistay. Each account contributes its own locks to the Premium smart locks panel.

To add another account, open the Premium smart locks drawer from Integrations and click "Add Yale or Schlage". The same secure connection window will open and you can sign in with a different lock account. Once connected, the new locks appear in the assignment list alongside the ones from your other accounts.

Billing rules are unchanged: only locks that you actually assign to a property are charged €5/month, regardless of which account they come from.

How automatic passcodes work

Once a lock is assigned to a property, Nowistay handles everything automatically:

  1. A booking is created for your property β€” from any platform (Airbnb, Booking.com, VRBO, Expedia, direct booking, manual entry).
  2. Before the guest arrives, Nowistay generates a unique keypad code. By default the code is created 5 days before check-in; you can configure this from 1 to 14 days per lock.
  3. The code is active during the guest's stay only β€” it starts working before the scheduled check-in time and stops working after the scheduled check-out time, based on the access margin you configured (default: 30 minutes, maximum: 240 minutes).
  4. After checkout, the code is automatically revoked and removed from the lock.

Configuring the code generation timing

For each lock, you can choose how many days before check-in Nowistay should send the code to the lock. The setting appears below the lock selector, labeled "Generate codes X days before arrival".

Allowed values are 1 to 14 days, with a default of 5 days.

Examples:

  • A guest checks in on March 20 and the setting is 5 days β†’ the code is created on March 15.
  • A guest checks in on March 20 and the setting is 1 day β†’ the code is created on March 19.

If the code cannot be created on the scheduled day (for example, if the lock is temporarily offline), Nowistay automatically retries every hour until it succeeds β€” up to midnight on the check-in day in the property's local timezone.

Configuring the access margin

The access margin controls how much extra time the code remains valid before check-in and after check-out. The setting appears below the code generation timing.

Allowed values are 0 to 240 minutes (4 hours), with a default of 30 minutes. The margin is applied symmetrically β€” the same duration is added before check-in and after check-out.

Examples:

  • Check-in at 3:00 PM, check-out at 11:00 AM, margin 30 min β†’ code works from 2:30 PM to 11:30 AM.
  • Check-in at 3:00 PM, check-out at 11:00 AM, margin 120 min β†’ code works from 1:00 PM to 1:00 PM the next day.
  • Check-in at 4:00 PM, check-out at 10:00 AM, margin 0 min β†’ code works from 4:00 PM to 10:00 AM exactly.

Which check-in and check-out times are used?

The code's validity window is based on the check-in and check-out times set for each booking, in the property's timezone:

  • The negotiated check-in/check-out times if set on the specific booking.
  • Otherwise, the default check-in/check-out times configured on the property.
  • If neither is set, Nowistay falls back to 3:00 PM check-in and 11:00 AM check-out.

If code generation fails

If Nowistay can't create a code (for example, if the lock is offline), the system keeps retrying every hour:

  • The evening before check-in (6:00 PM local time): if the code still hasn't been created, you receive an email alert so you can investigate.
  • Midnight on the check-in day (local time): the system stops retrying.

Sending the code to your guests automatically

The generated keypad code is automatically available in your automated guest messages through the {{smartlock_code}} variable. The legacy {{nuki_code}} variable also works for backward compatibility.

Create an automated message triggered before check-in and include something like:

"Your door code is {{smartlock_code}}. It will be active from check-in to check-out β€” simply enter it on the keypad to unlock the door."

Your guests receive their code automatically, with no manual handoff.

Choosing how the code is generated

By default, Nowistay generates a random code for each booking. You can also choose to use the last digits of your guest's phone number, which makes the code easier for them to remember.

Open the smart lock settings for the property and pick from the Code source dropdown:

  • Random code (default) β€” Nowistay generates a unique random code for every booking.
  • Last digits of guest phone β€” the code is derived from the guest's phone number.

If the guest phone mode is selected but the phone number is missing, too short, already in use, or rejected by the lock, Nowistay automatically falls back to a random code β€” your guests always get a working access code.

Disconnecting an account

If you need to disconnect a Yale or Schlage account, open the Premium smart locks panel from Integrations and click "Disconnect" next to the account name.

Disconnecting will:

  • Revoke active codes for current and upcoming guests of locks linked to that account.
  • Remove all property assignments tied to that account's locks.
  • Stop all future code generation for those locks.

If you have multiple Yale or Schlage accounts connected, disconnecting one only affects its own locks β€” your other accounts continue to work normally.

Ready to Put Your Rental on Autopilot?

Join 300+ property managers who save hours every week with AI-powered guest communication.