How to connect the AI Co-host to my Booking.com listing?
Want your nowistay AI Assistant to manage messages from your Booking.com guests? There are two ways to connect your Booking.com listings to nowistay. Choose the option that best fits your situation.
Option 1: Connect via the Nowistay Integration (Recommended)
When to choose this option
This is the recommended method if:
You don't currently use a PMS (Property Management System) or channel manager
Or you're ok to switch to nowistay as your channel manager to centralize the management of your listings if you already use another channel manager
You want the most reliable and feature-rich connection with Booking.com
Why is this the preferred solution?
Nowistay becomes your channel manager: manage your availabilities, bookings, and prices directly from nowistay across all your booking platforms (Airbnb, Booking.com, etc.) — no need for a separate PMS subscription
AI handles inquiries from the very first message: unlike the direct method, the AI assistant can respond to guest messages right from the start — no message is missed
Greater reliability: the integration is more stable and robust, ensuring uninterrupted synchronization between your listings and nowistay
More features coming: this integration is actively being developed with new capabilities added regularly — your AI co-host will become even more powerful over time
⚠️ Important: If your Booking.com listing is currently connected to another channel manager or PMS, you will need to disconnect it first before connecting with nowistay. Booking.com only allows one connectivity provider per property at a time.
How to set it up
Step 1: Activate the Nowistay PMS on your Booking.com property
Before adding your property in nowistay, you need to activate the Nowistay PMS as your connectivity provider in the Booking.com extranet.
Open the property by clicking the proposed list from the extranet home.
Copy your Property ID (also called Property Code) displayed at the top of the navigation — you will need it later in nowistay.
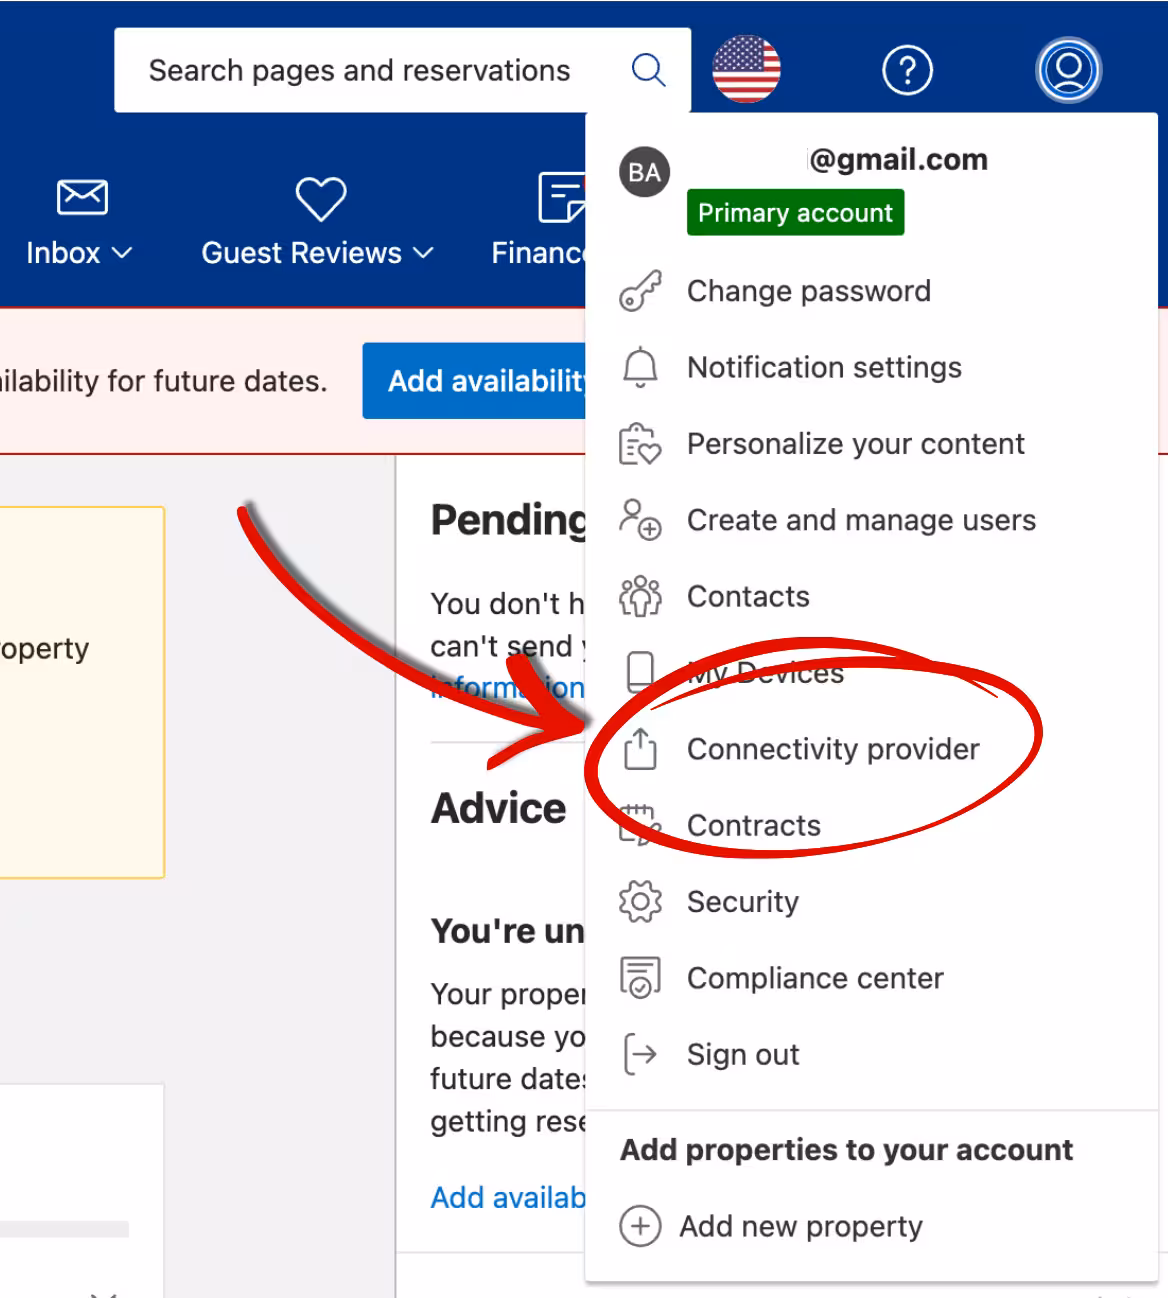
Go to Account > Connectivity Provider.
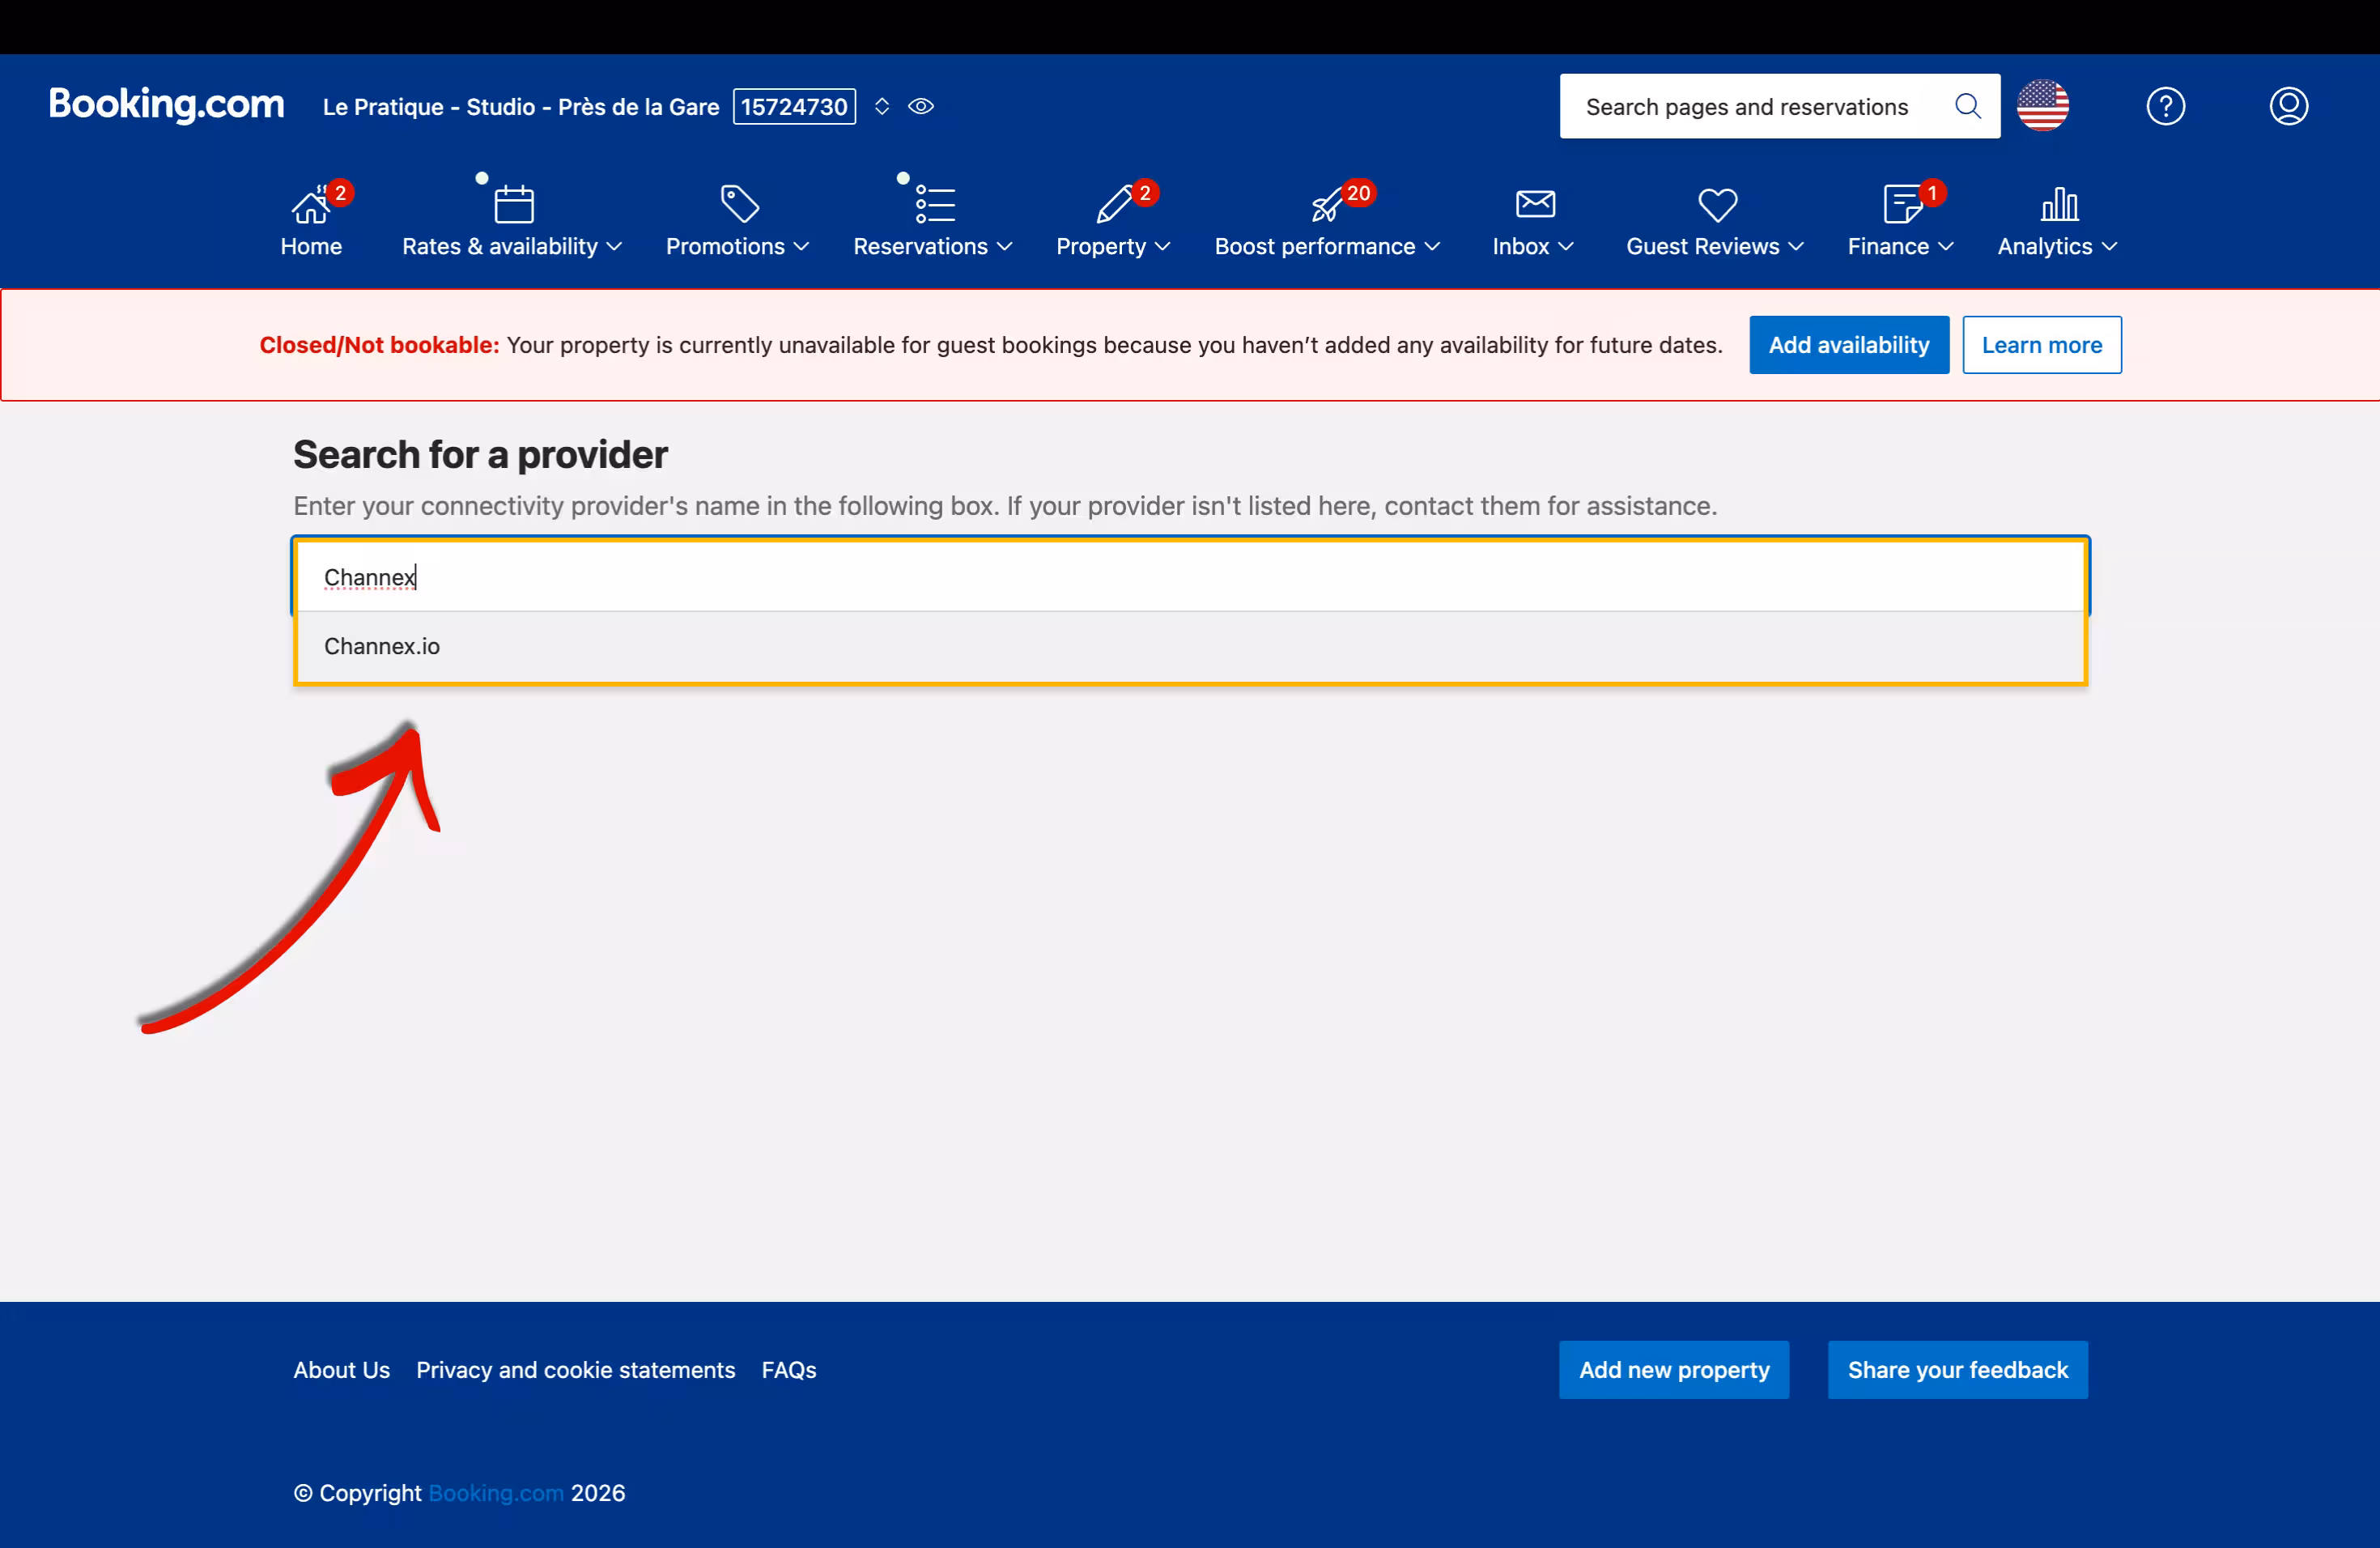
On the provider selection screen, click "Search" and type the complete word "Channex" (Nowistay's channel manager) (the system won't recognize partial entries). Select Channex.io (Nowistay's channel manager) from the results and click Next.
Check the checkbox to agree with the terms and click "Yes, I accept" on the XML Service Agreement form. No other fields need to be filled in.
Your connection will enter a waiting status until approved. You can proceed to the next step in nowistay while waiting.
💡 Tip: This step should be done by the property owner or manager personally, as Booking.com uses 2-step security with passcodes sent to your phone.
Your property should be already added. If not and you have a Airbnb listing start by importing it following these instructions. Otherwise add the property manually.
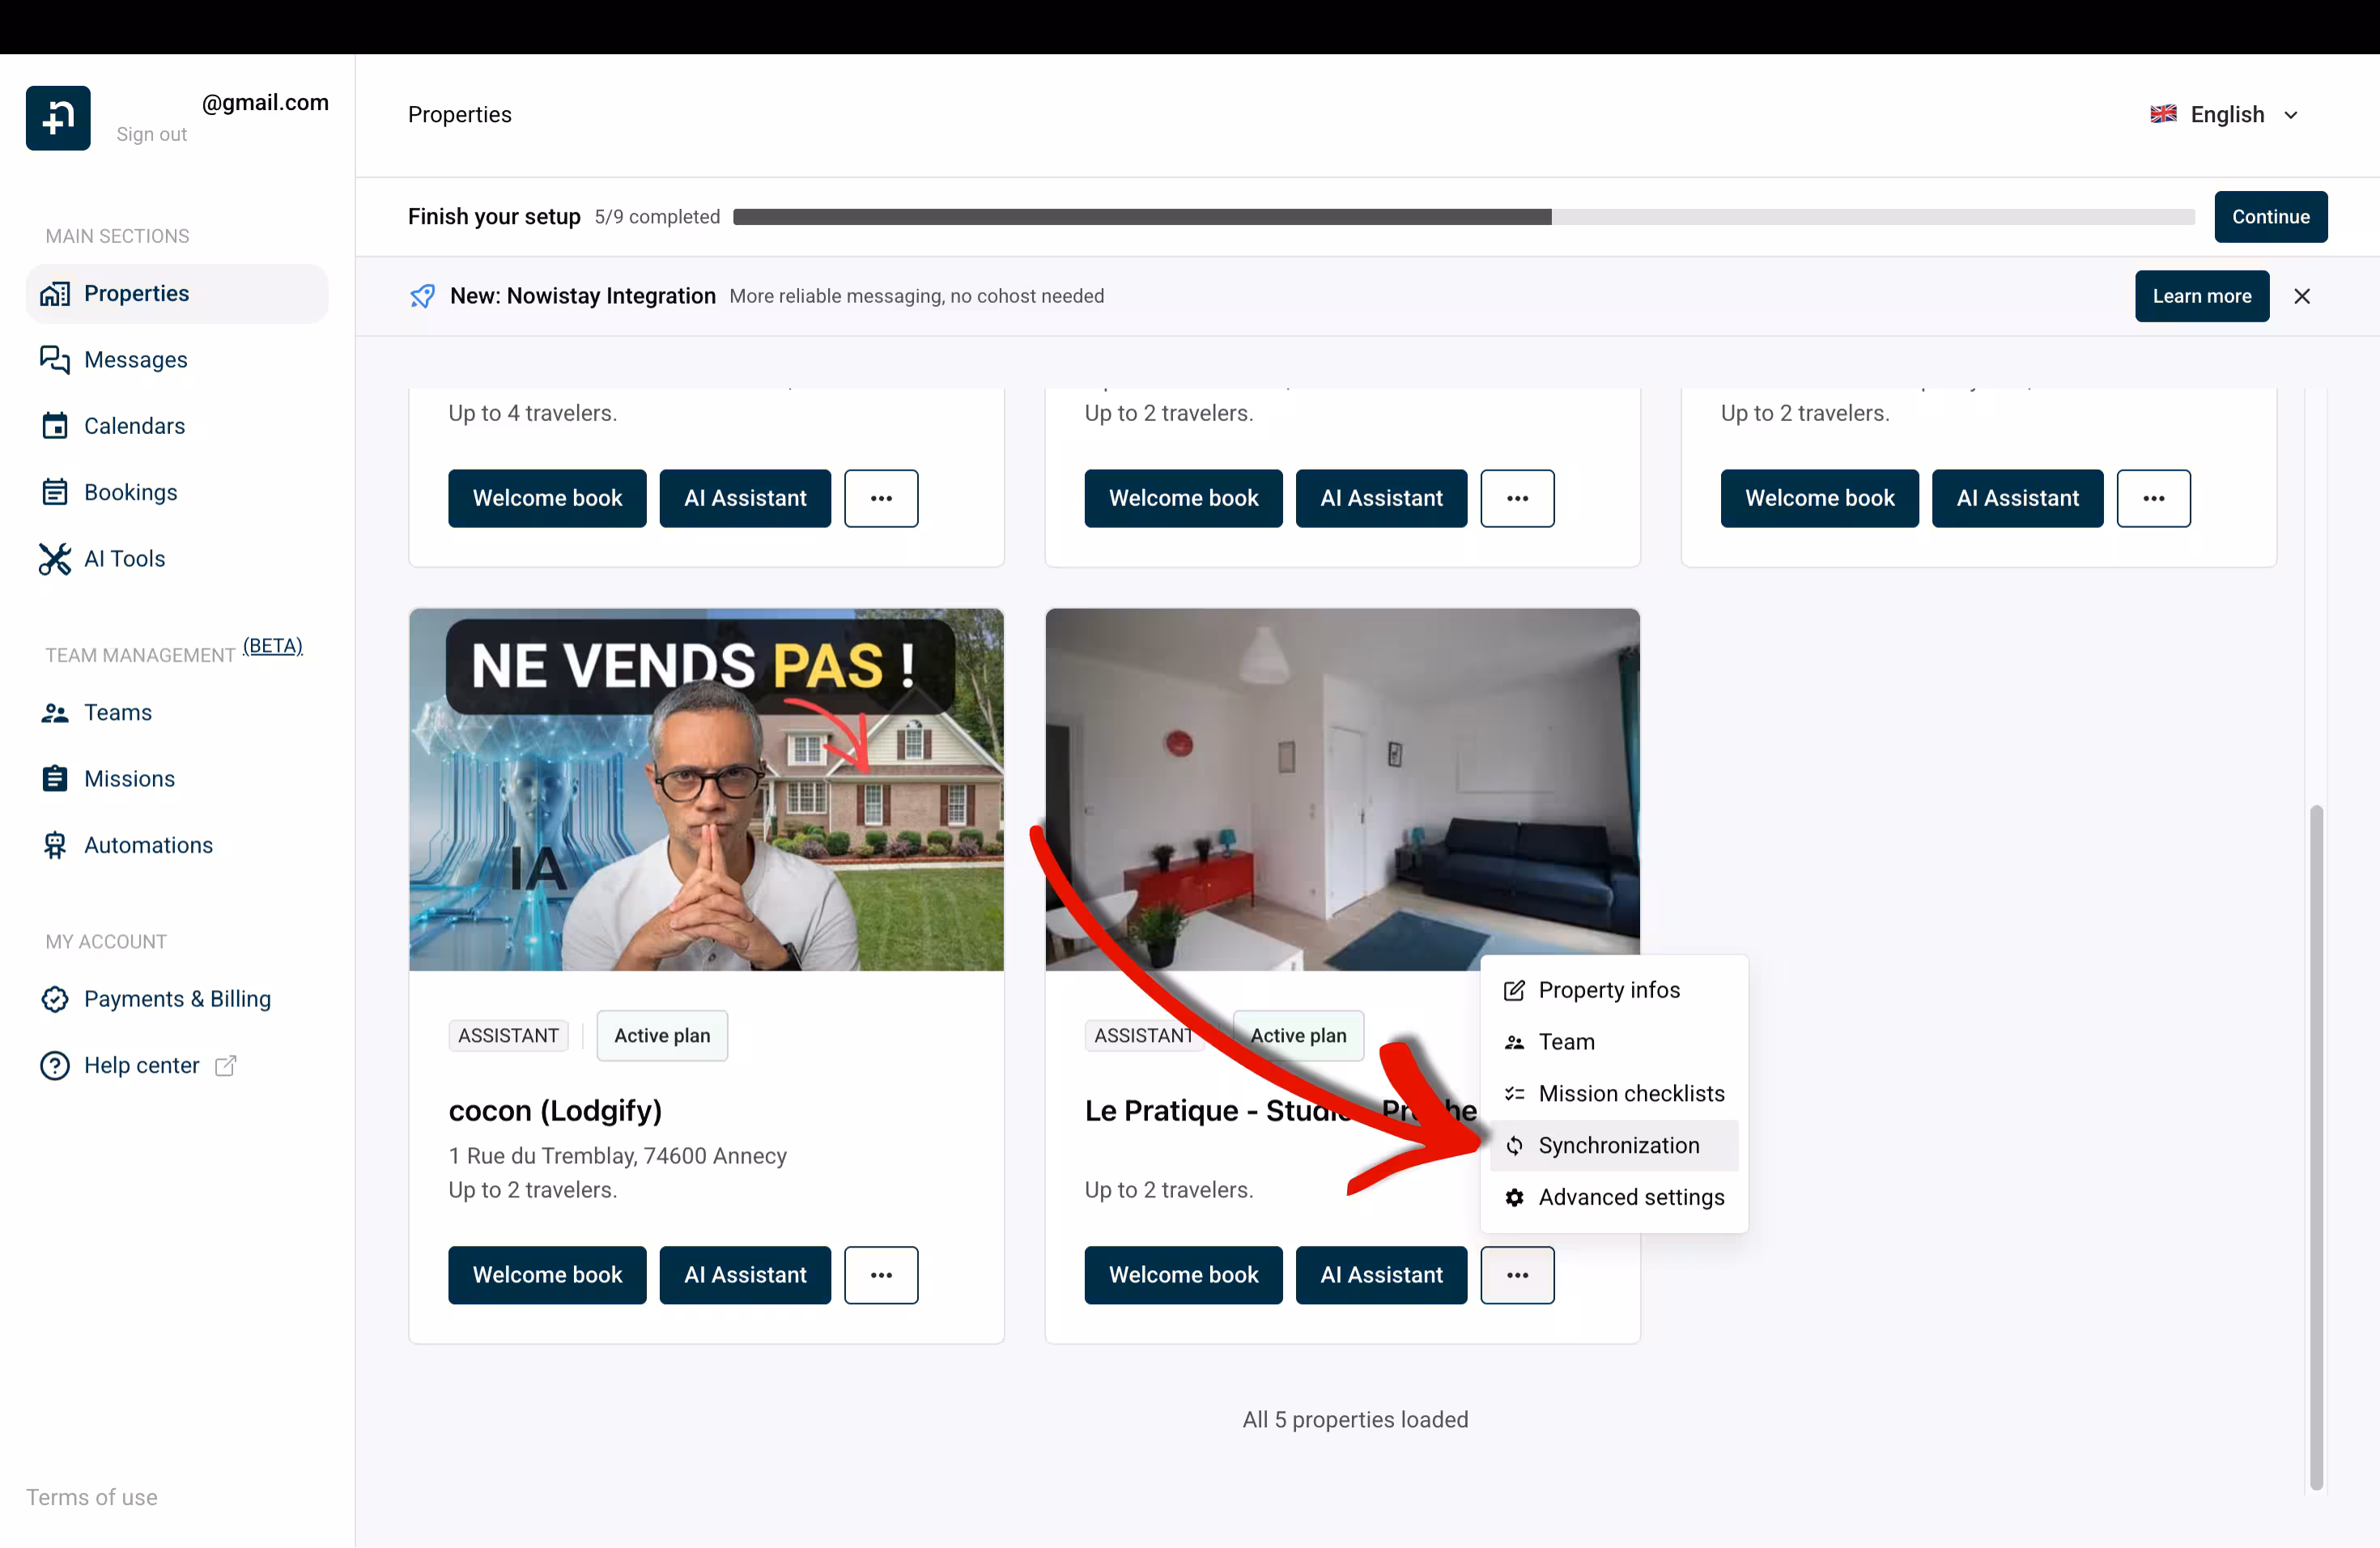
Once added and visible in the dashboard click the "..." menu and then "Synchronization" (pre-requisites is to subscribe to the AI Channel Manager offer, otherwise that option does not appear).
If your property is not yet connected to Nowistay (PMS), just answer « No, I don't use aPMS".
If you already publish your property on Airbnb, start by connecting Airbnb first so that nowistay can set up your prices and availabilities from Airbnb (not possible via Booking.com). When you connect booking.com afterward, it will propagate the same availabilities. This will save you some time.
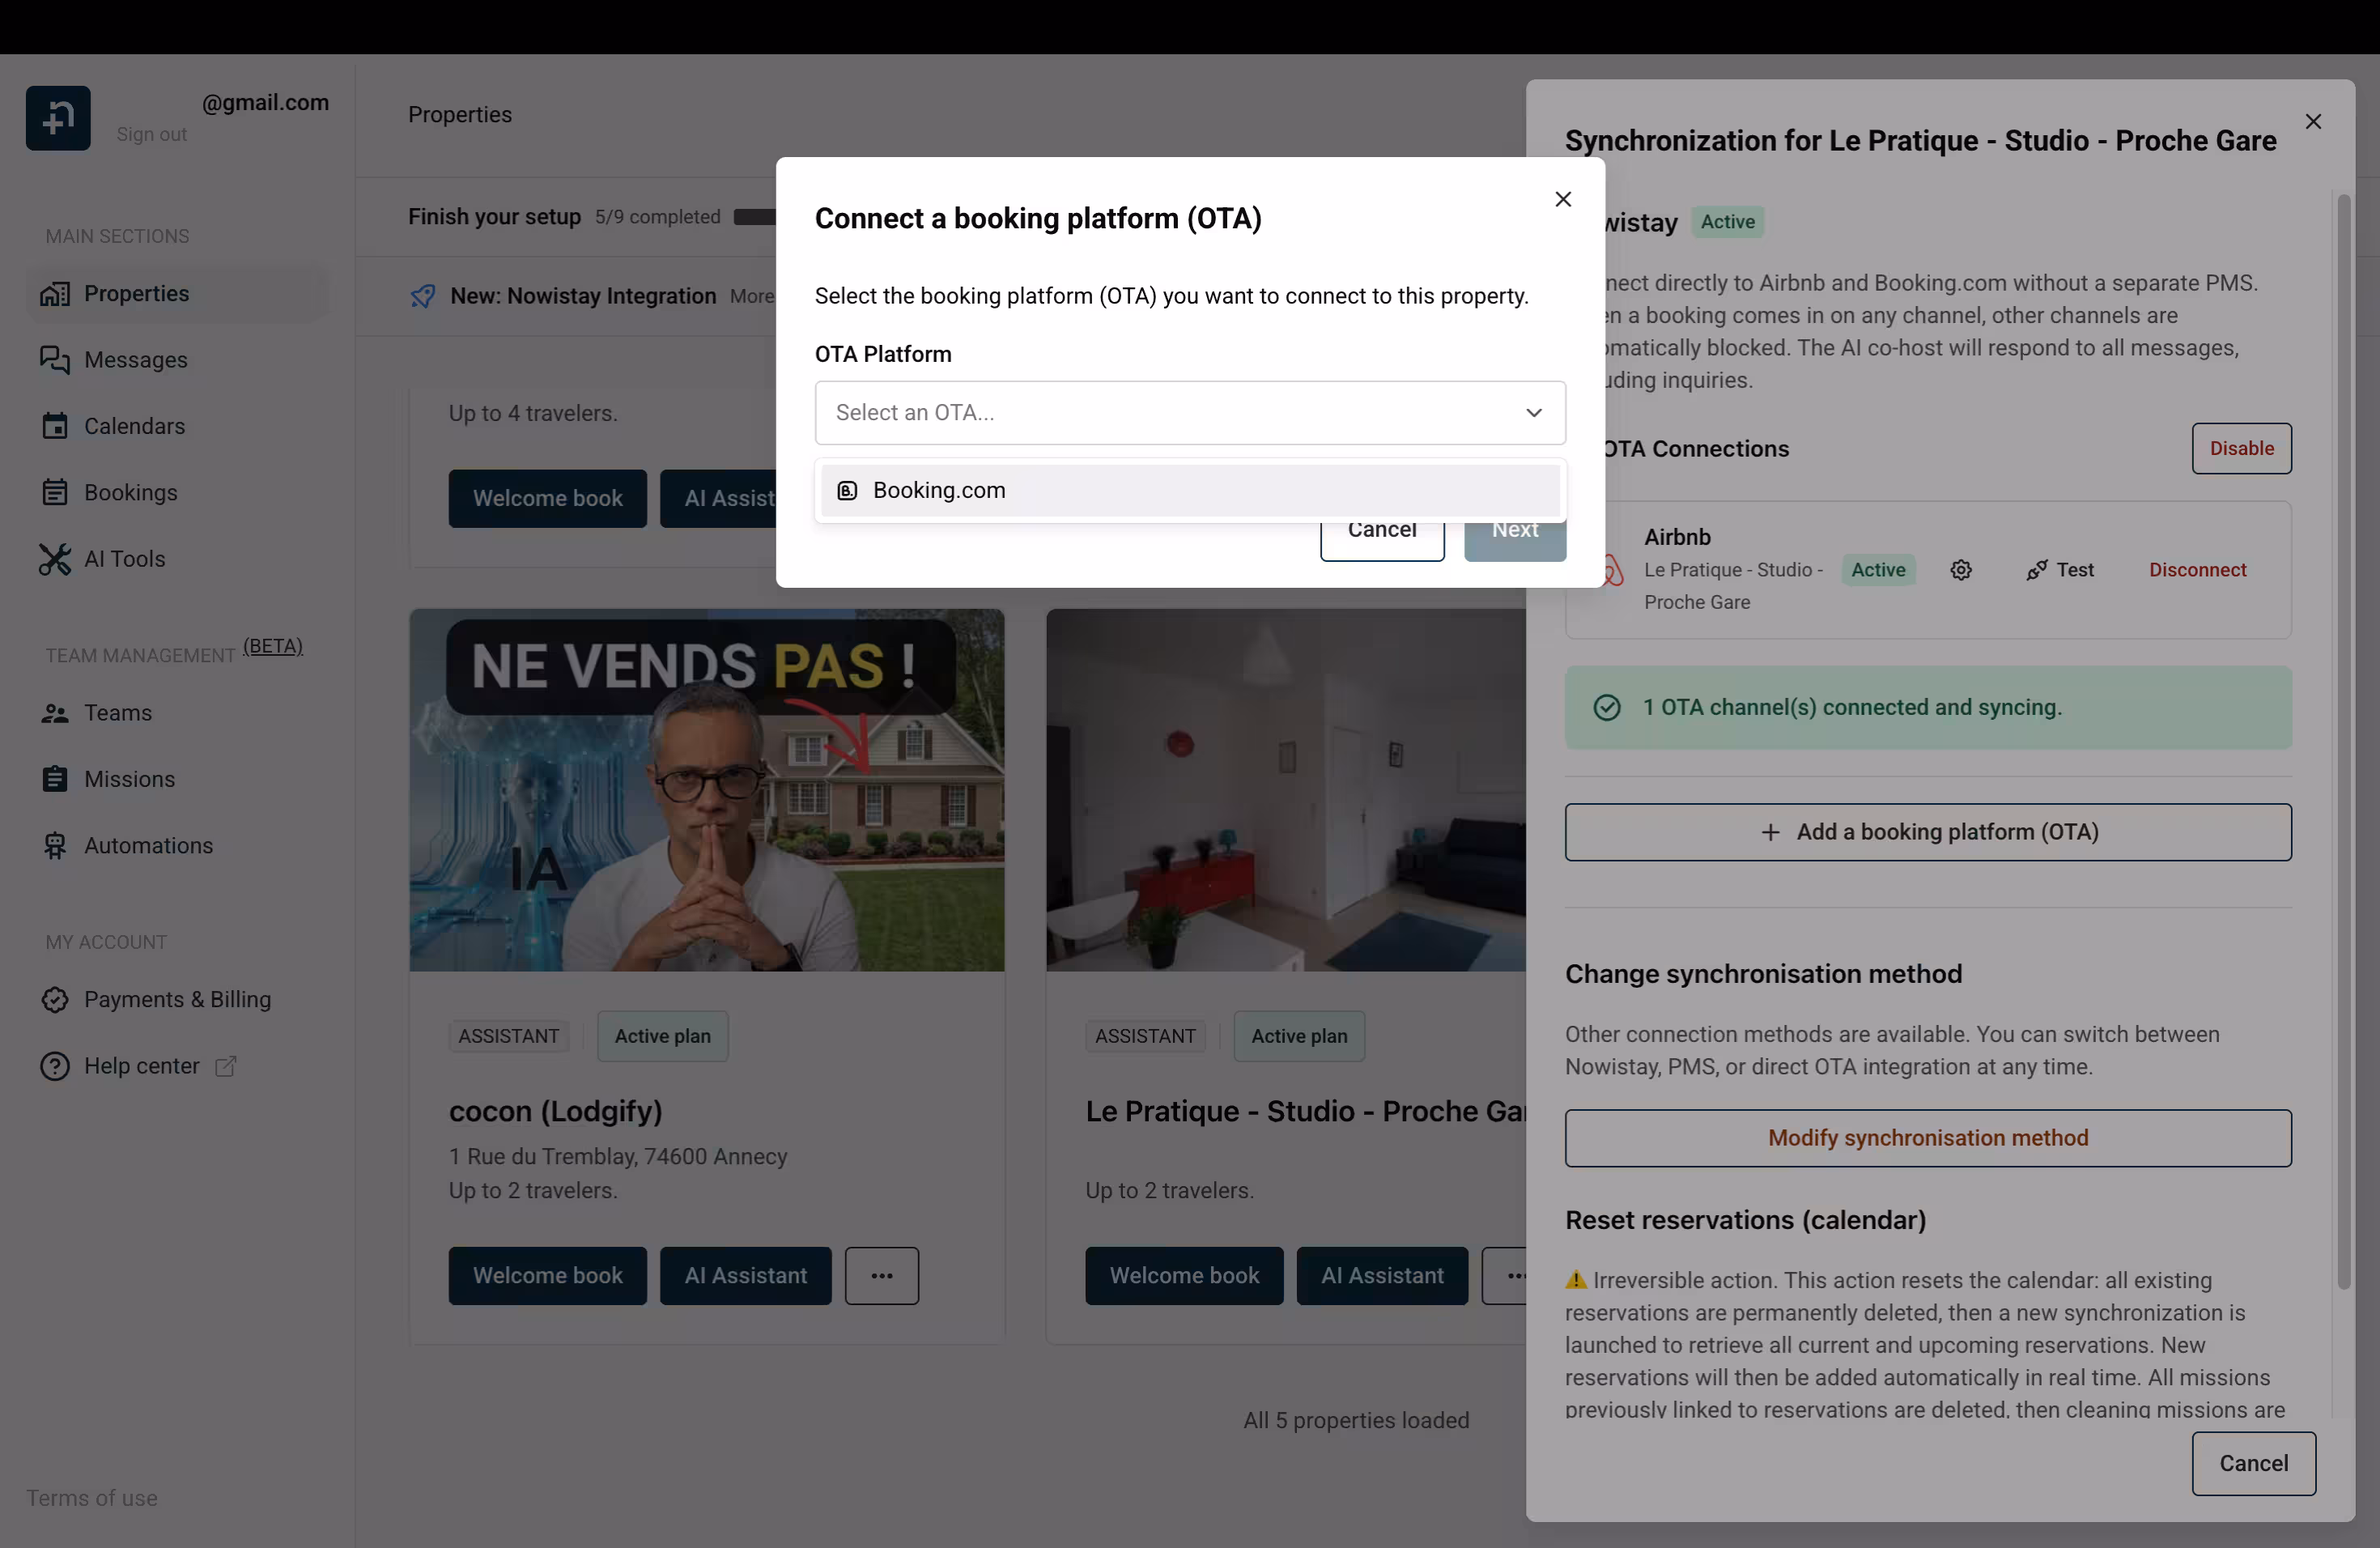
Then choose "Booking.com" then your Hotel ID (the one you saved from step 1).
Click synchronization from the property card
⚠️ Important: After connecting the Nowistay PMS, verify all your derived rate settings in Booking.com, as the platform may automatically adjust minimum stay requirements and other configurations.
Option 2: Direct Connection (OTA)
When to choose this option
Choose this method if you already use a PMS that is not currently supported by nowistay. The currently supported PMS integrations are: Beds24, Smoobu, and Lodgify. If your PMS is one of these, you can connect it directly from the PMS integrations panel instead.
With this method, nowistay connects directly to your Booking.com property to handle messaging via email forwarding, while your existing PMS continues to manage availability and pricing.
⚠️ Note: With the direct connection, the AI assistant can only handle messages once a booking is confirmed. It cannot respond to pre-booking inquiry messages.
👉 To help you with this method, here is a video tutorial by Bassel Abedi, founder of nowistay:
Prerequisites
Before getting started, make sure you meet the following requirements:
Your nowistay subscription must include the "AI Channel Manager" subscription
You must have a fully set up Booking account with at least one published listing.
⚠️ A Nowistay property = a Booking property = a Booking Property ID. It is not possible to manage assistants individually for rooms within the same Booking property. A Property ID cannot be used by more than one assistant at a time.
Step 1: Set up Booking in nowistay
Go to your property in nowistay and click on the "Assistant" button.
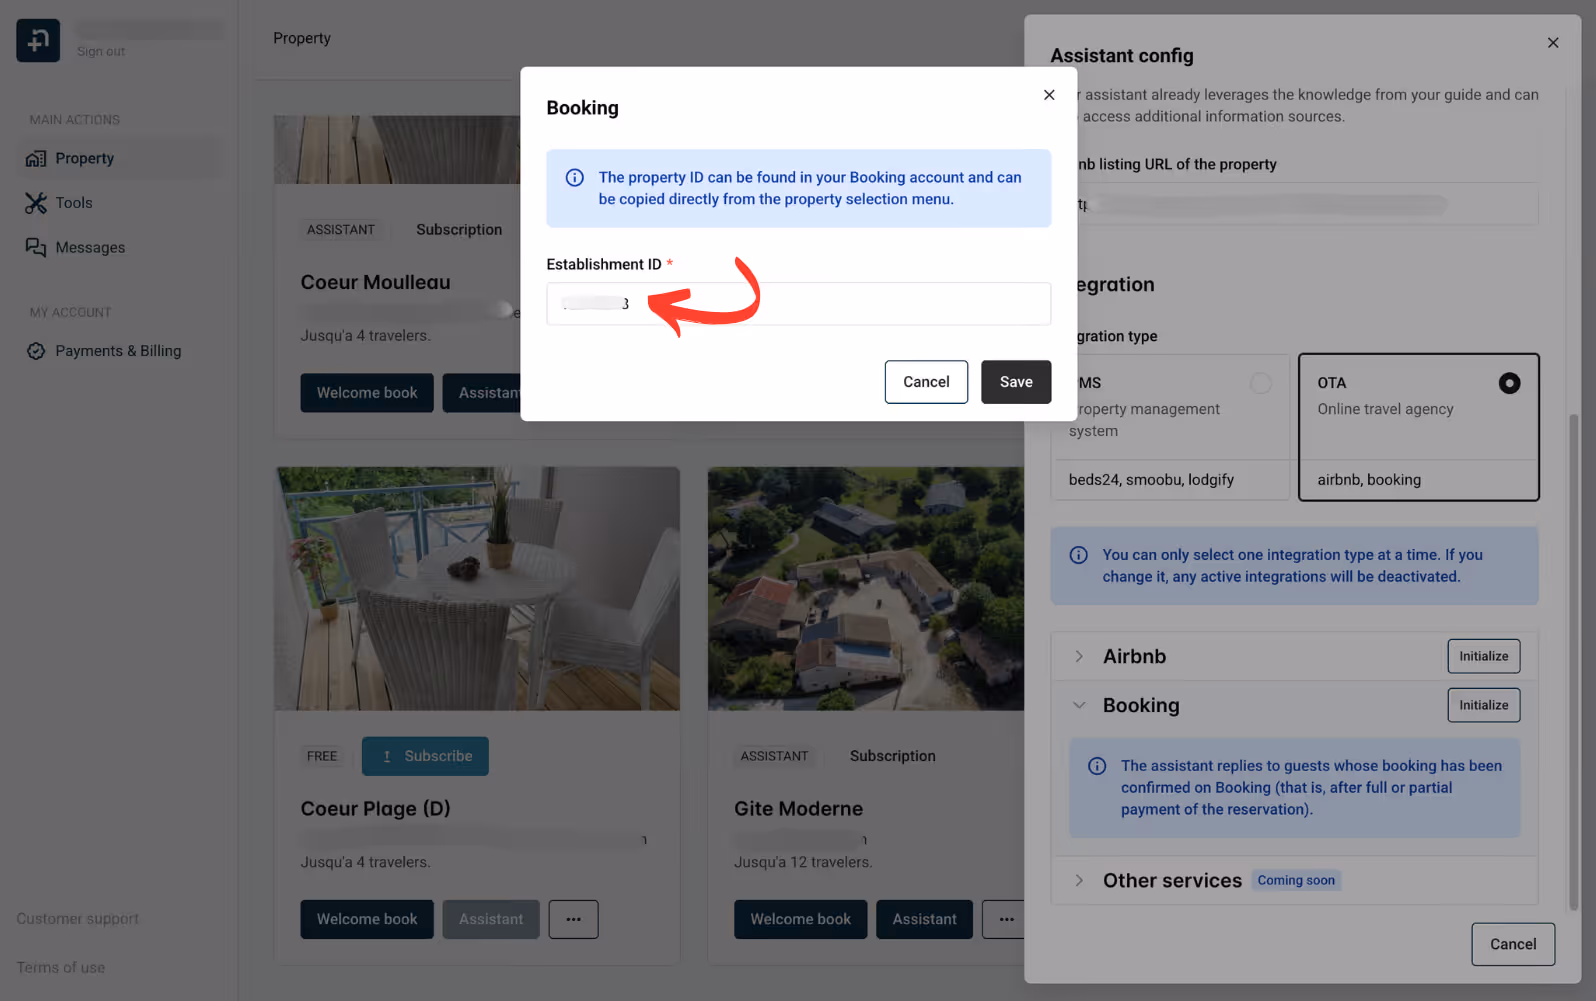
A window will open. In the "Integration" section, check the "Direct (OTA)" integration type. Just below, click on the "Initialize" button near Booking.
A window will open. Enter the ID of your Booking property (required step) and click on "Save".
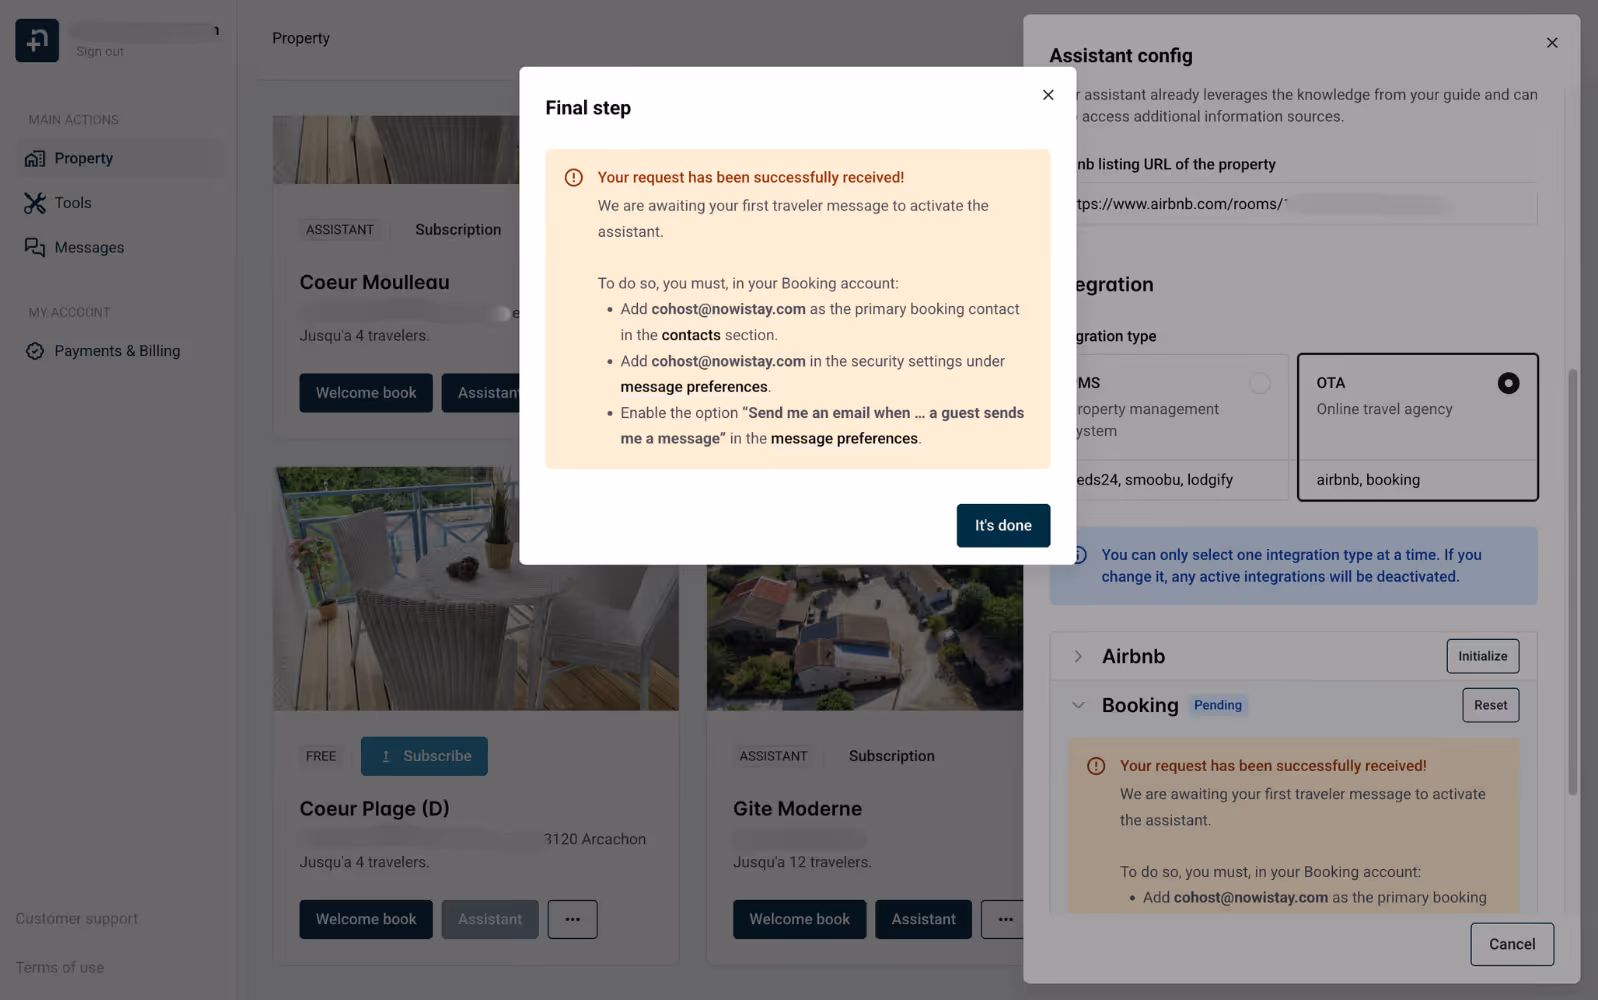
You're done on nowistay. Now you need to set up Booking:
Step 2: Add nowistay as a Reservations contact on Booking
Log in to your Booking dashboard and go to your Profile. Then click on "Contacts"
In the "Reservations" section, click on "Add contact".
⚠️ Good to know at this step: this new contact Nowistay must be the first in the list if there are multiple contacts. If there are multiple contacts and Nowistay isn't the first in the list, be sure to delete the others, add the Nowistay contact first, and then add the others.
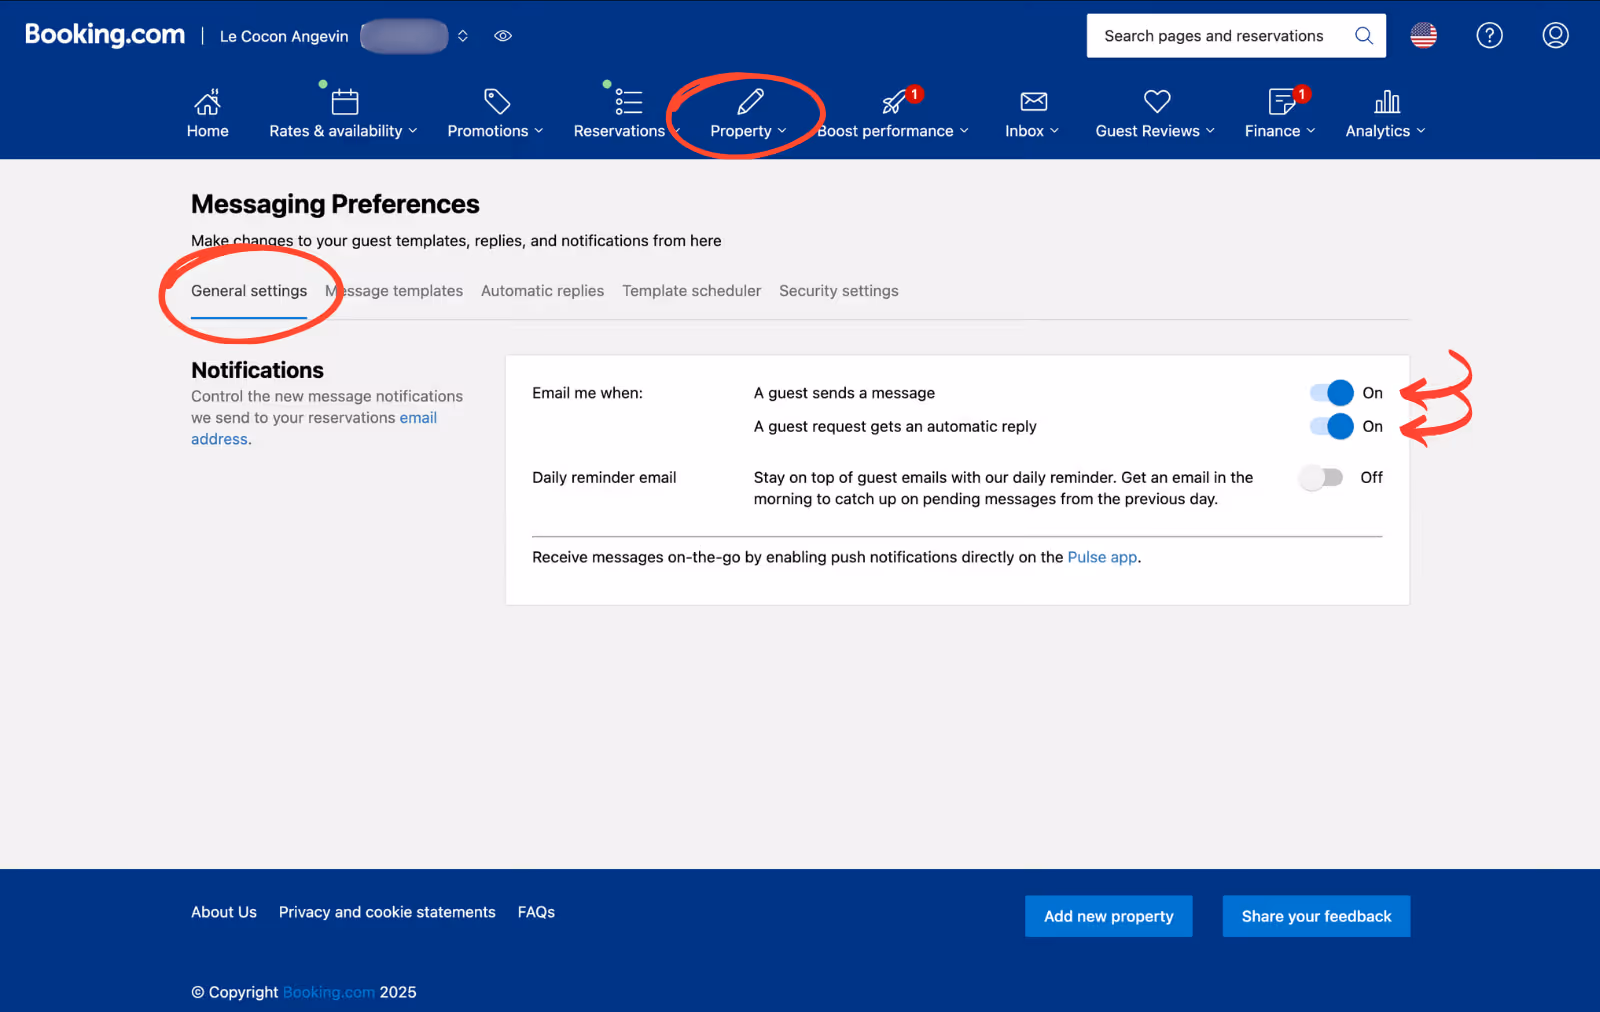
Go to "Property" > "Messaging Preferences" > "General Settings", and activate these 2 email notifications.
Go to "Property" > "Messaging Preferences" > "Security settings", and click on "Add email address".
Add the email address : cohost@nowistay.com
You can now see this email address in your listing:
What happens next in your nowistay space?
The AI co-host is automatically activated as soon as it receives the first message from a guest who has booked the accommodation in question.
Until the configuration is finalized, the status will display "Pending".
Once activated, a green "Active" label confirms that your AI co-host is operational. It will then respond to traveler messages on Booking on your behalf.
Step 3: Respond to messages in the nowistay messaging system, if necessary.
When your AI co-host is connected directly to Booking, it may sometimes encounter a question that it cannot answer. In this case, you will receive two types of emails indicating that your intervention is required:
Notification message: action or a response from the host is required because it cannot respond to the traveler.
Urgent Message: this is an emergency that requires immediate action on your part (water leak, forgotten cleaning, etc.).
Once the email has been sent, the AI co-host will not respond to the conversation with the traveler for 2 hours to avoid any confusion. Please note that you can control the settings for this pause period.
👉 Always reply to travelers using the messaging feature in your Nowistay account (Messages section), as this is where the AI co-host can follow the conversation and continue to learn from your responses.
⚠️ Good to know: If you send automated messages directly from Booking's messaging system or another channel, the AI co-host will not see them. As a result, its future responses may be slightly less accurate, as it does not have access to the entire conversation history.
💡 Tip: Centralize your exchanges in the Nowistay messaging system as much as possible so that the AI co-host remains as consistent and effective as possible.