When you manage short-term rentals across platforms like Airbnb and Booking.com, keeping your availability and pricing up to date is essential. With Nowistay, you can manage everything directly from your Calendar page — and every change you make is automatically pushed to all your connected booking platforms.
This guide walks you through everything you can do from the calendar to stay in control of your listings.
To manage your availability and prices from the calendar, your property must be connected through the Nowistay PMS integration. This is the integration that turns Nowistay into your channel manager, synchronizing your calendar, availability, and pricing across all your connected platforms (Airbnb, Booking.com, etc.).
If you haven't set up the Nowistay integration yet, check out our guide on how to create your first property and connect it.
When you open the Calendar, you'll see all your properties listed on the left, with a timeline of days stretching across the screen. Each cell represents one day for one property.
For properties connected through the Nowistay integration, the calendar cells are color-coded to give you an instant overview:
You'll also notice small indicators on each cell:

Bookings appear as colored tiles spanning their check-in to check-out dates. Blue tiles are confirmed bookings, and gray tiles are manually blocked dates.
Adjusting your prices is straightforward:
Your new rate is immediately applied and pushed to all connected platforms. You'll see the updated price badge on each affected date cell.
Need to block a few days for personal use? Or re-open dates you previously closed? Here's how:
Closed dates will appear in red on your calendar. This is the simplest way to mark dates as unavailable across all your connected platforms at once.
Sometimes you want to keep dates available for direct bookings but stop selling them on platforms like Airbnb or Booking.com. That's what the stop sell feature is for:
Dates with stop sell active will show a gray background with a diagonal strikethrough on your calendar. This means the dates are still technically available in your system, but no guest can book them through connected OTA platforms.
To resume sales, simply toggle the switch back to "OTA sales open" and save.

Want to avoid one-night bookings during a busy season? You can set a minimum number of nights for any date range:
The minimum stay will appear as a small indicator (e.g., "3n") on each affected date cell, so you can see at a glance which dates have restrictions.
When you set a minimum stay on a date, any booking that includes that night must meet the requirement — not just bookings that start on that date. This means a guest cannot check in before that date and check out after it unless their total stay is long enough.
Here's a simple example: imagine you set a 3-night minimum on June 15th to June 20th.
In short: think of minimum stay as a rule applied per night. Every night included in a booking must have its minimum stay requirement satisfied by the total length of the stay.
Tip: This is especially useful during high-demand periods like holidays or local events, where you want to ensure longer bookings and avoid gaps in your calendar.
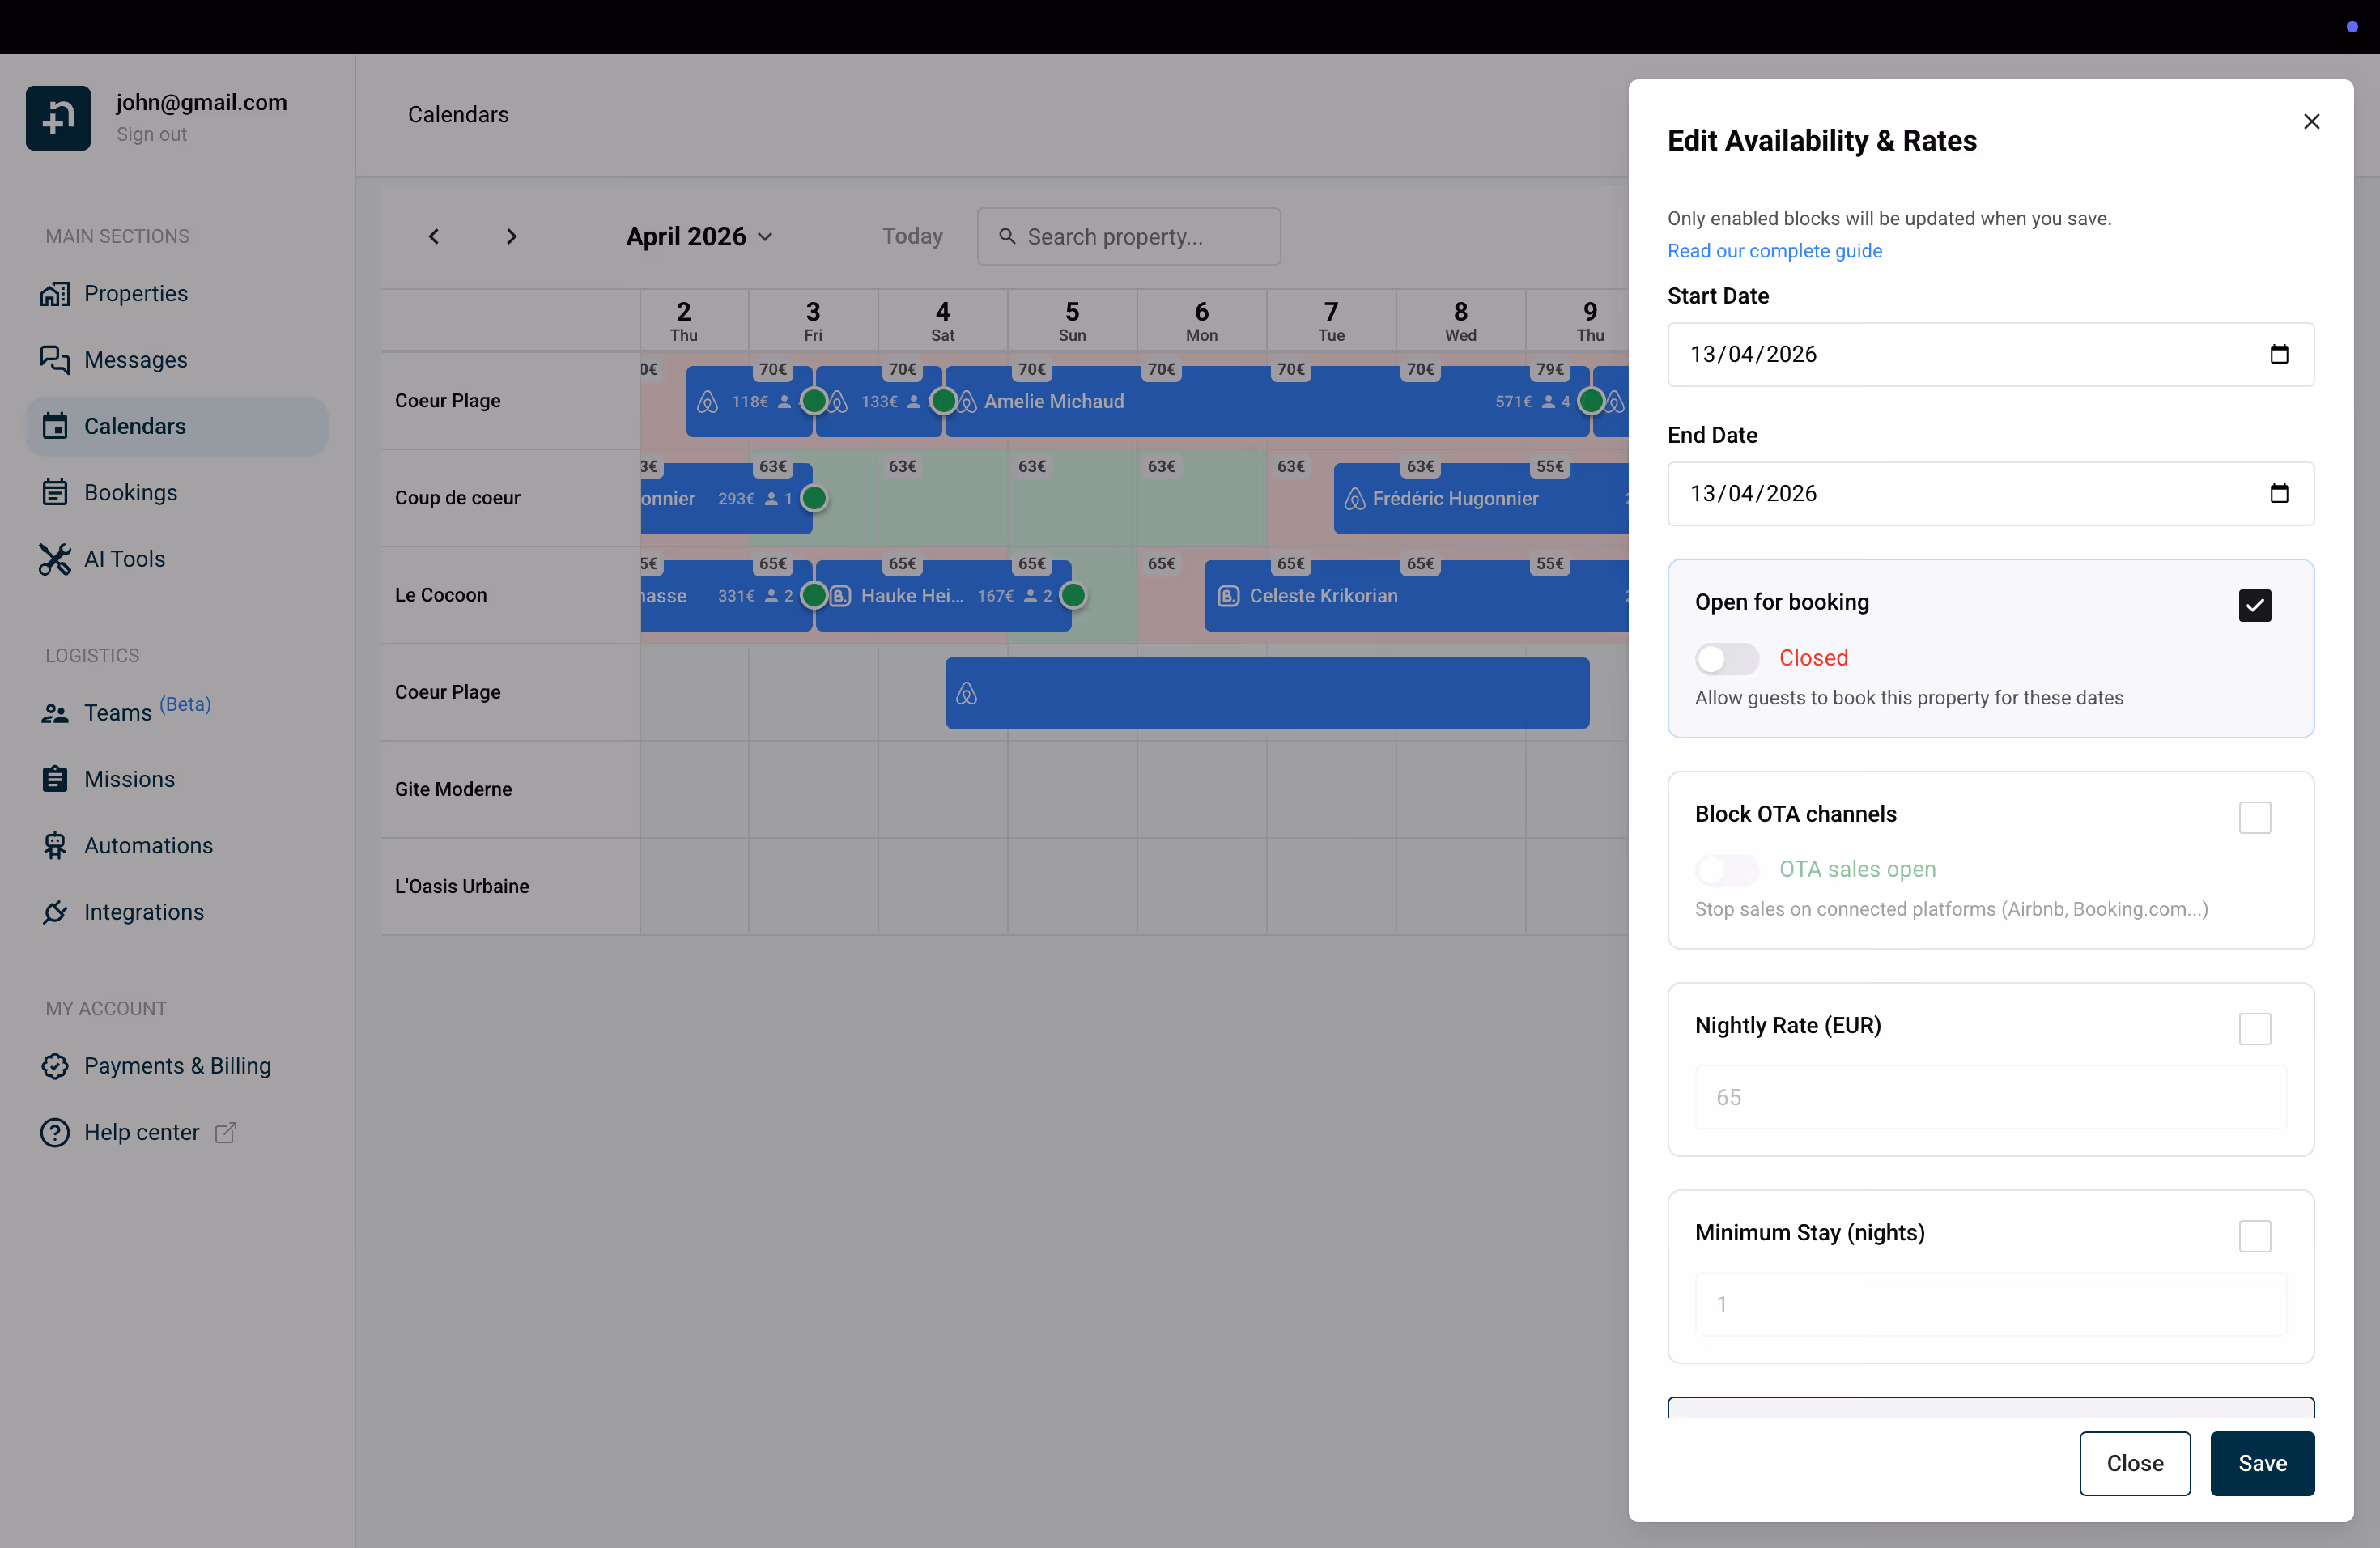
The edit panel includes an Advanced settings section with additional controls for fine-tuning your booking rules. Click on Advanced settings at the bottom of the panel to expand it.
Here's what each setting does:
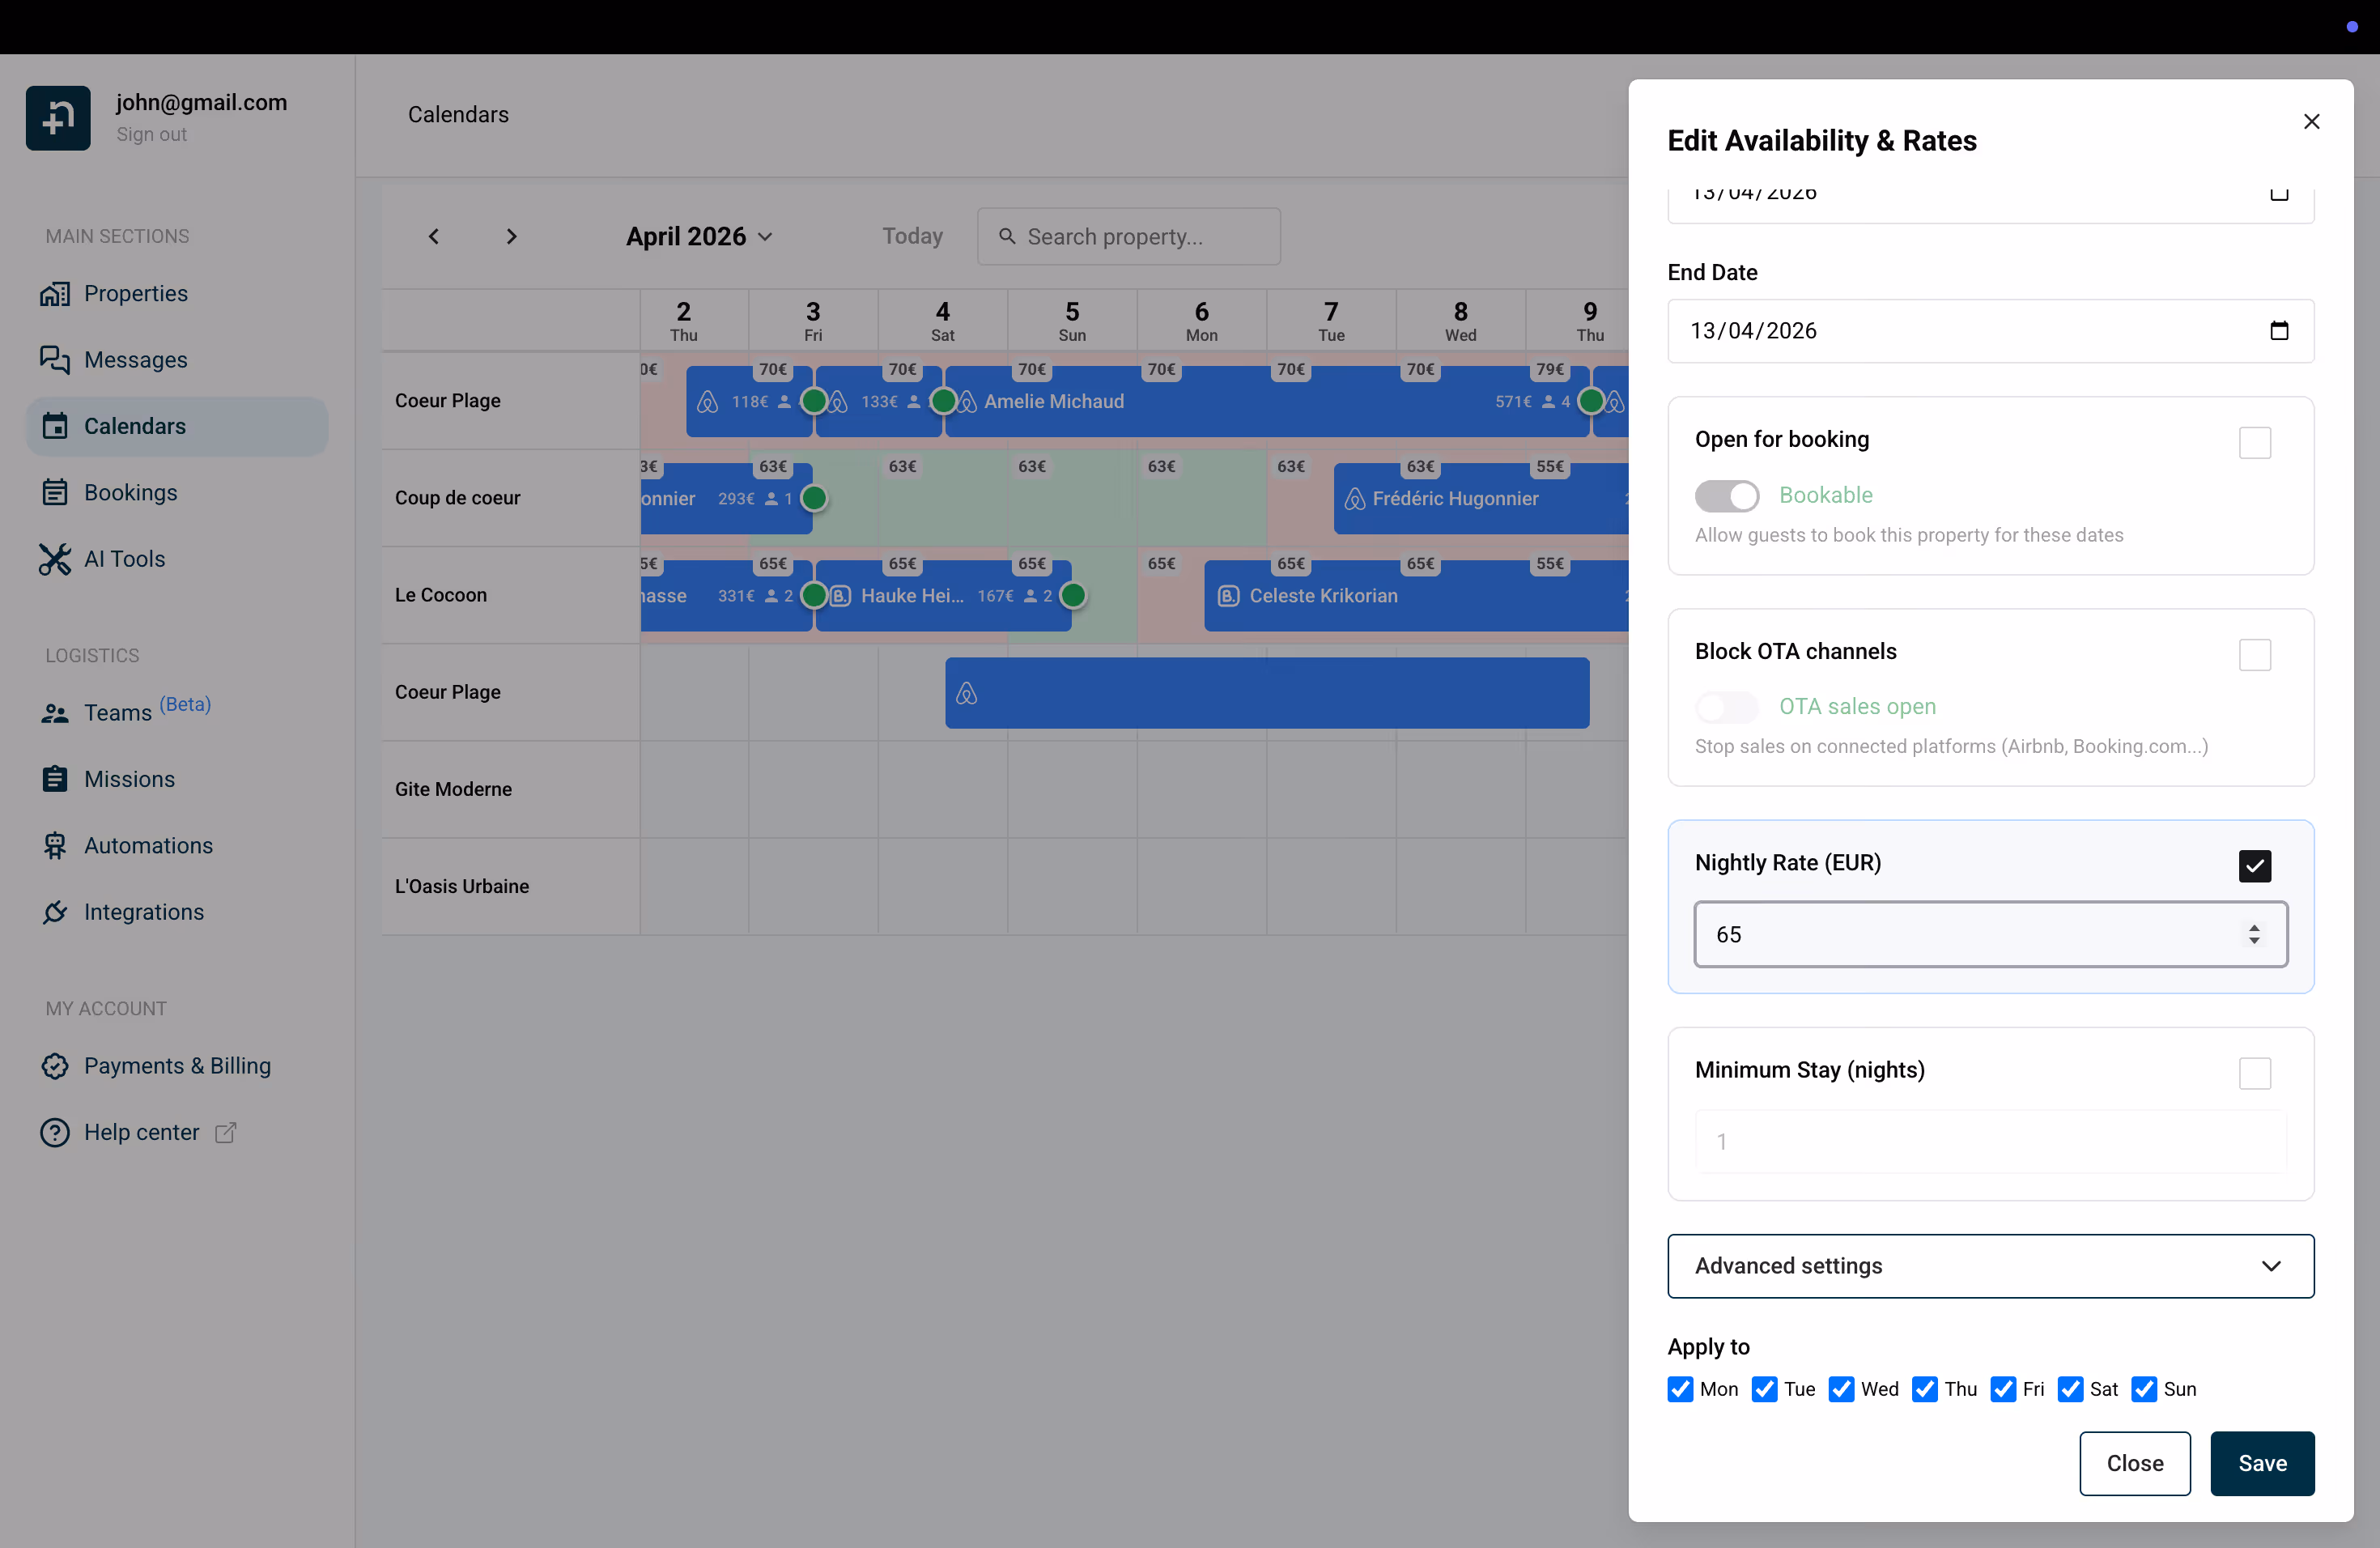
Like all other fields, each advanced setting has a checkbox next to it. Only checked fields will be updated when you save — unchecked fields keep their current values.

Each setting in the edit panel — availability, stop sell, nightly rate, minimum stay, and the advanced settings — has a checkbox next to its label. Only checked fields will be updated when you save. Unchecked fields keep their existing per-day values untouched.
A notice at the top of the panel reminds you: "Only enabled blocks will be updated when you save."
For example, if you want to set a 3-night minimum stay across the next two months without changing any of your carefully configured per-day pricing:
Only the minimum stay will be updated. Your existing rates, availability, and stop sell settings for each individual day will remain exactly as they were.
This is especially useful when you have different prices set for each day (for example, via PriceLabs or manual per-day adjustments) and you want to update just one setting across a large date range without overwriting everything else.
One of the most useful features is the ability to apply changes only to certain days of the week. For example, you might want to set a higher rate for weekends only:
This is perfect for setting weekend vs. weekday pricing, or for blocking specific days across a longer period.
When you apply changes from the edit panel, the date range between your start date and end date cannot exceed 730 days (approximately 2 years).
For example, if you set the start date to April 12, 2026, the latest possible end date is April 11, 2028. If you try to set an end date further out, it will automatically be capped at 730 days from the start date.
However, this is only a limit on the span of the date range, not on how far into the future you can make changes. You're free to set a start date years from now — for instance, you could apply changes starting January 1, 2028 through December 31, 2029, as long as the range itself doesn't exceed 730 days.
In practice, this means you can plan your pricing and availability well into the future — just break very long periods into multiple updates if needed.
Sometimes a date is open for booking, but one or more rules prevent guests from actually booking it. When this happens, the date cell appears green with red diagonal stripes on your calendar. This visual pattern tells you at a glance: "this date is available, but something is blocking it."
Restrictions can come from different places — rules you've set directly on the calendar, default settings on your property, or your Airbnb listing configuration. Nowistay shows you exactly what's blocking each date and where the restriction comes from, so you always stay in control.
When you hover over a striped date cell on the calendar, a tooltip appears explaining why the date is restricted. For example:


When you click on a restricted date, the edit panel shows a Booking restrictions block at the top. This block gives you more detail than the tooltip:
This makes it easy to understand why a date is blocked and quickly jump to the right place to change the setting if needed.


Some booking restrictions are determined by your property information rather than being set on specific calendar dates. These are default values that apply across your entire calendar unless overridden by a date-specific setting.
The key settings are:
To access these settings:

If you have an Airbnb listing connected, additional restrictions can come from your Airbnb availability settings. These settings are specific to your Airbnb listing and control how Airbnb handles booking rules for your property. When a restriction comes from these settings, your calendar will show it with a direct link so you can quickly jump to the right place.
To access these settings:
Here's what each setting does:

Tip: These settings are synced to your Airbnb listing automatically. Any changes you make here will be reflected on Airbnb and on your Nowistay calendar. Daily restrictions set directly on your calendar (like minimum stay per date) can still override these defaults.
Nowistay only controls the "Standard rate" and the "Non-refundable rate" of your Booking.com calendar. When you update the calendar from Nowistay (for instance minimum nights), it won't propagate to other rate plans you may have configured on the Booking extranet website.
For instance you might have a "Weekly Rate Plan" in your calendar, see capture below. Usually that plan is added by default on the extranet and is usually not set to 7 days minimum.
That means If you set, for example, 3 nights minimum on a particular day and this weekly rate plan exist and is set to 1 night minimum then a guest could book on that day only one night even if you configured 3 nights in the Nowistay Calendar.
To avoid that, the solutions are simple, you can :

The calendar lets you set a base nightly rate that applies to all your connected platforms equally. But what if you want one platform to receive a different rate? For example, you might want Booking.com rates to be 10% higher to offset their commission, while keeping your Airbnb rates unchanged.
With the rate adjustment feature, you can set a percentage increase or decrease for any individual channel — without touching your base calendar prices. Your calendar stays exactly the same; only the rate sent to that specific platform is adjusted.


For example, if your base rate in the calendar is 100€ and you set a +10% adjustment for Airbnb, Airbnb will receive 110€. Your calendar still shows 100€, and other channels without an adjustment continue to receive 100€.
This is especially useful when different platforms charge different commission rates. You can compensate by marking up your price on higher-commission channels, while keeping a single base rate in your calendar that reflects your actual earnings.
Tip: You can set a different adjustment for each connected channel. This gives you fine-grained control over your pricing strategy across platforms — all without cluttering your calendar with platform-specific rates.
The Calendar settings dialog lets you configure the mobile calendar display and export your availability via iCal. To open it, click the settings gear icon at the top of the Calendar page.

You can choose how your calendar appears on mobile devices:
Pick the view that best fits how you use your phone to manage your properties.
The iCal export lets you sync your Nowistay calendar with external calendar applications like Google Calendar, Apple Calendar, or Outlook. This is useful if you want to see your blocked dates alongside your personal calendar.
To use it:
The iCal feed only includes blocked dates and never exposes guest names, pricing data, or any other sensitive information. It simply shows which dates are unavailable, so you can see your availability at a glance from any calendar app.
Note: The iCal URL is unique per property. If you manage multiple properties, you'll need to add a separate iCal subscription for each one.
Every time you save a change from the calendar, Nowistay automatically pushes the update to all your connected booking platforms (Airbnb, Booking.com, and any other OTA connected through the Nowistay integration). This happens in real time — you don't need to do anything extra.
This means you have a single place to manage your pricing and availability, and all your listings stay perfectly synchronized.
If you ever need to force a full synchronization of your availability and prices, you can do so from the property's synchronization settings.
The calendar works great on mobile too. On your phone, the view depends on your Calendar settings preference (see above). In List mode, you see a scannable list of bookings per property. In Calendar mode, you get a horizontally scrollable grid of all properties — including the same color-coded availability and restriction indicators as on desktop.
Tap on any property card or date to manage its availability and pricing — just like on desktop. You can also swipe left or right to navigate between months.

While the calendar gives you full manual control over your nightly rates, you can also automate your pricing strategy by connecting PriceLabs — a dynamic pricing tool that adjusts your rates automatically based on market demand, seasonality, local events, and competitor pricing.
When PriceLabs is connected, it pushes optimized rates directly to your Nowistay calendar, which are then synced to all your connected platforms. This means you no longer need to manually adjust prices for peak seasons, weekends, or slow periods — PriceLabs handles it for you.
To get started, follow our step-by-step guide: How to connect PriceLabs for dynamic pricing.
Note: Keep in mind that when PriceLabs is active, it may override any manual price changes you make from the calendar during its next sync. If you want full control over specific dates, you can always pause or adjust your PriceLabs settings.