Connecting your VRBO listing to Nowistay lets you synchronize your calendar, rates, restrictions, and import bookings — all managed from a single dashboard alongside your other platforms like Airbnb and Booking.com.
Once connected, Nowistay automatically syncs the following with your Vrbo listing:
Unlike Airbnb and Booking.com, Vrbo does not support messaging through its API. This means:
But don’t worry — Nowistay gives you two powerful alternatives to automate guest communication for your VRBO bookings.
We cannot import your pre-existing bookings that were created before you connect VRBO to nowistay. You'll have to add them manually. Don't worry future bookings and updates to existing bookings will be retreived and synchronized in real time after you connect.
Before connecting Vrbo, make sure you have:
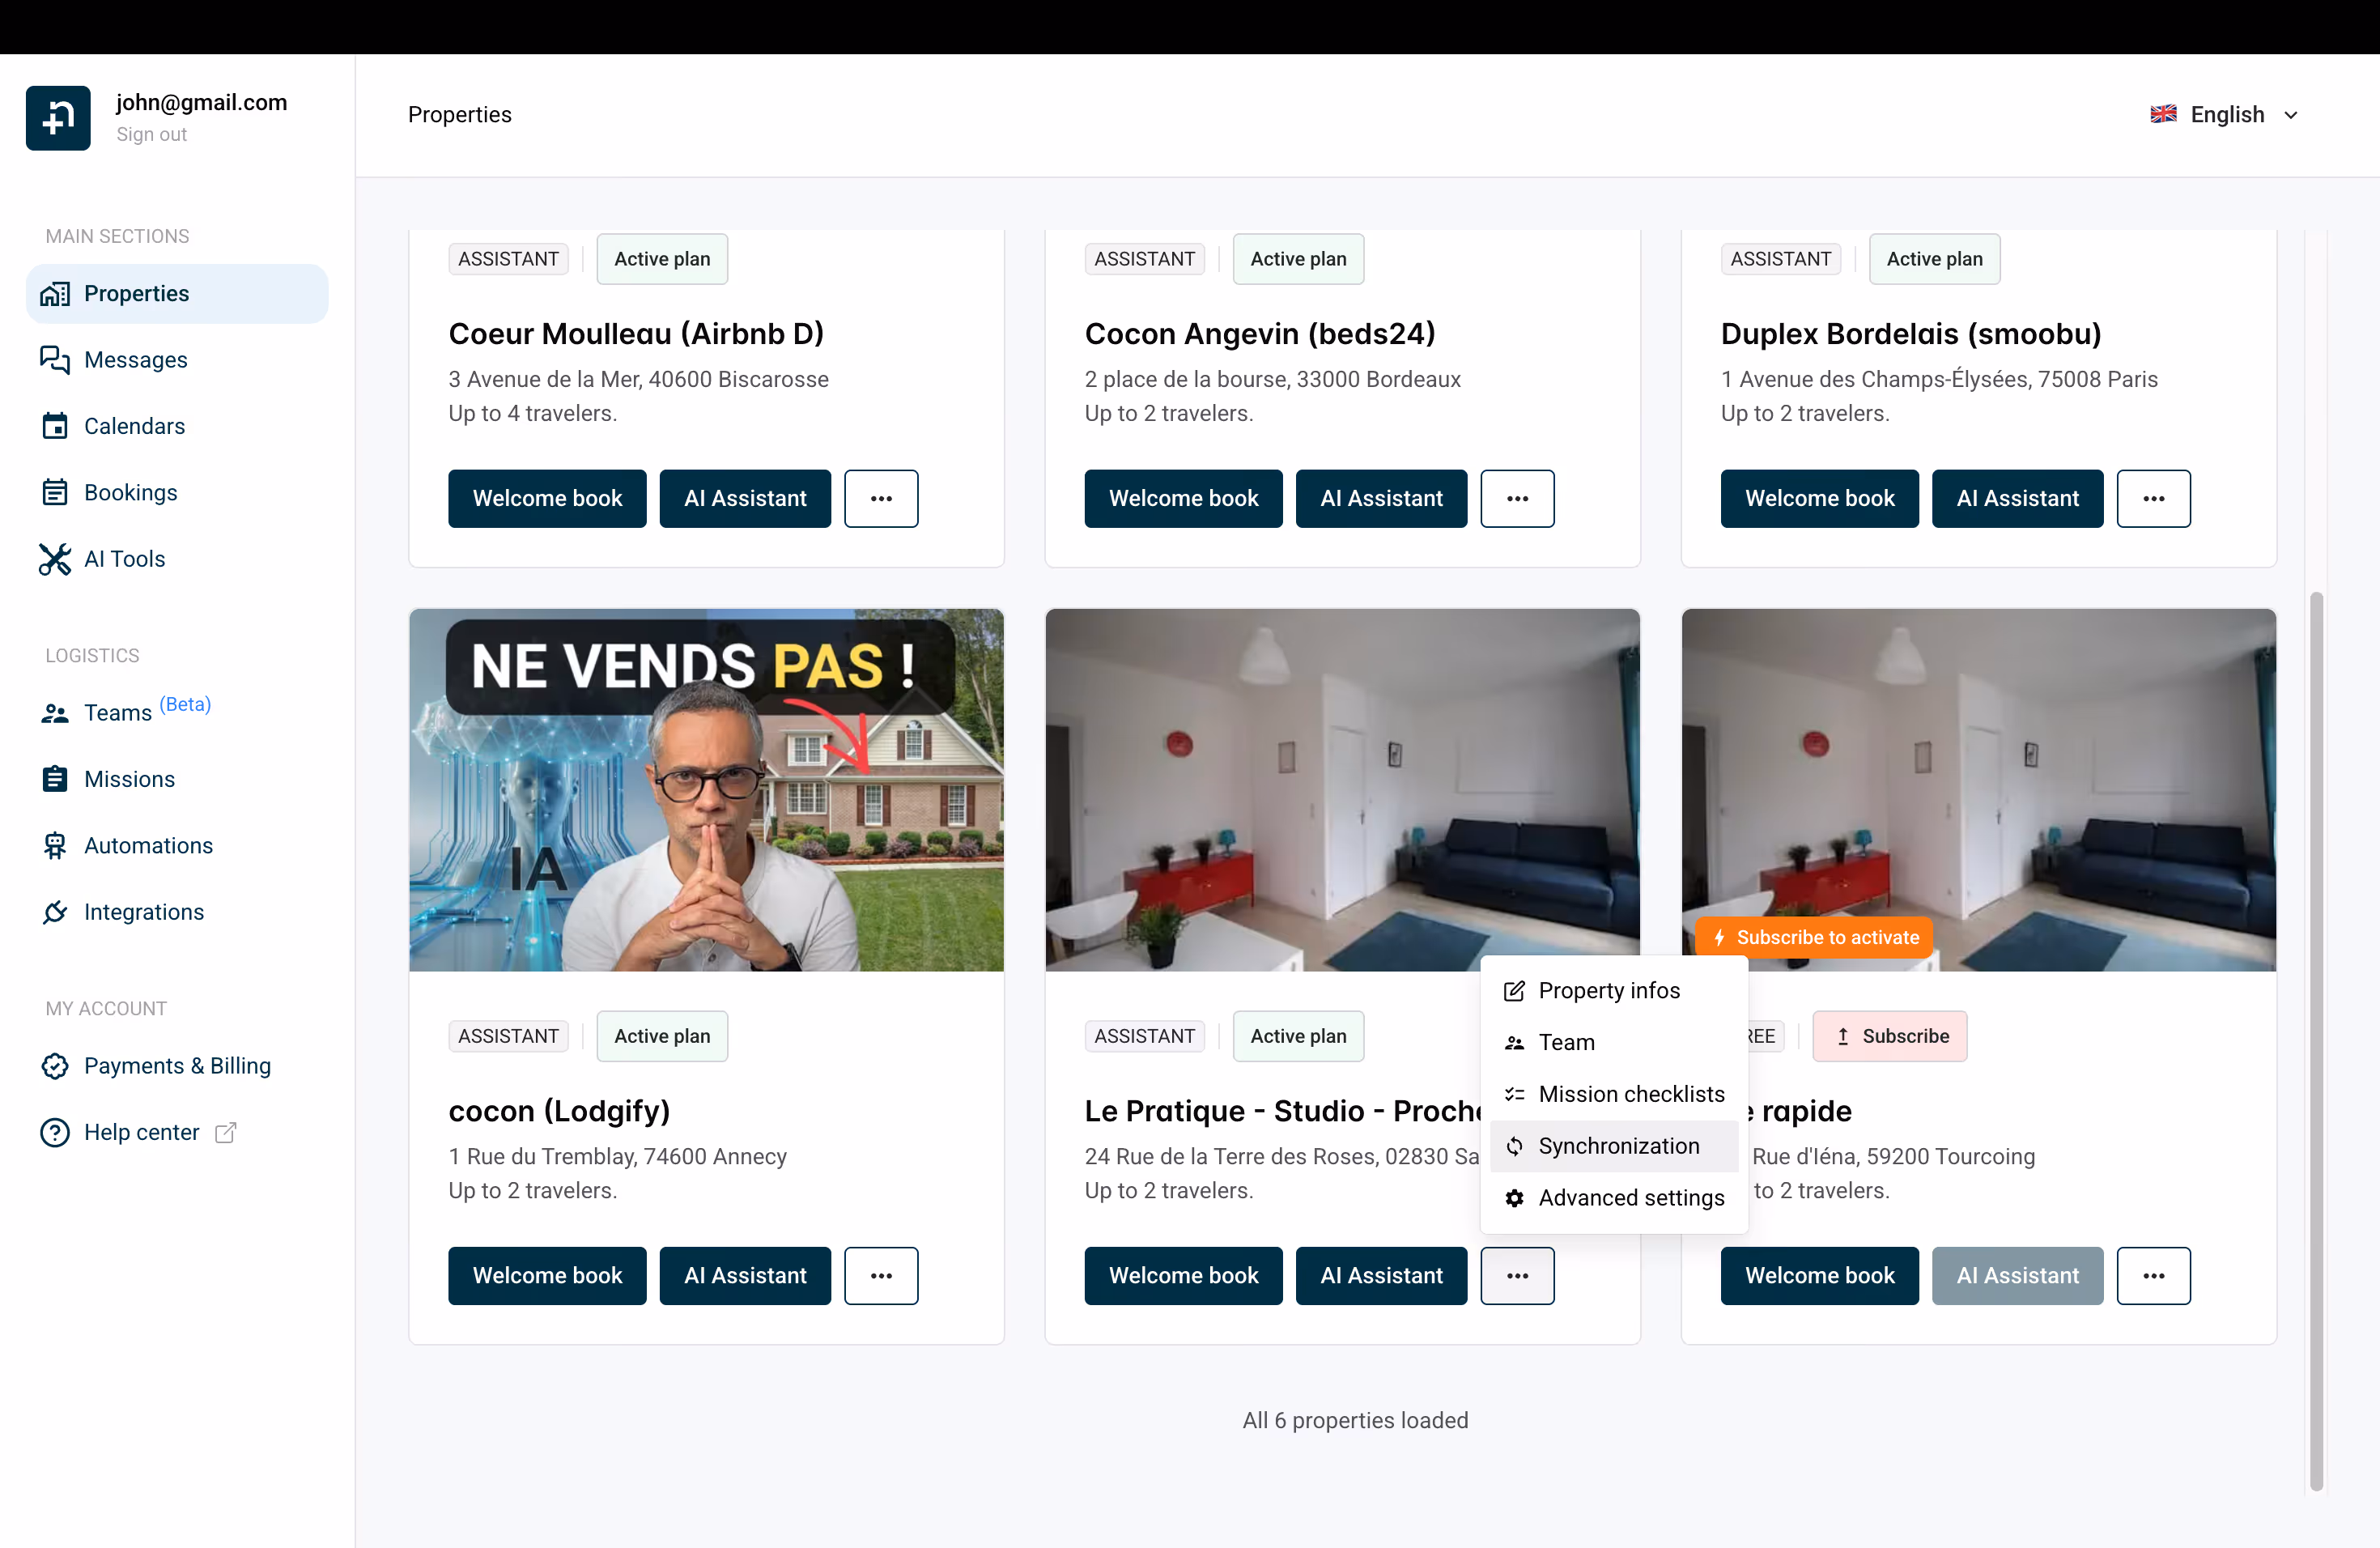
From your Properties page, find the property you want to connect. Click the "..." menu on the property card, then select "Synchronization".
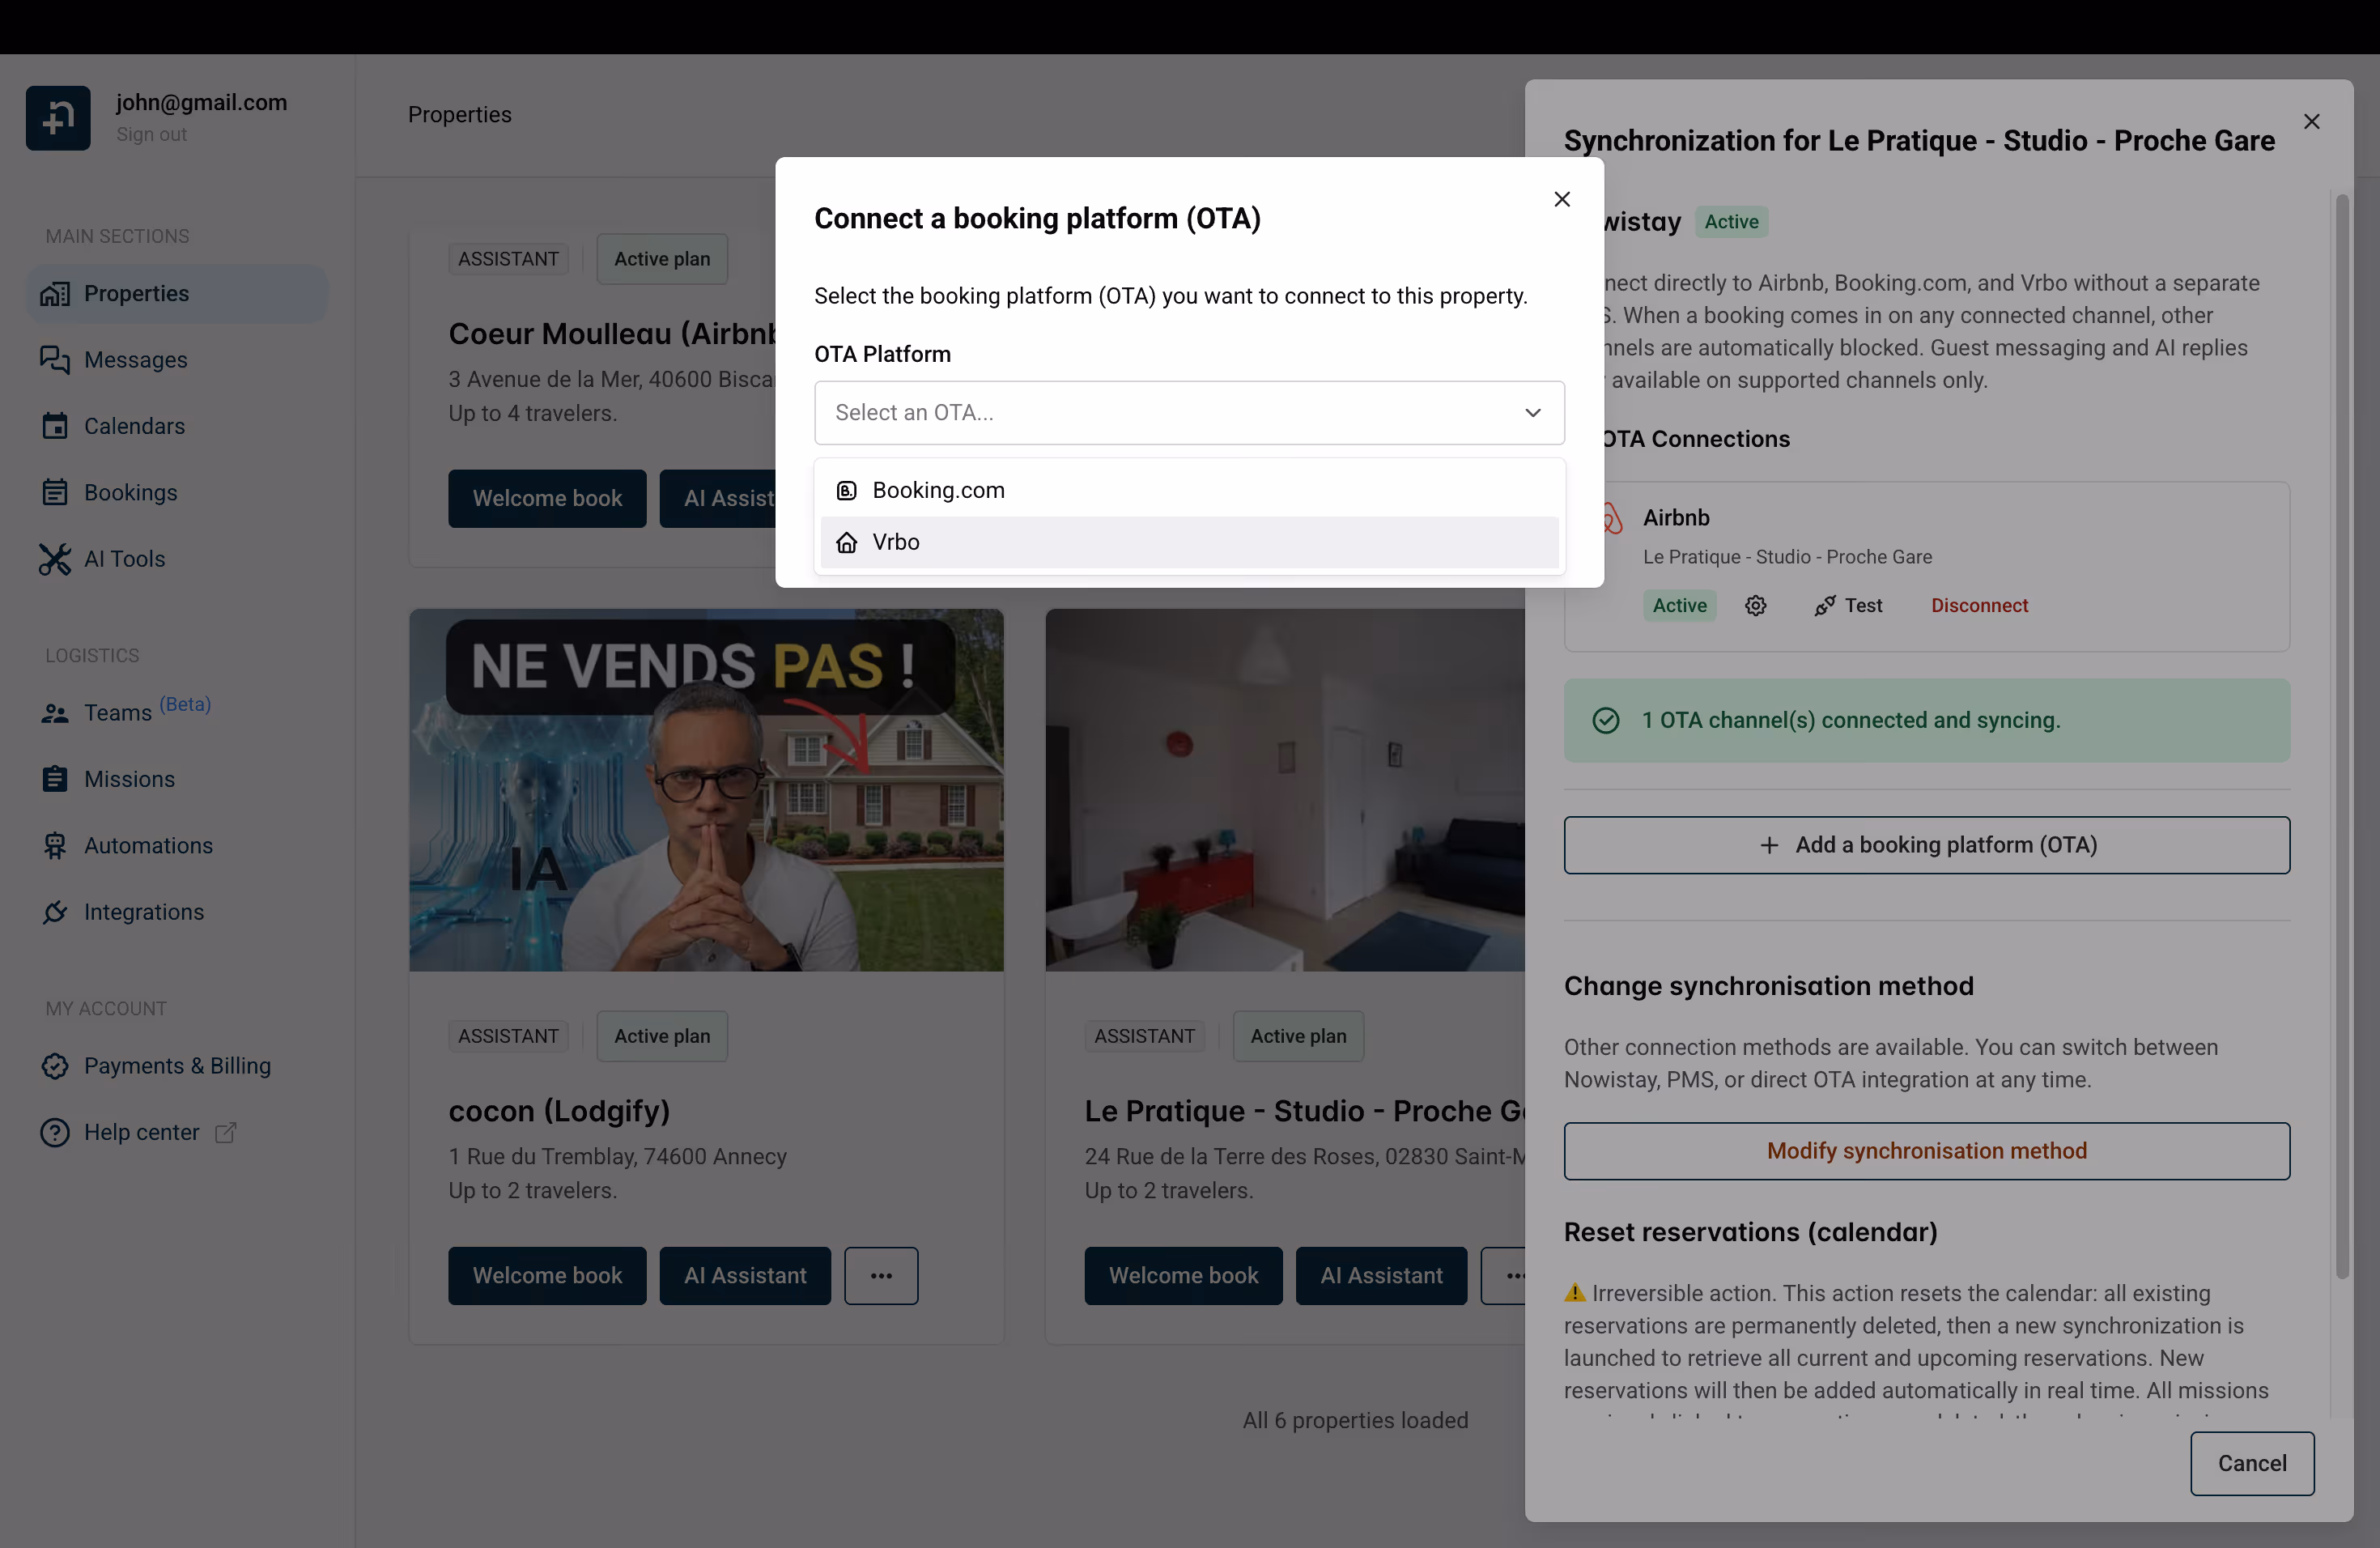
In the Synchronization drawer that opens on the right, click "+ Add a booking platform (OTA)". A dialog will appear — open the "OTA Platform" dropdown and select "Vrbo".
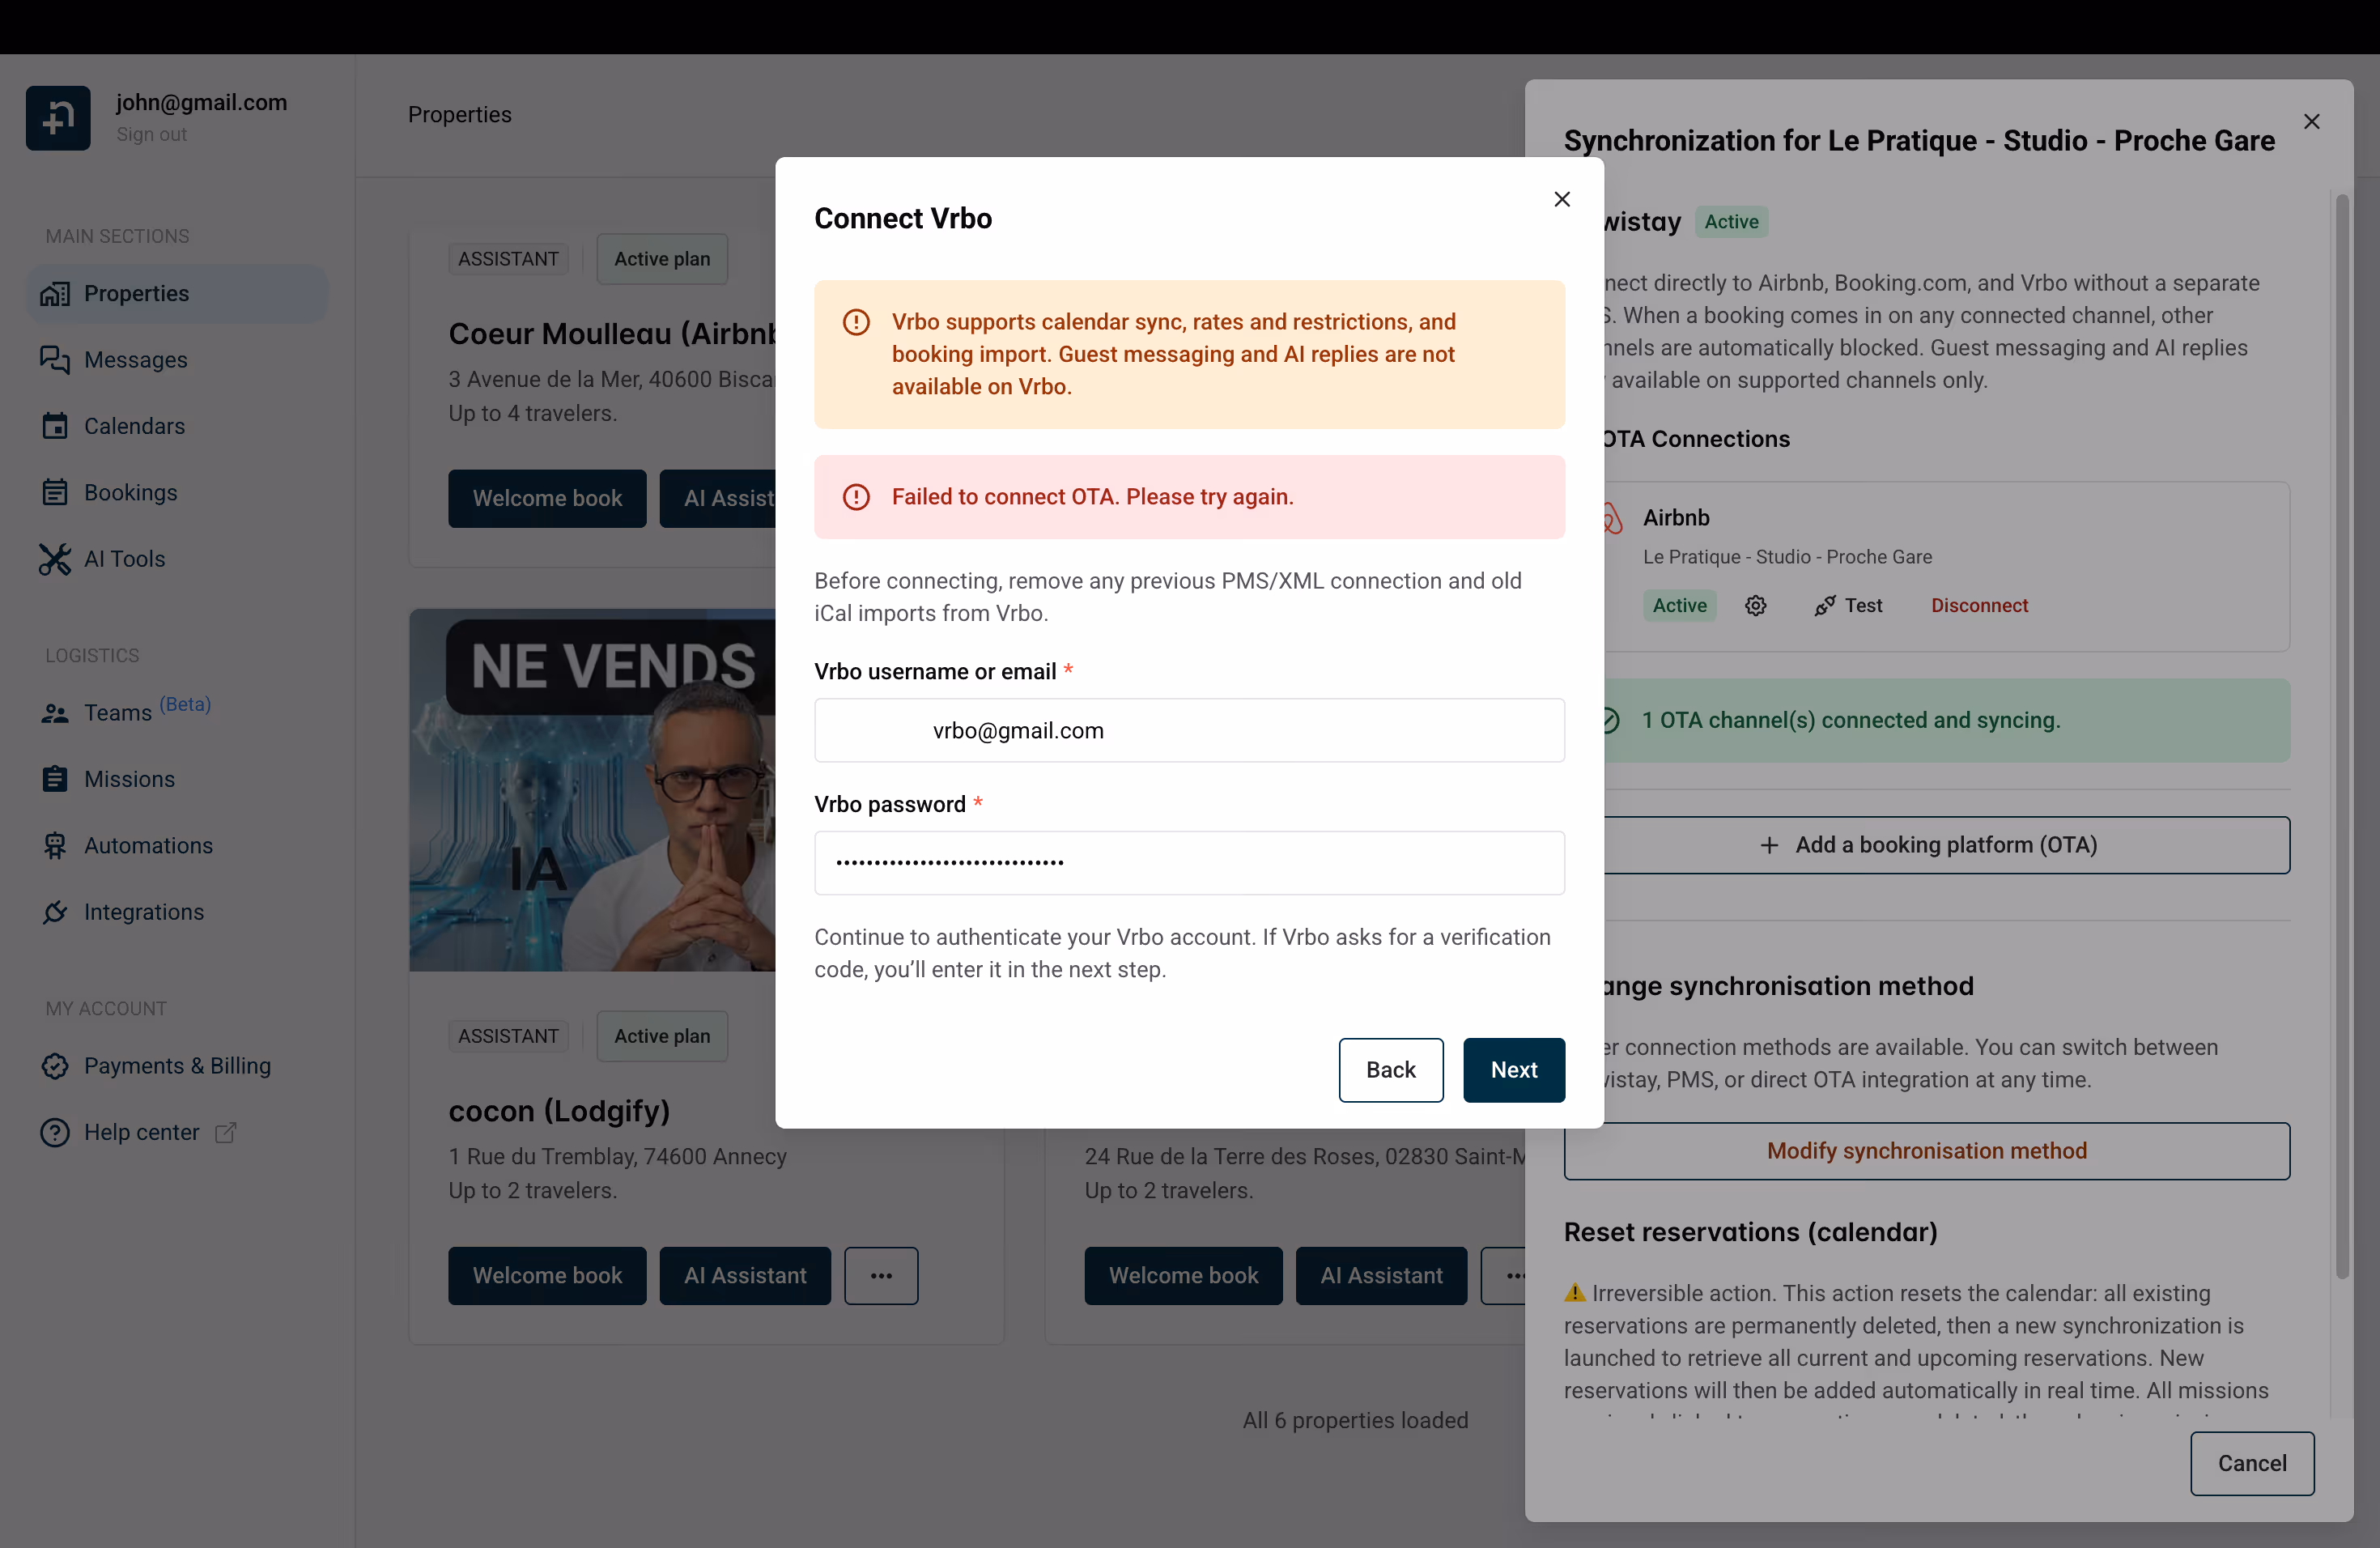
The "Connect Vrbo" dialog appears with a notice reminding you that guest messaging and AI replies are not available on Vrbo.
Fill in your Vrbo login details:
Click "Next" to continue.
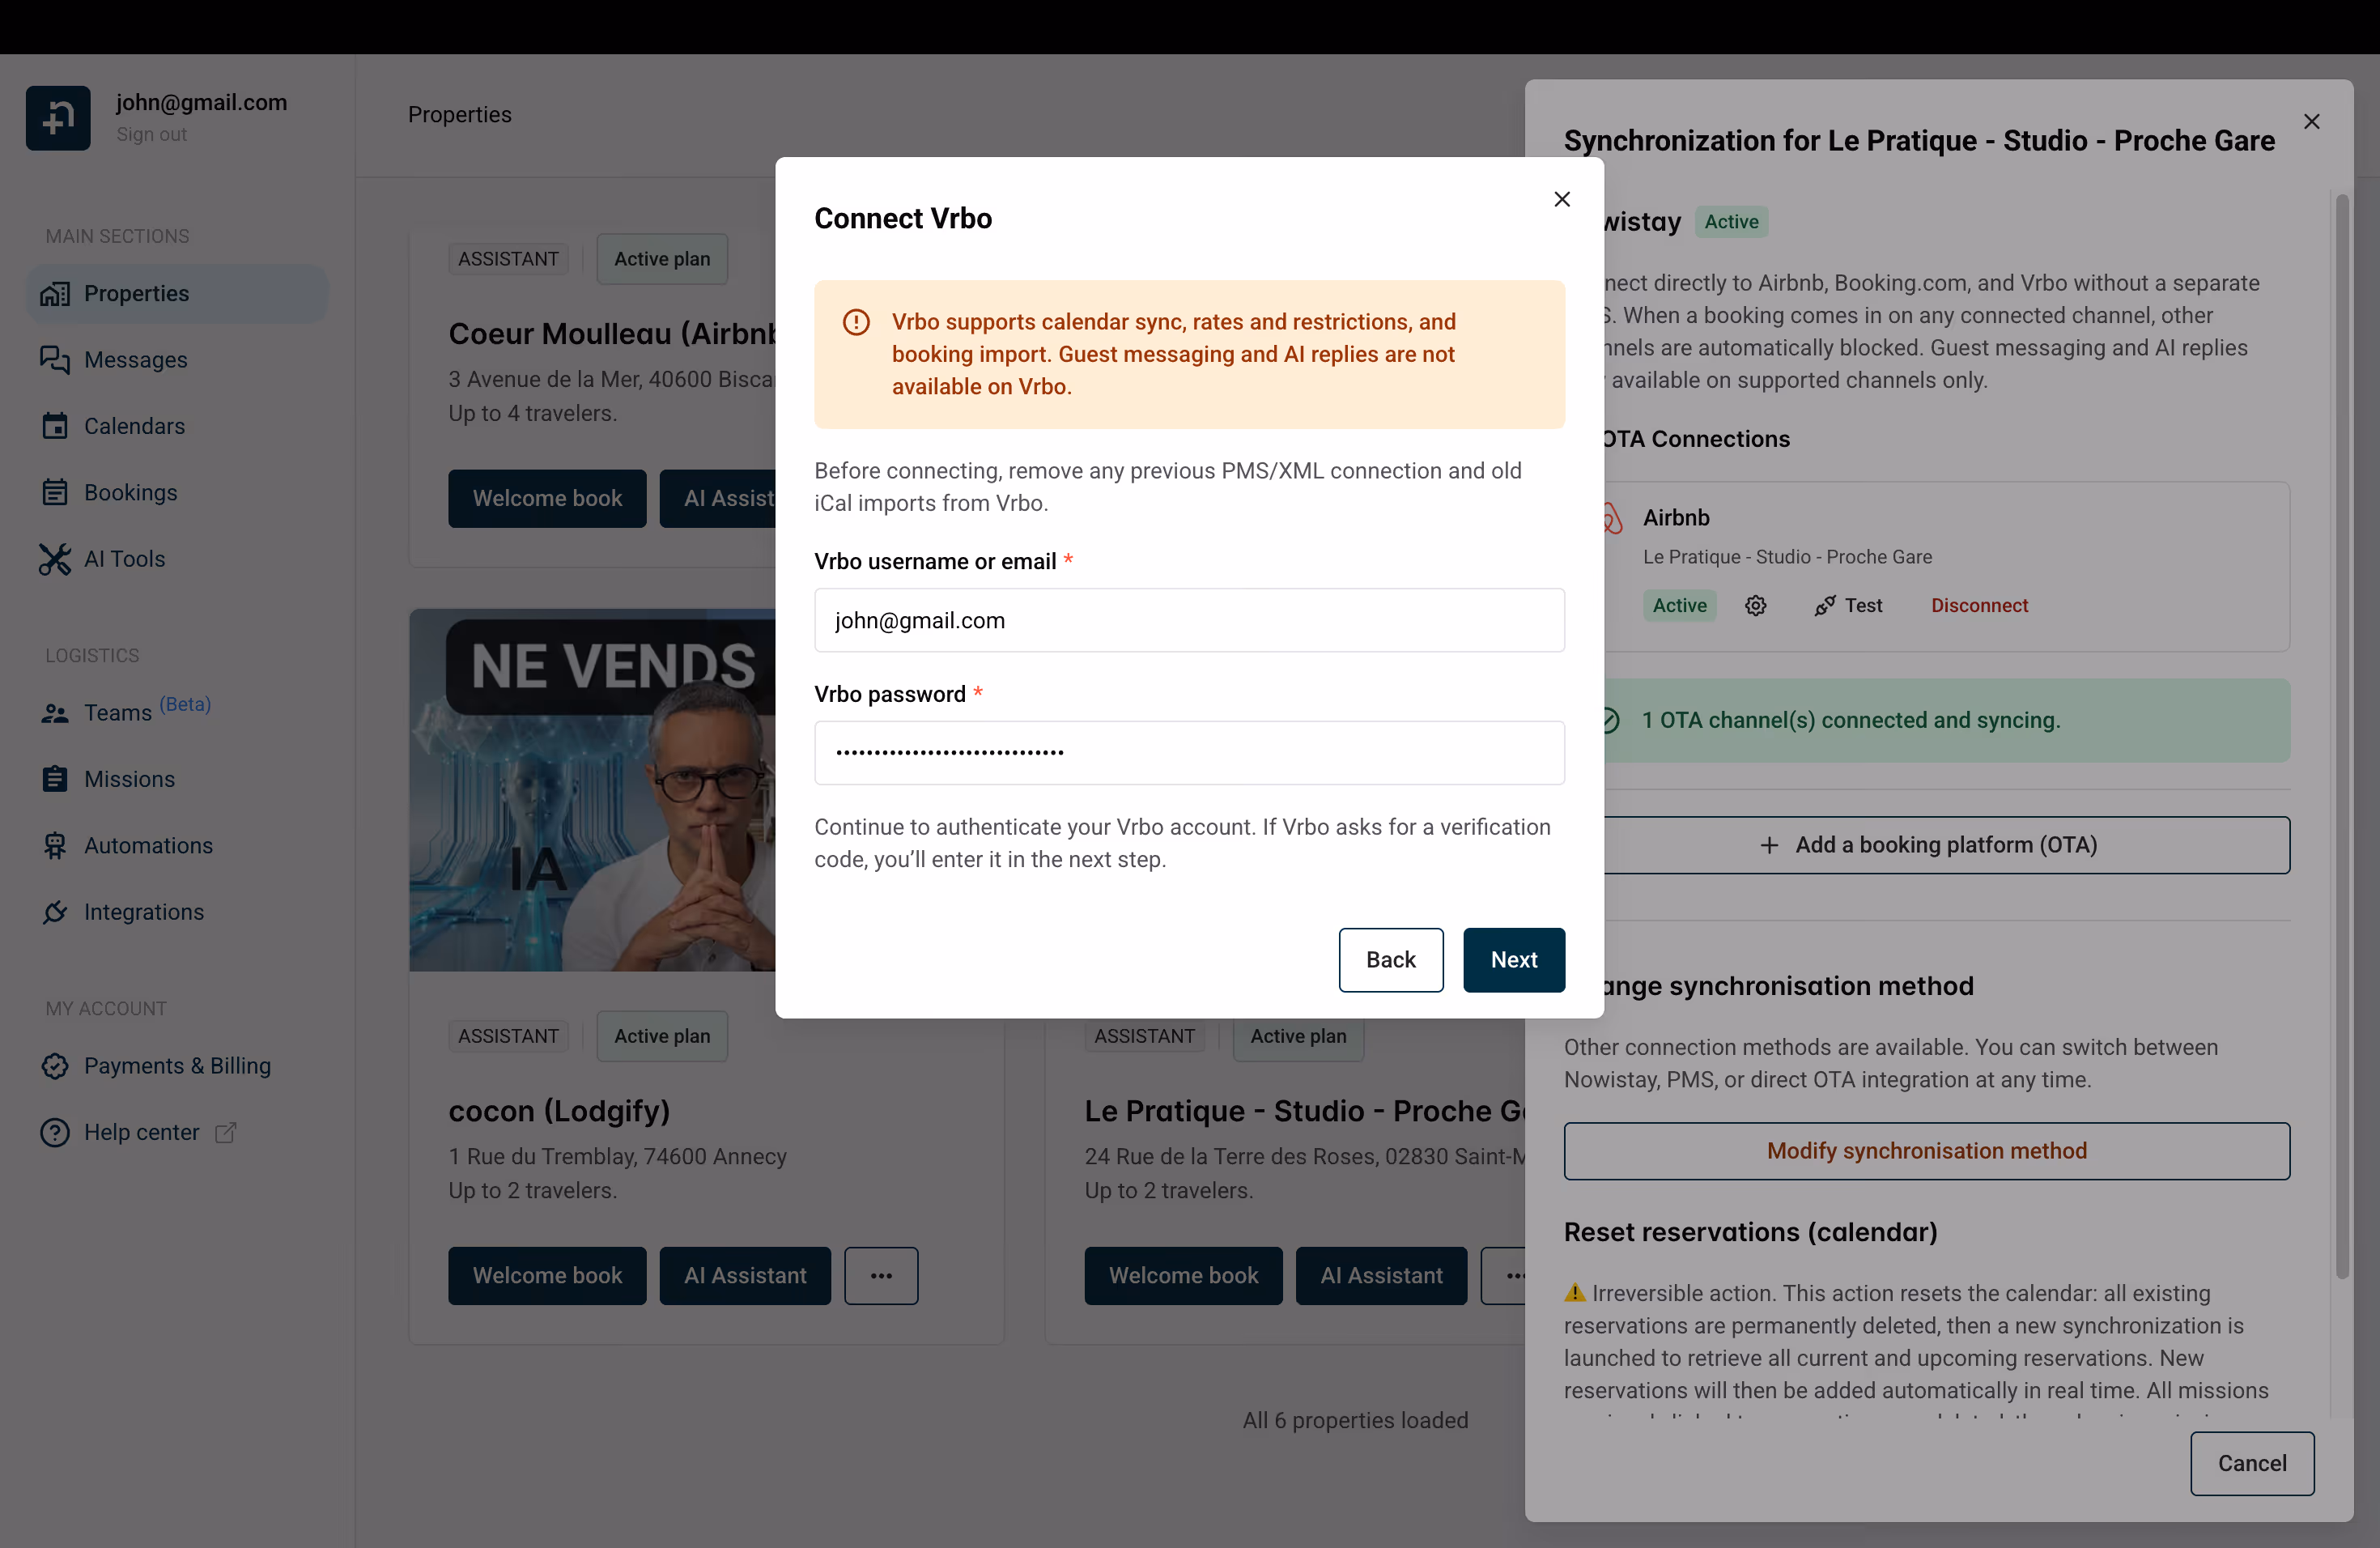
💡 Tip: Before connecting, make sure to remove any previous PMS/XML connection and old iCal imports from your VRBO account. Keeping them active will create synchronization conflicts.
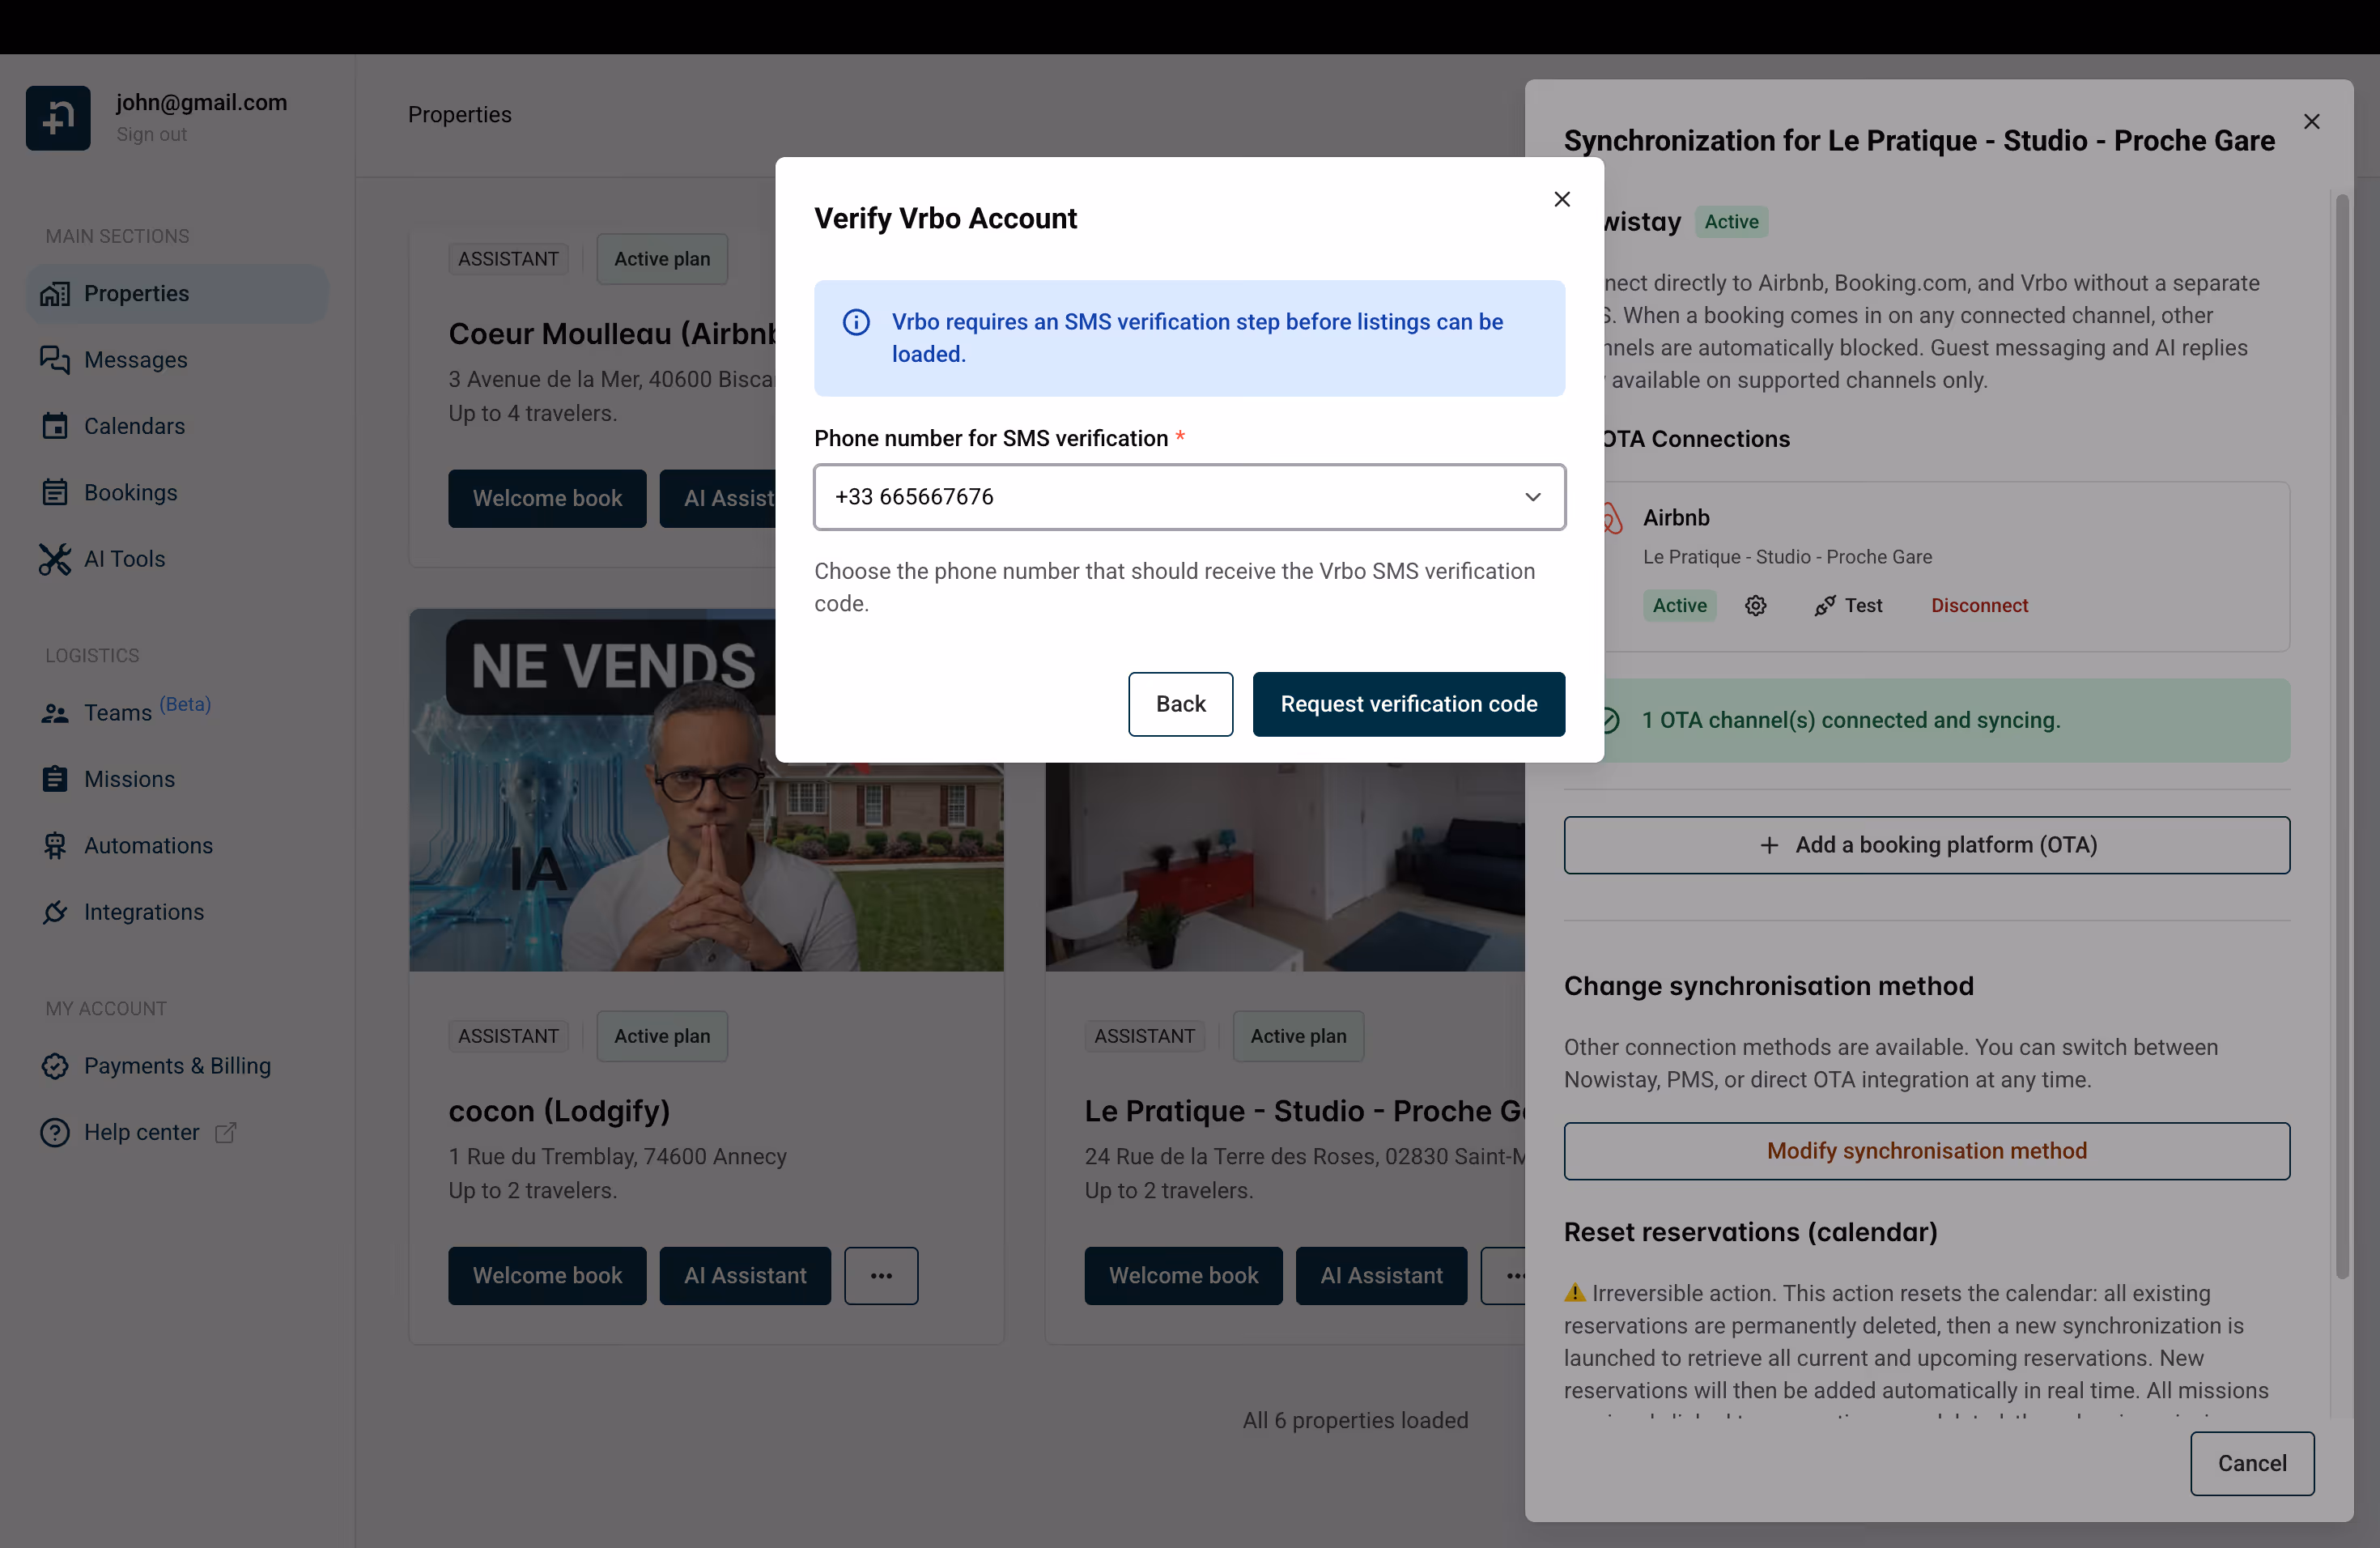
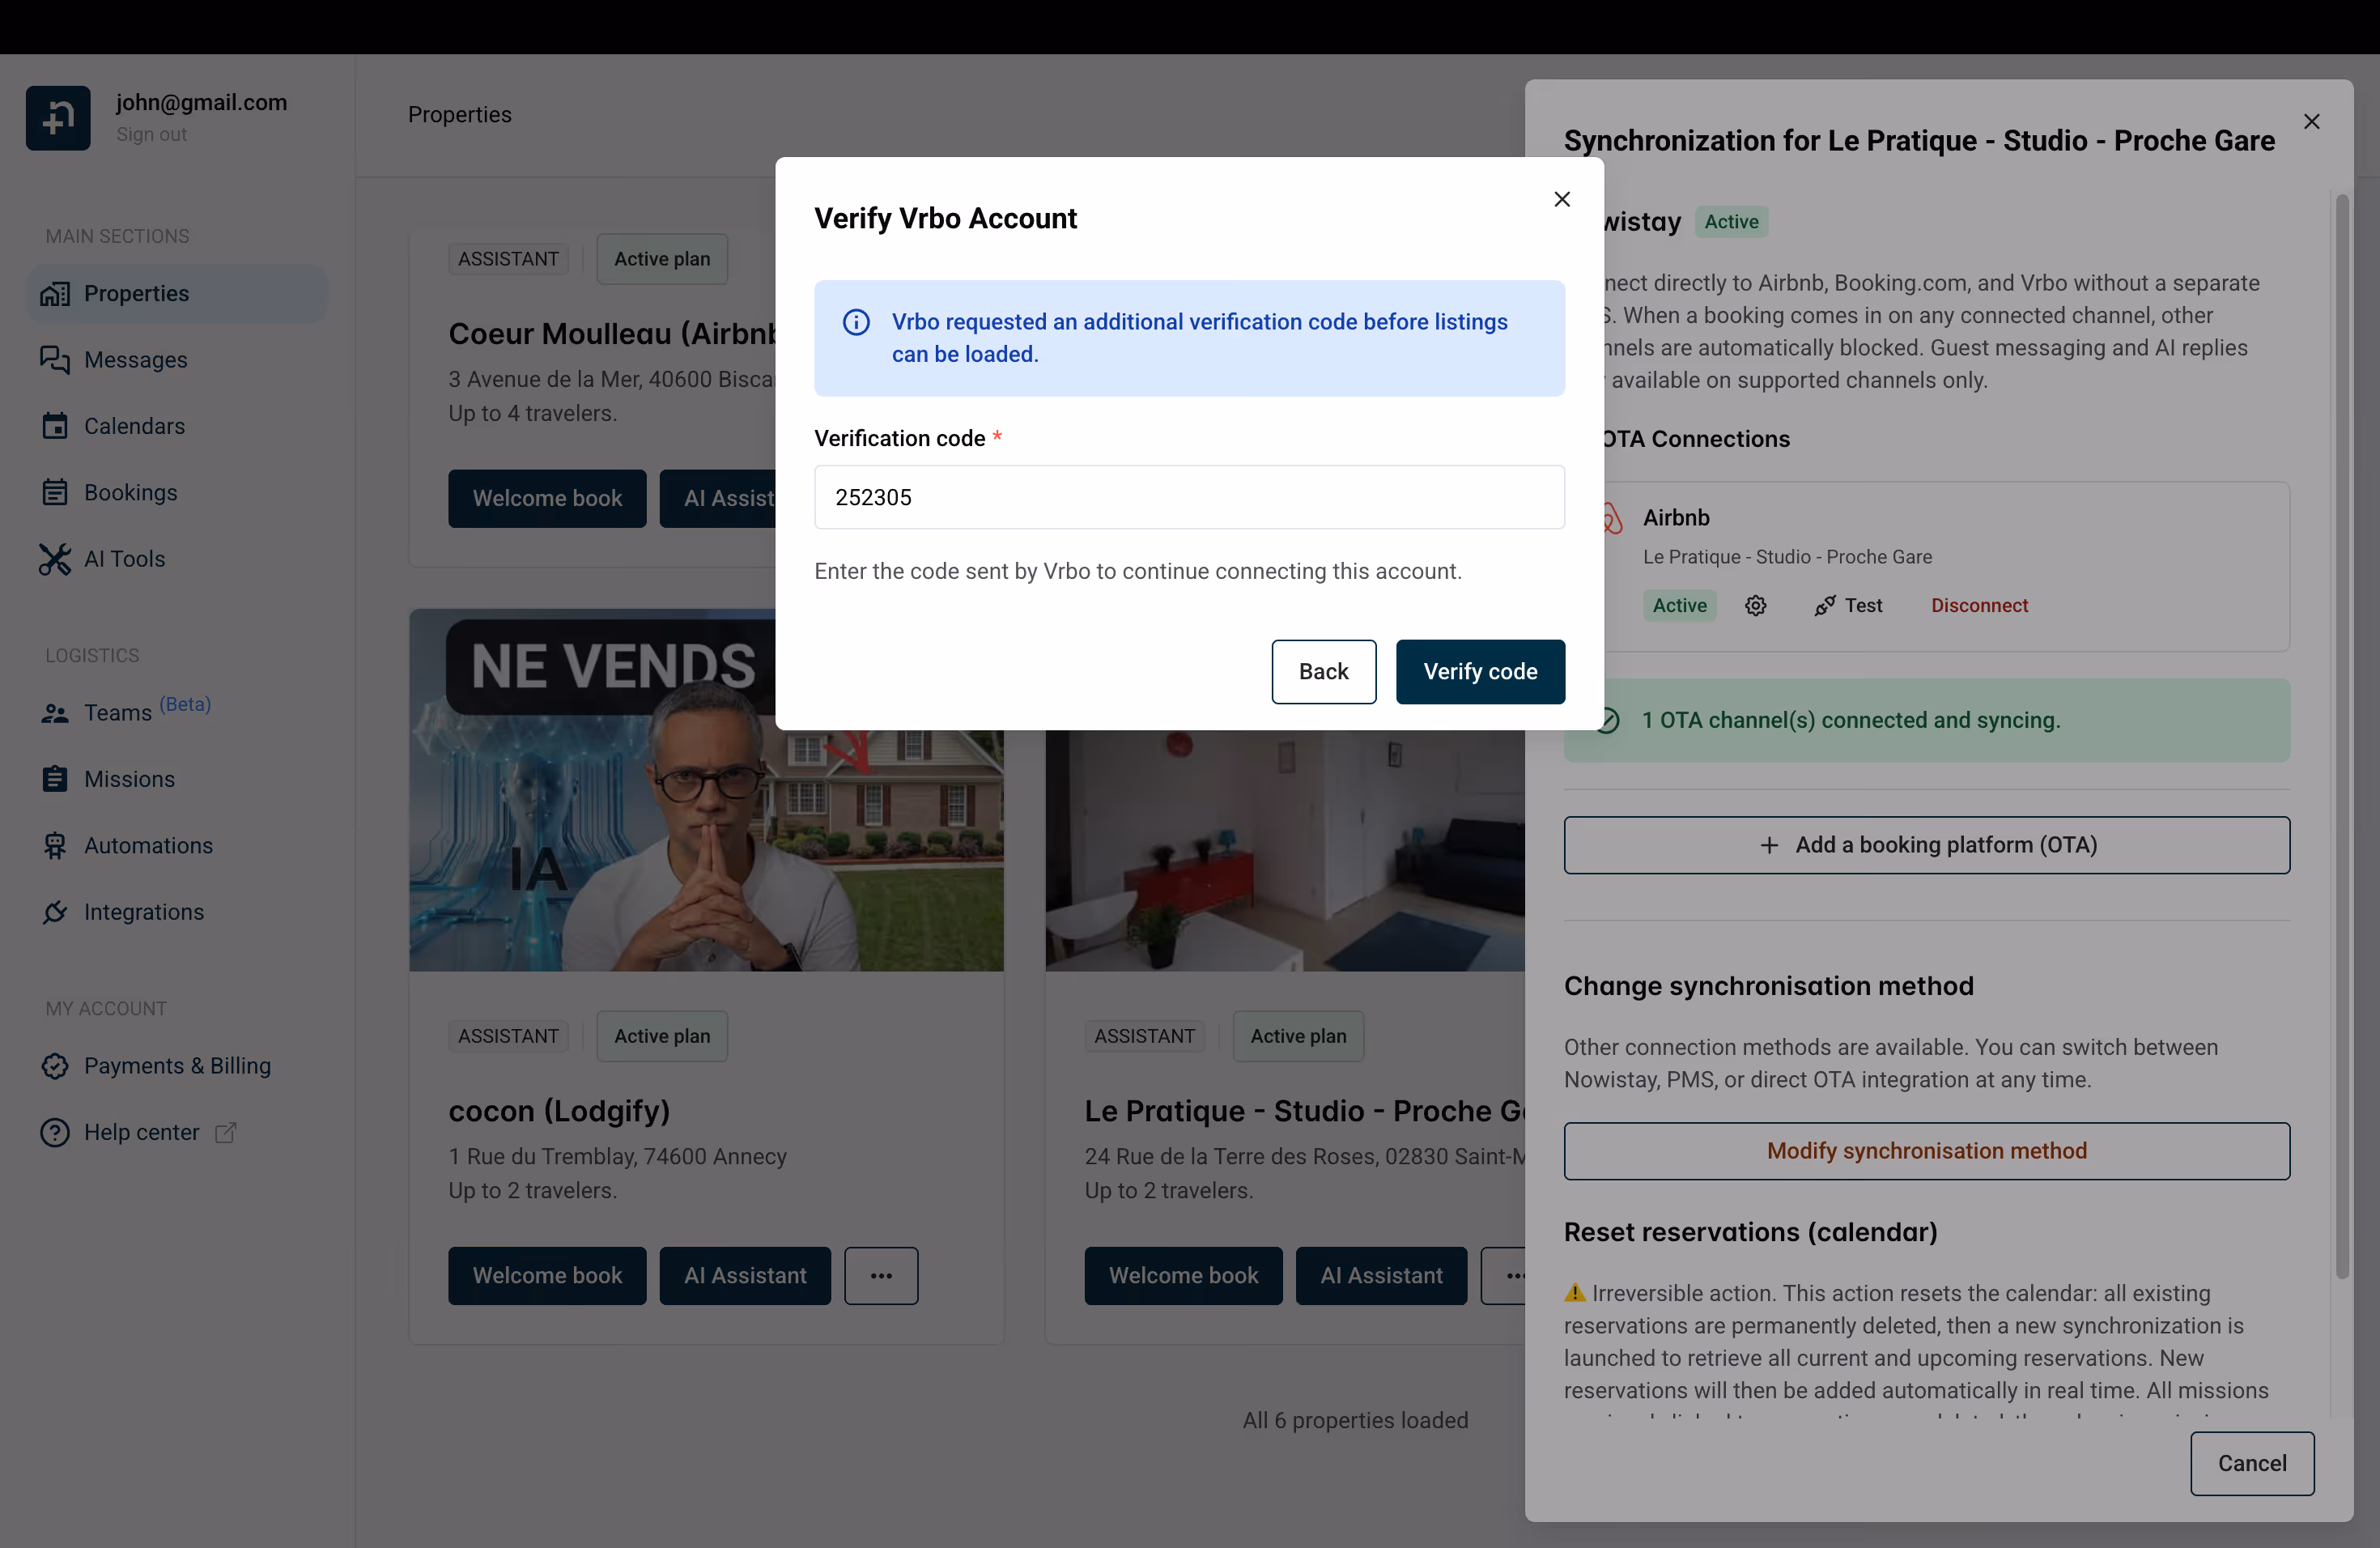
Vrbo requires SMS verification to secure the connection. This step has two parts:
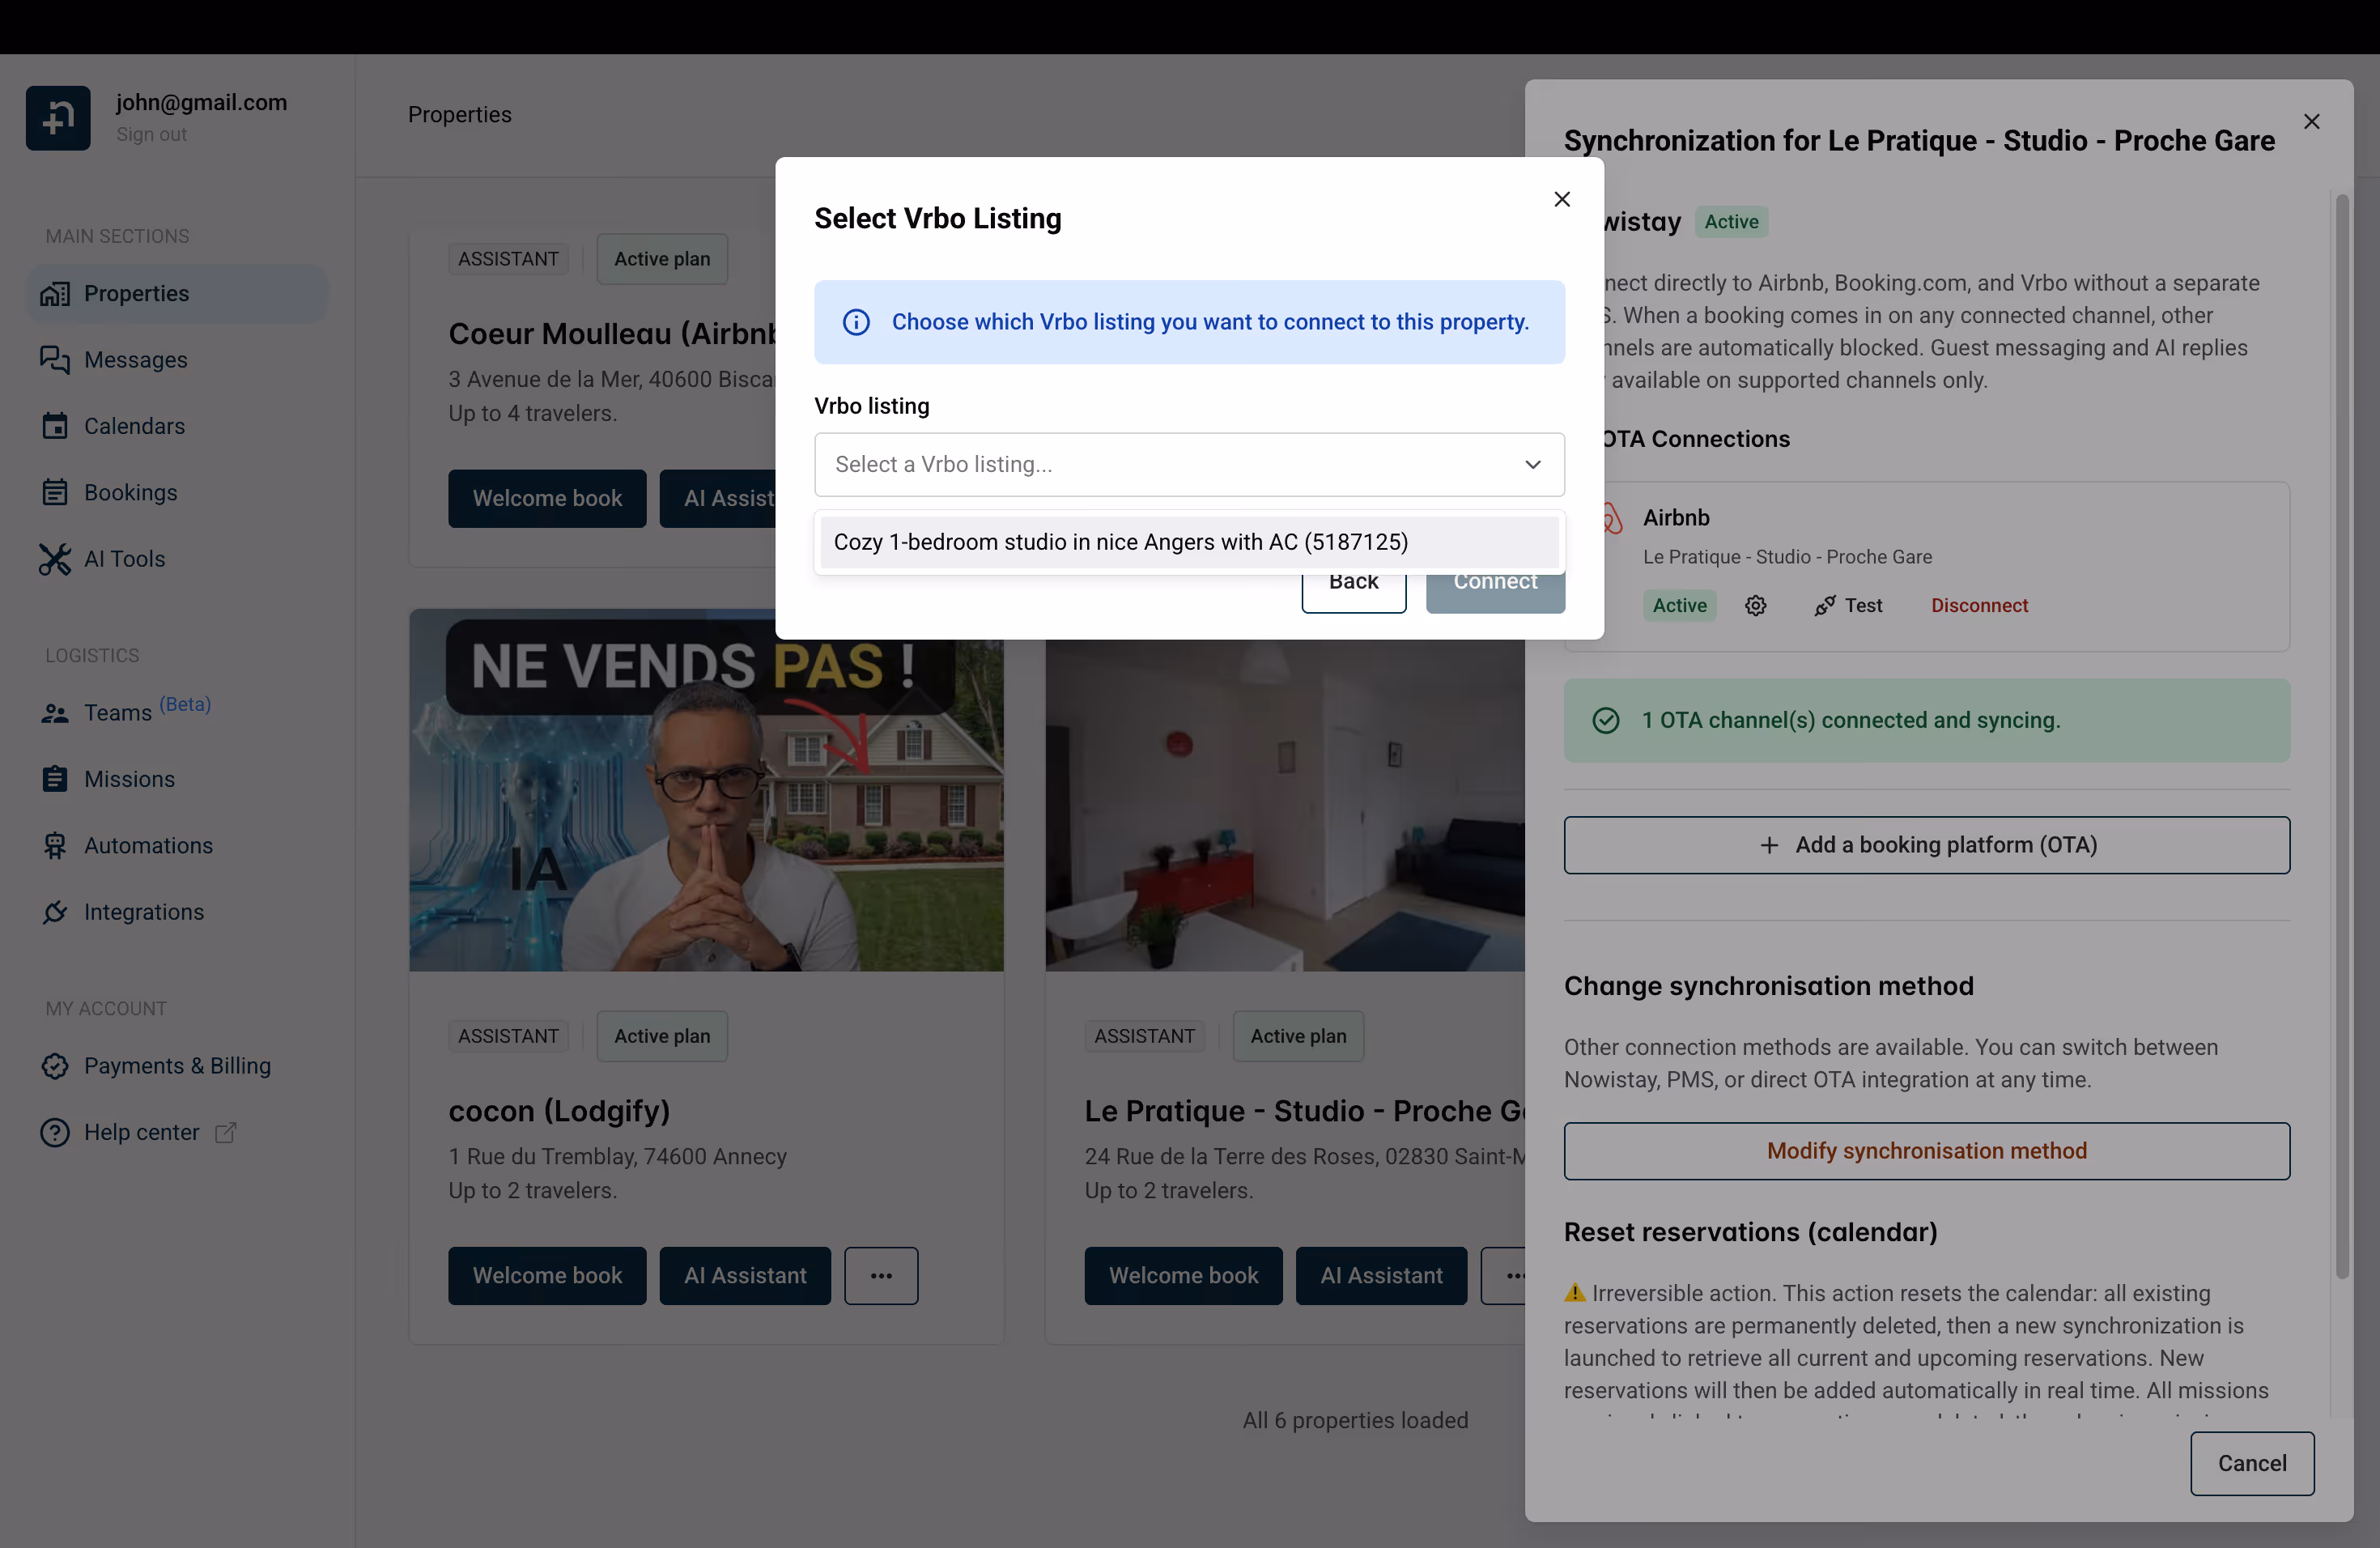
After successful verification, Nowistay loads your Vrbo listings. Open the "Vrbo listing" dropdown, select the listing you want to connect to this property, and click "Connect".
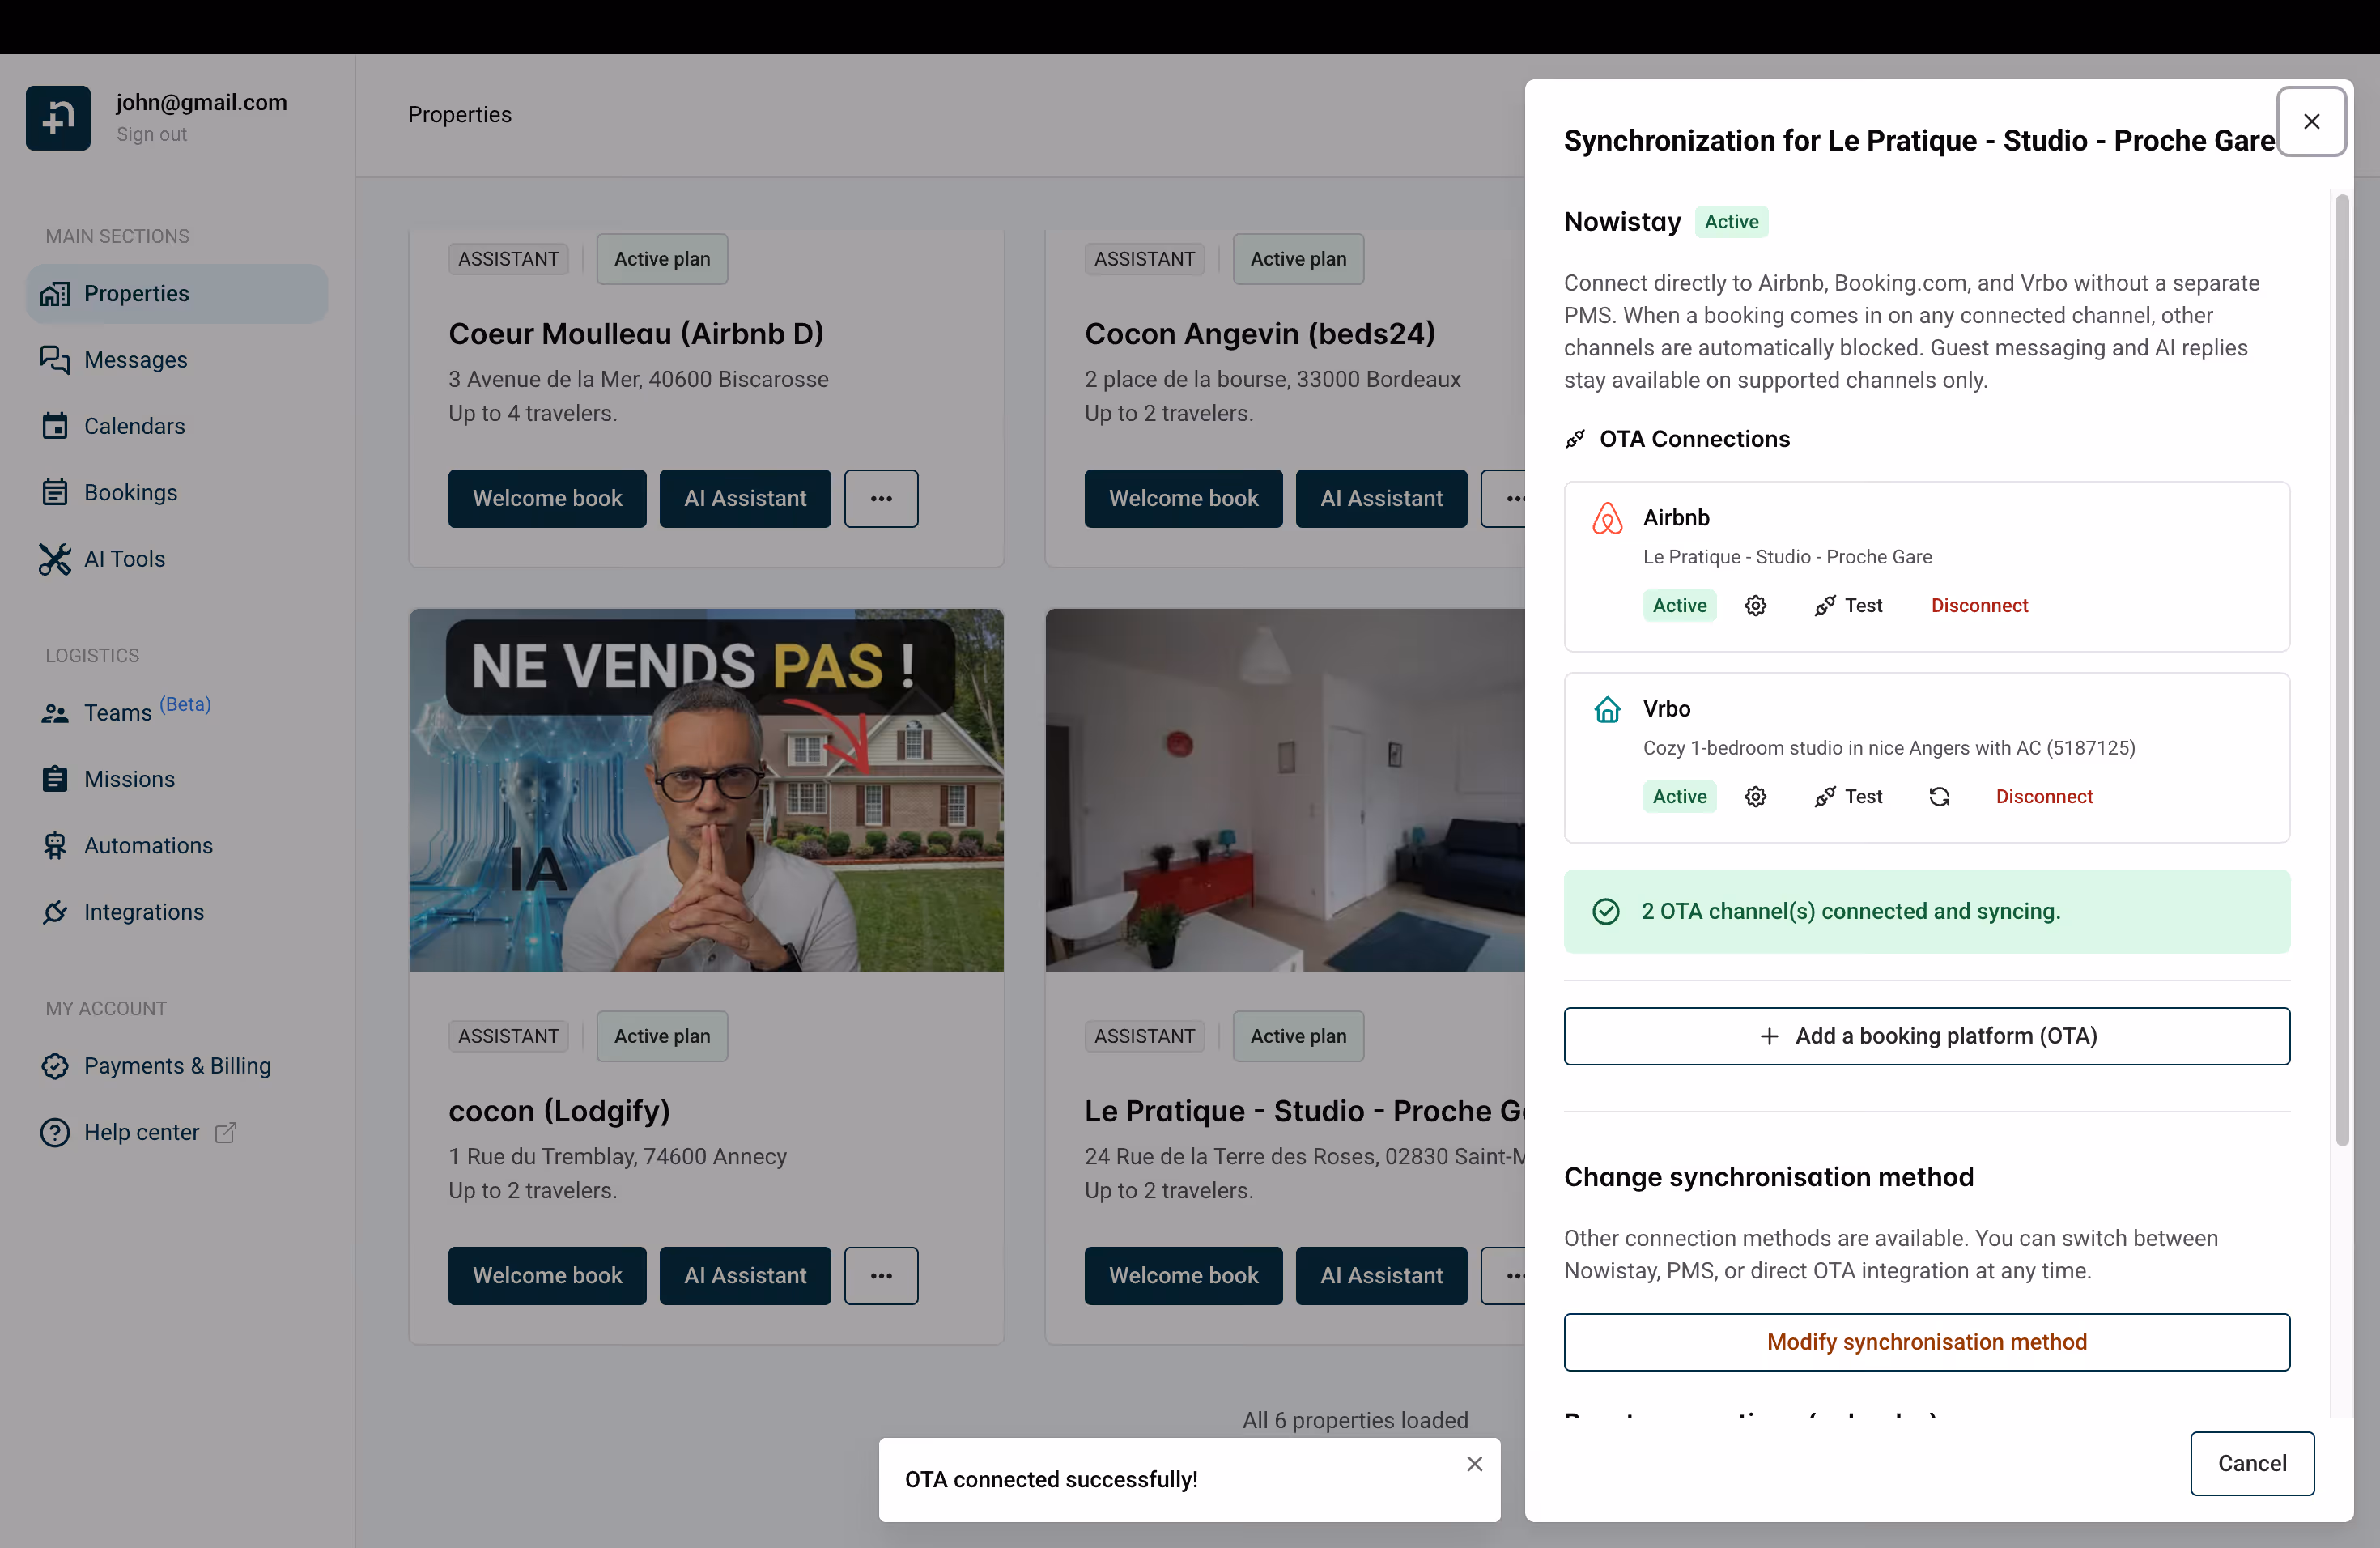
Once connected, you’ll see a confirmation message "OTA connected successfully!" and your Vrbo listing will appear in the Synchronization drawer alongside your other connected platforms. The status badges will show "Active" once synchronization is complete.
This is one limitation of the VRBO API. VRBO does not provide a feature for us to automatically retreive your current and futur bookings in the calendar.
To make sure the Nowistay calendar holds the truth on VRBO bookings that were created before you connect Nowistay, you'll have to add them manually. Best option is to add them as direct bookings (see here for more details).
Don't worry all future bookings and bookings updates will be synchronized in real time.
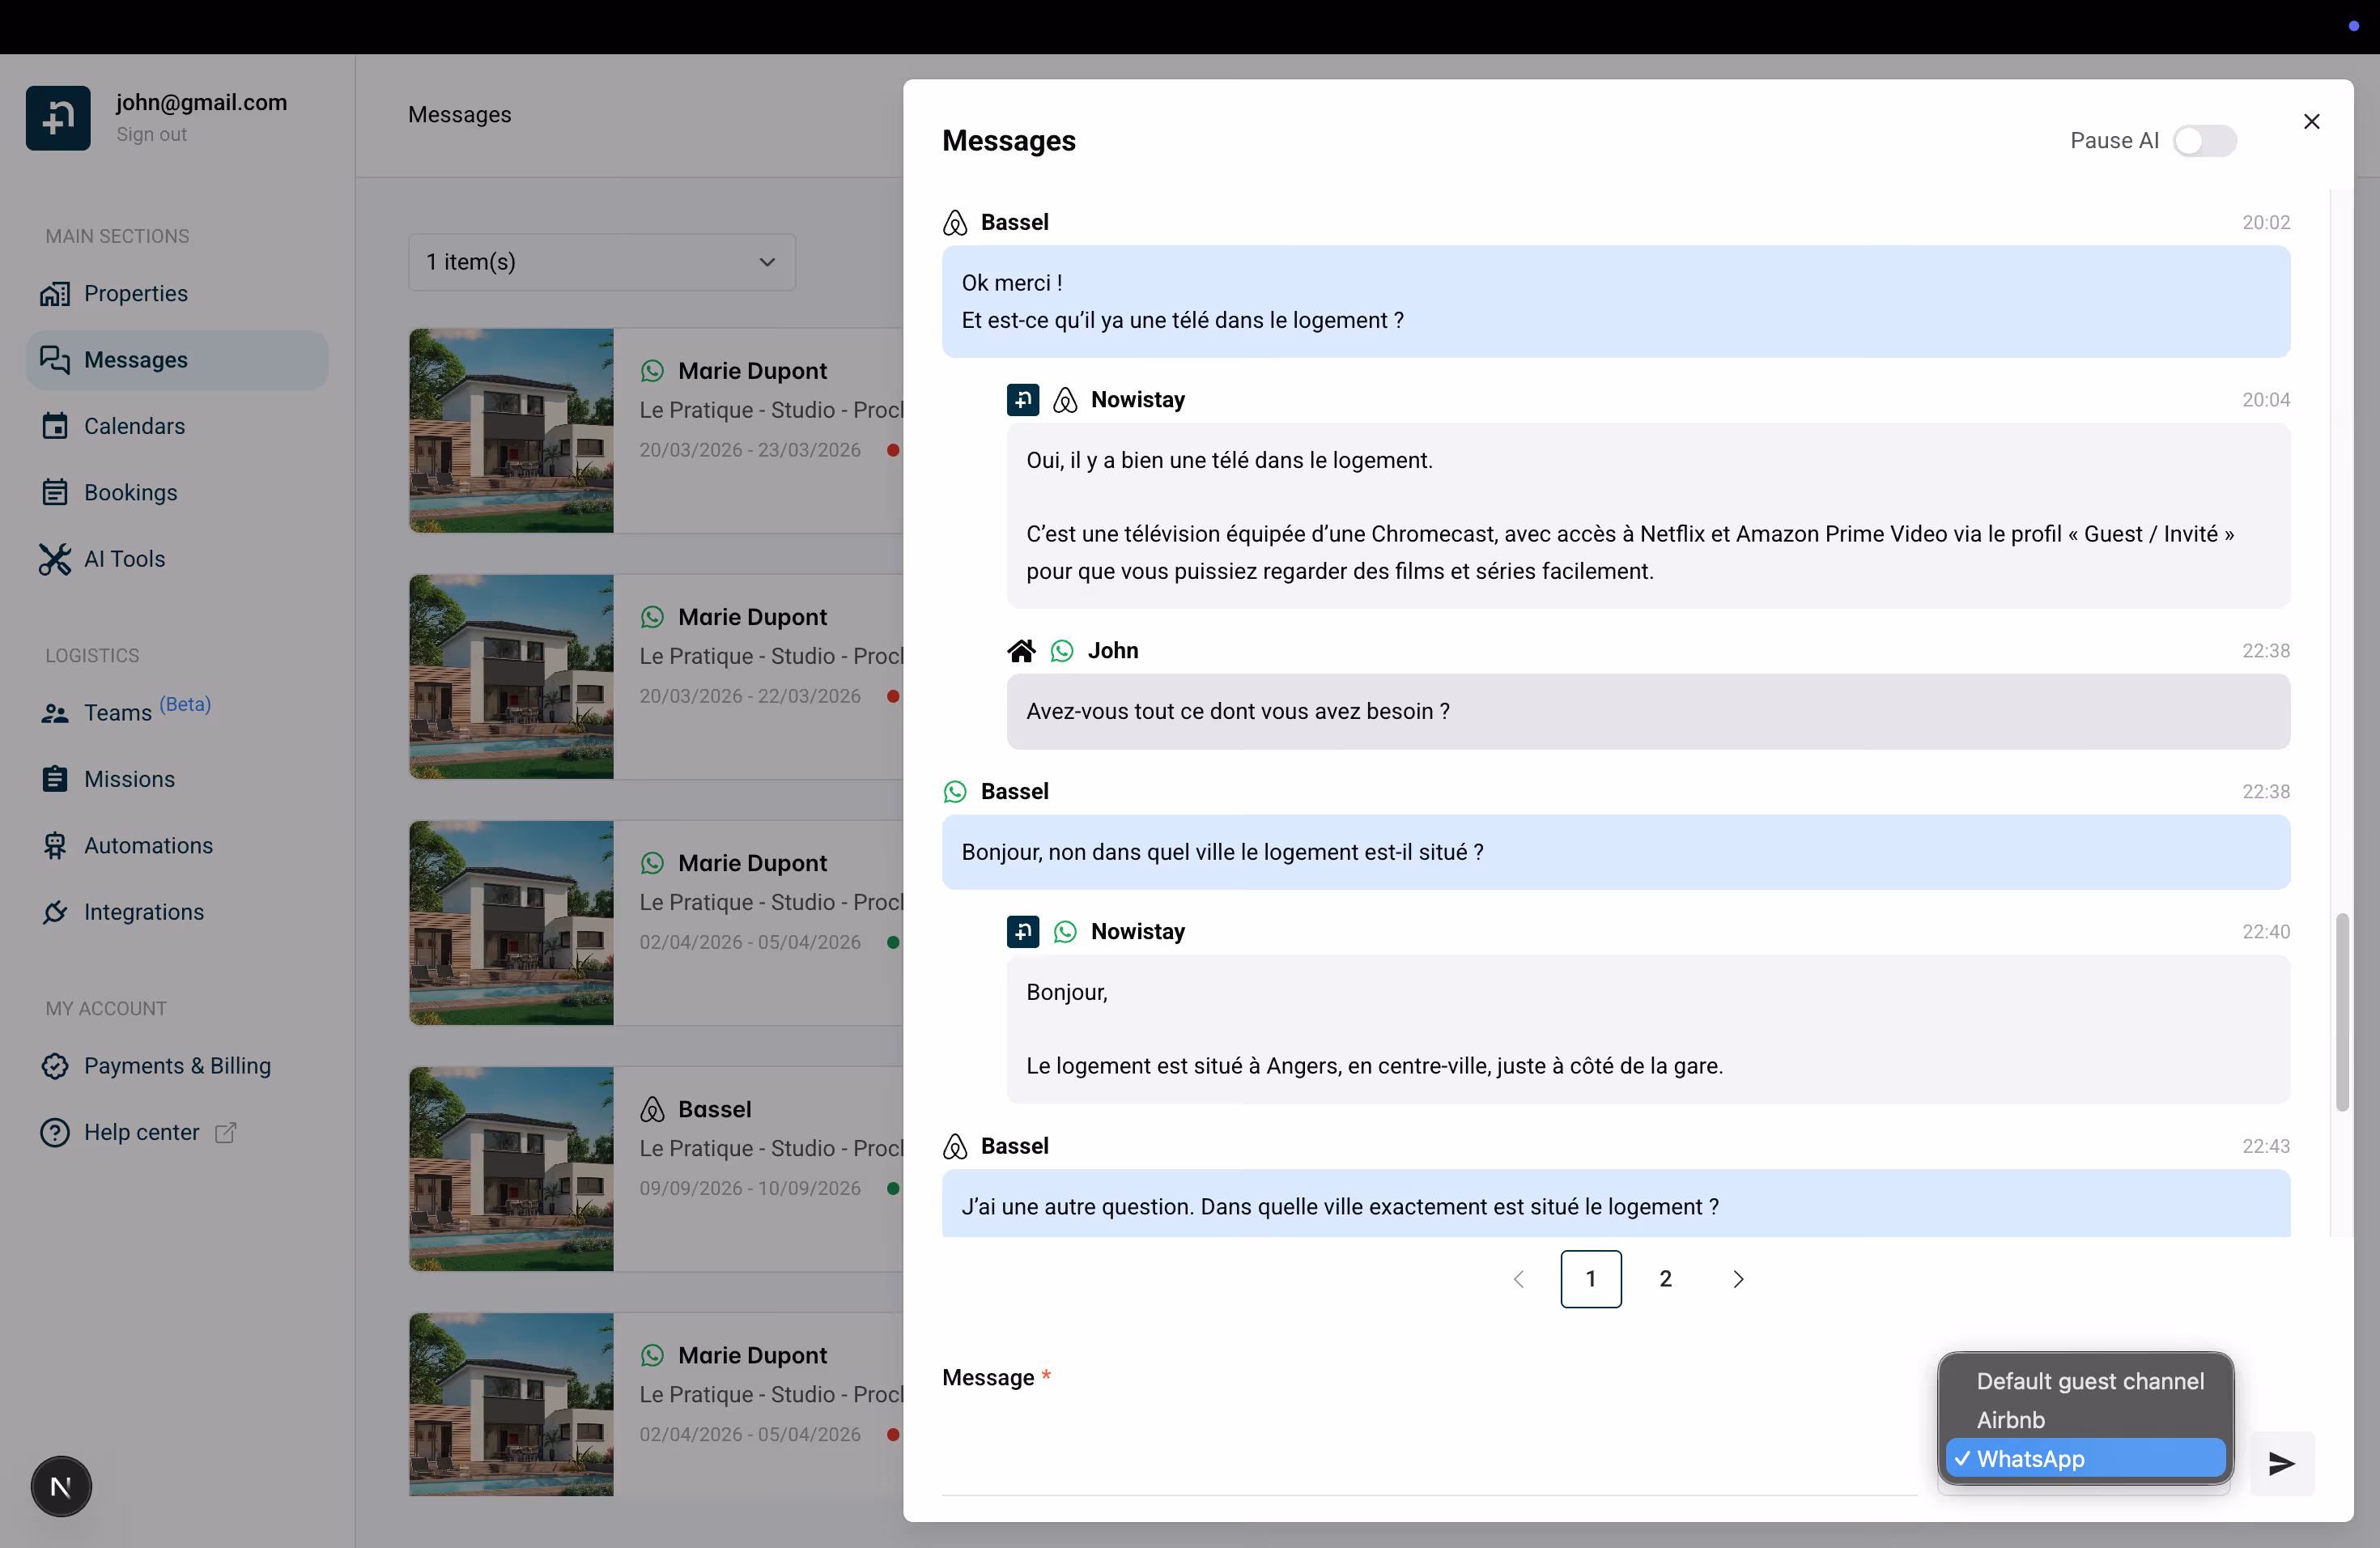
Make sure to fill in an email and/or a phone number when adding reservations manually. Automatic messages are sent to guests by email by default and thus won't appear in the discussions thread in the messages section. If the guest replies, you'll receive the email directly in your inbox. If you need to check if messages were sent, go to the automations section then on the "automatic messages" section click "Manage messages". You'll see a clock icon, click it to see the messages history.
⚠️ Migration tip — deposit automations on manually added VRBO bookings. If you already collected the security deposit directly via VRBO for your pre-existing reservations, the Nowistay deposit automation may still trigger and send your guest a deposit authorization link. To prevent this for a specific reservation, open the booking from the calendar or the bookings list, find the Deposit field, and click "Mark as paid". Nowistay then treats the deposit as already collected for that reservation only, and any message template gated by deposit = paid stops being held back. The confirmation dialog reads: "This bypasses Stripe authorization and unblocks messages gated by deposit = paid. Use it only if you collected the deposit another way."
You can also send messages using WhatsApp if the phone number is present in the guest details. In that case all messages will appear in the messaging thread and the AI assistant will answer automatically. This is the recommended method for discussing with VRBO guests from nowistay.
If you see the message "Failed to connect OTA. Please try again.", don’t worry — this is usually a temporary issue.
Here’s what to check:
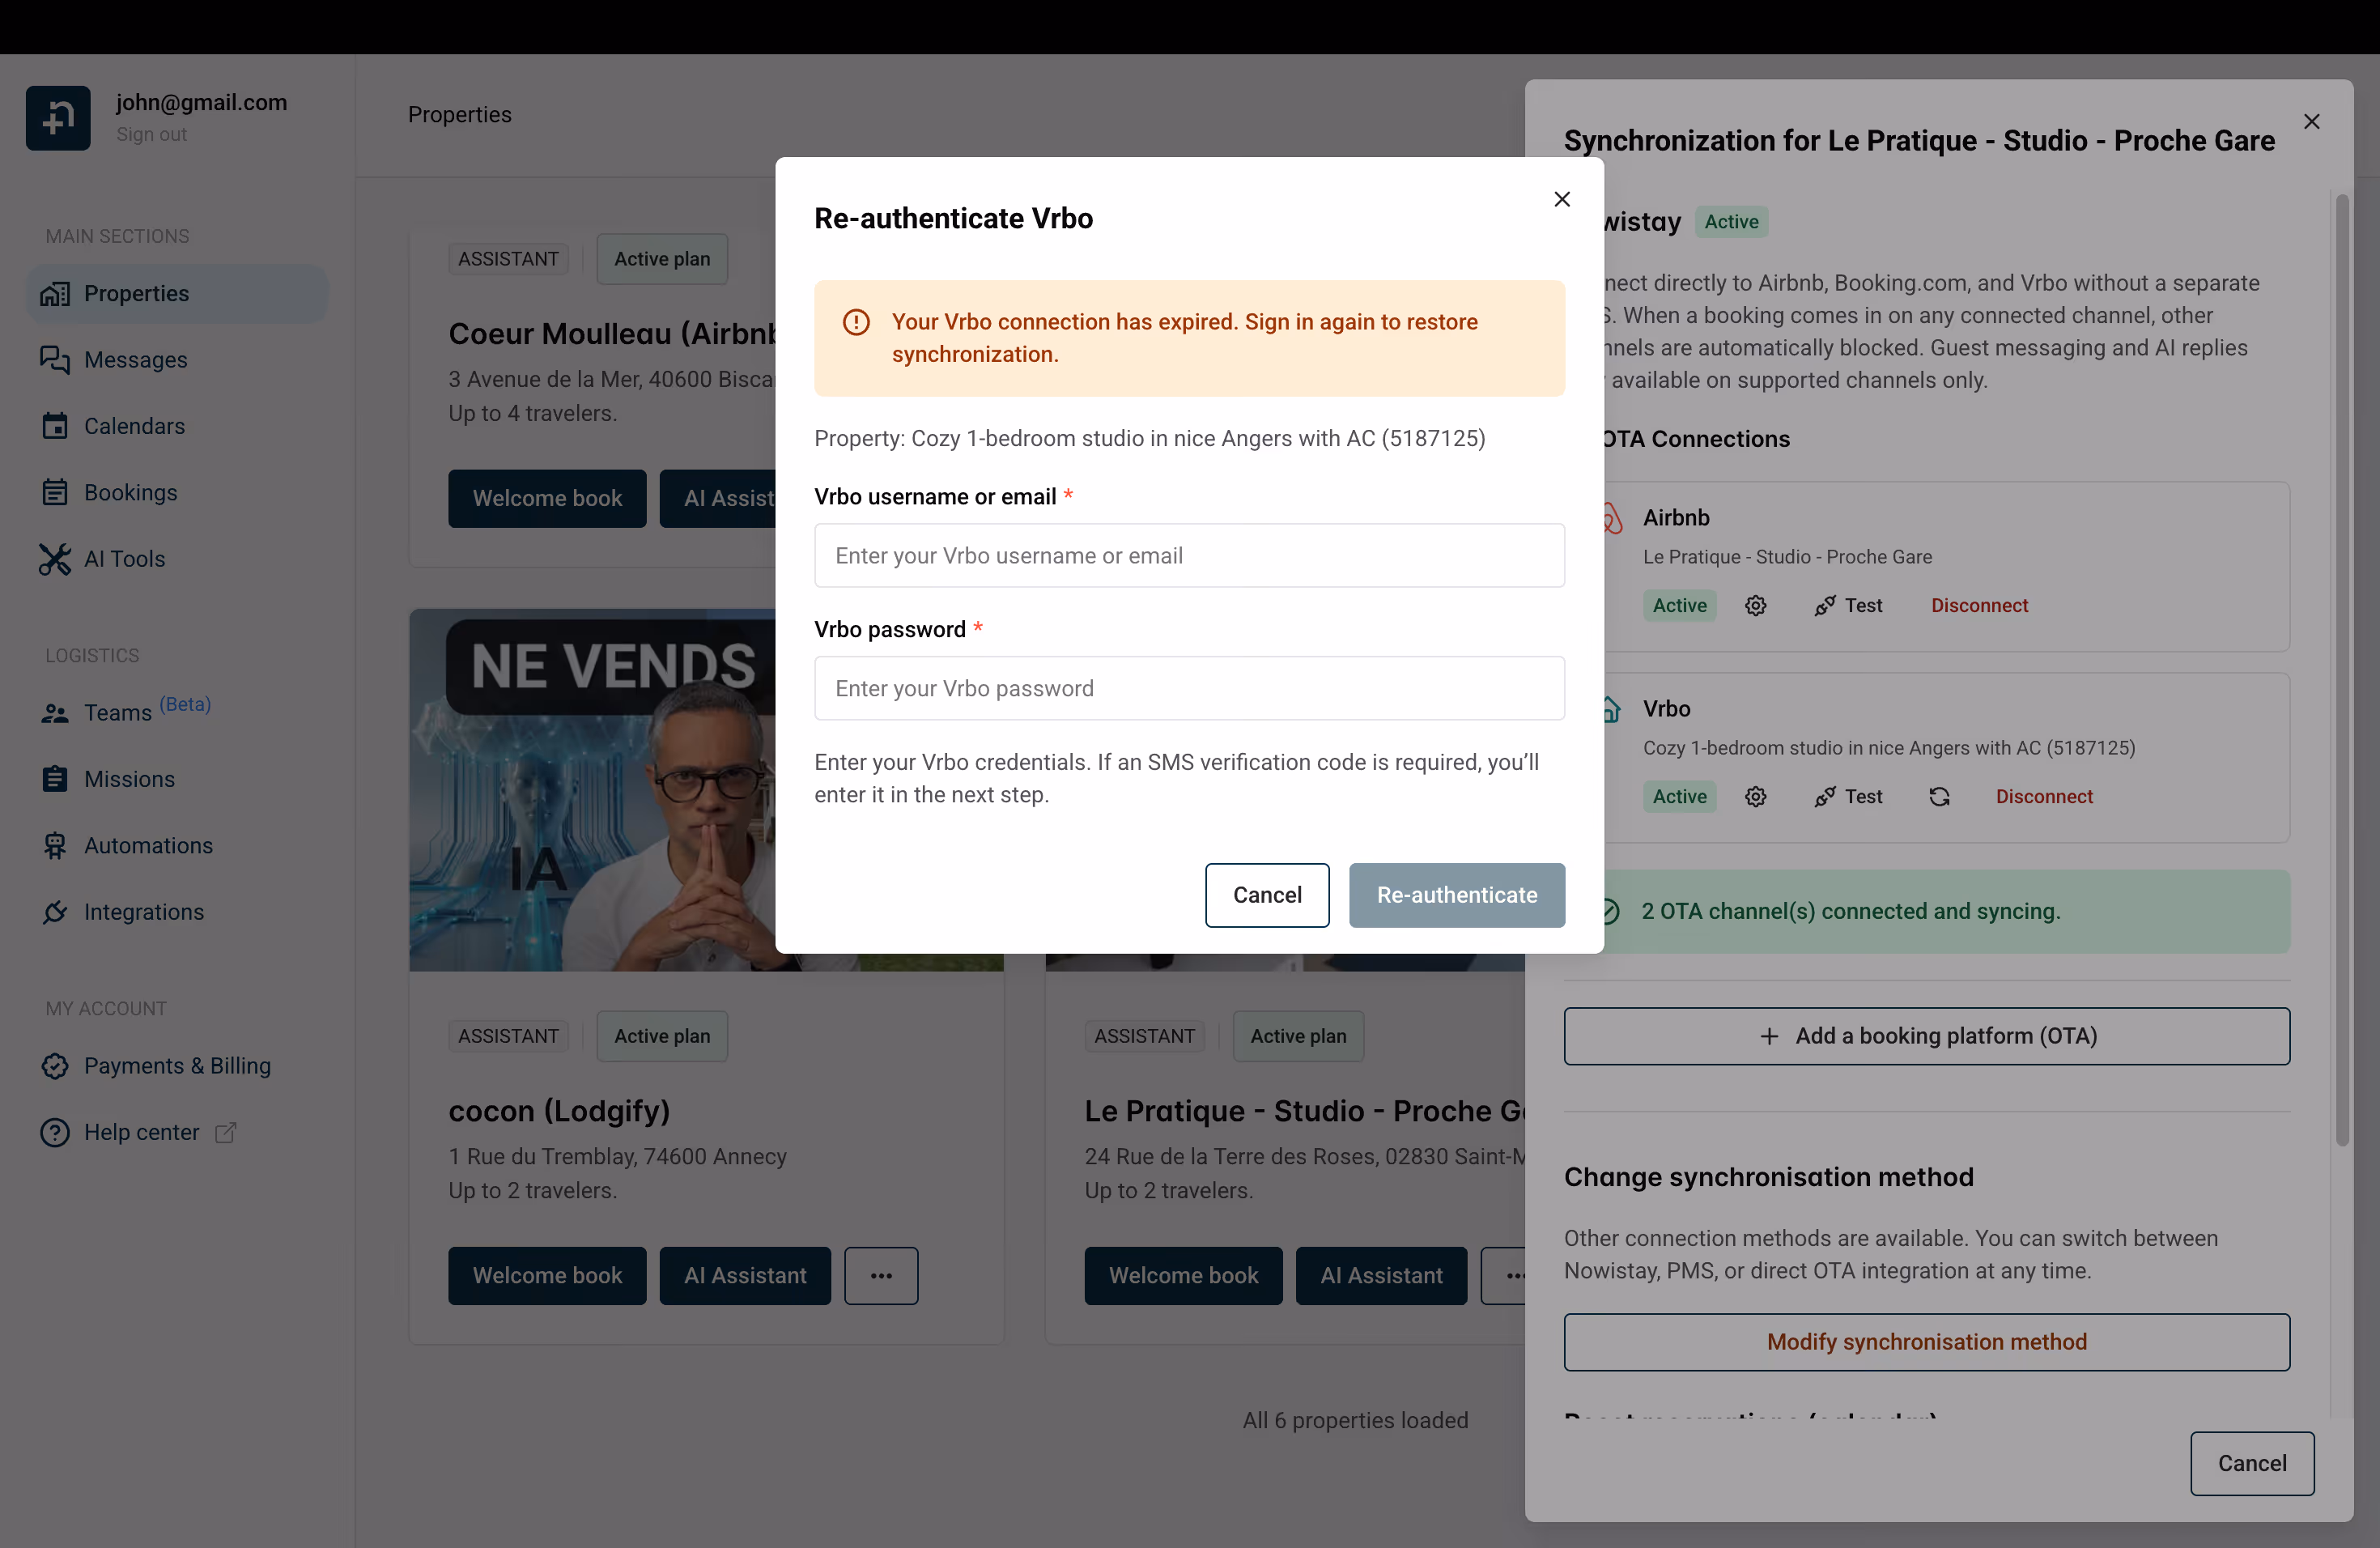
Vrbo connections may occasionally expire. When this happens, synchronization will stop and you’ll need to re-authenticate.
In the Synchronization drawer, click the "Re-authenticate" button next to your Vrbo connection. A dialog will appear asking you to enter your Vrbo credentials again. Complete the SMS verification if prompted, and your connection will be restored.
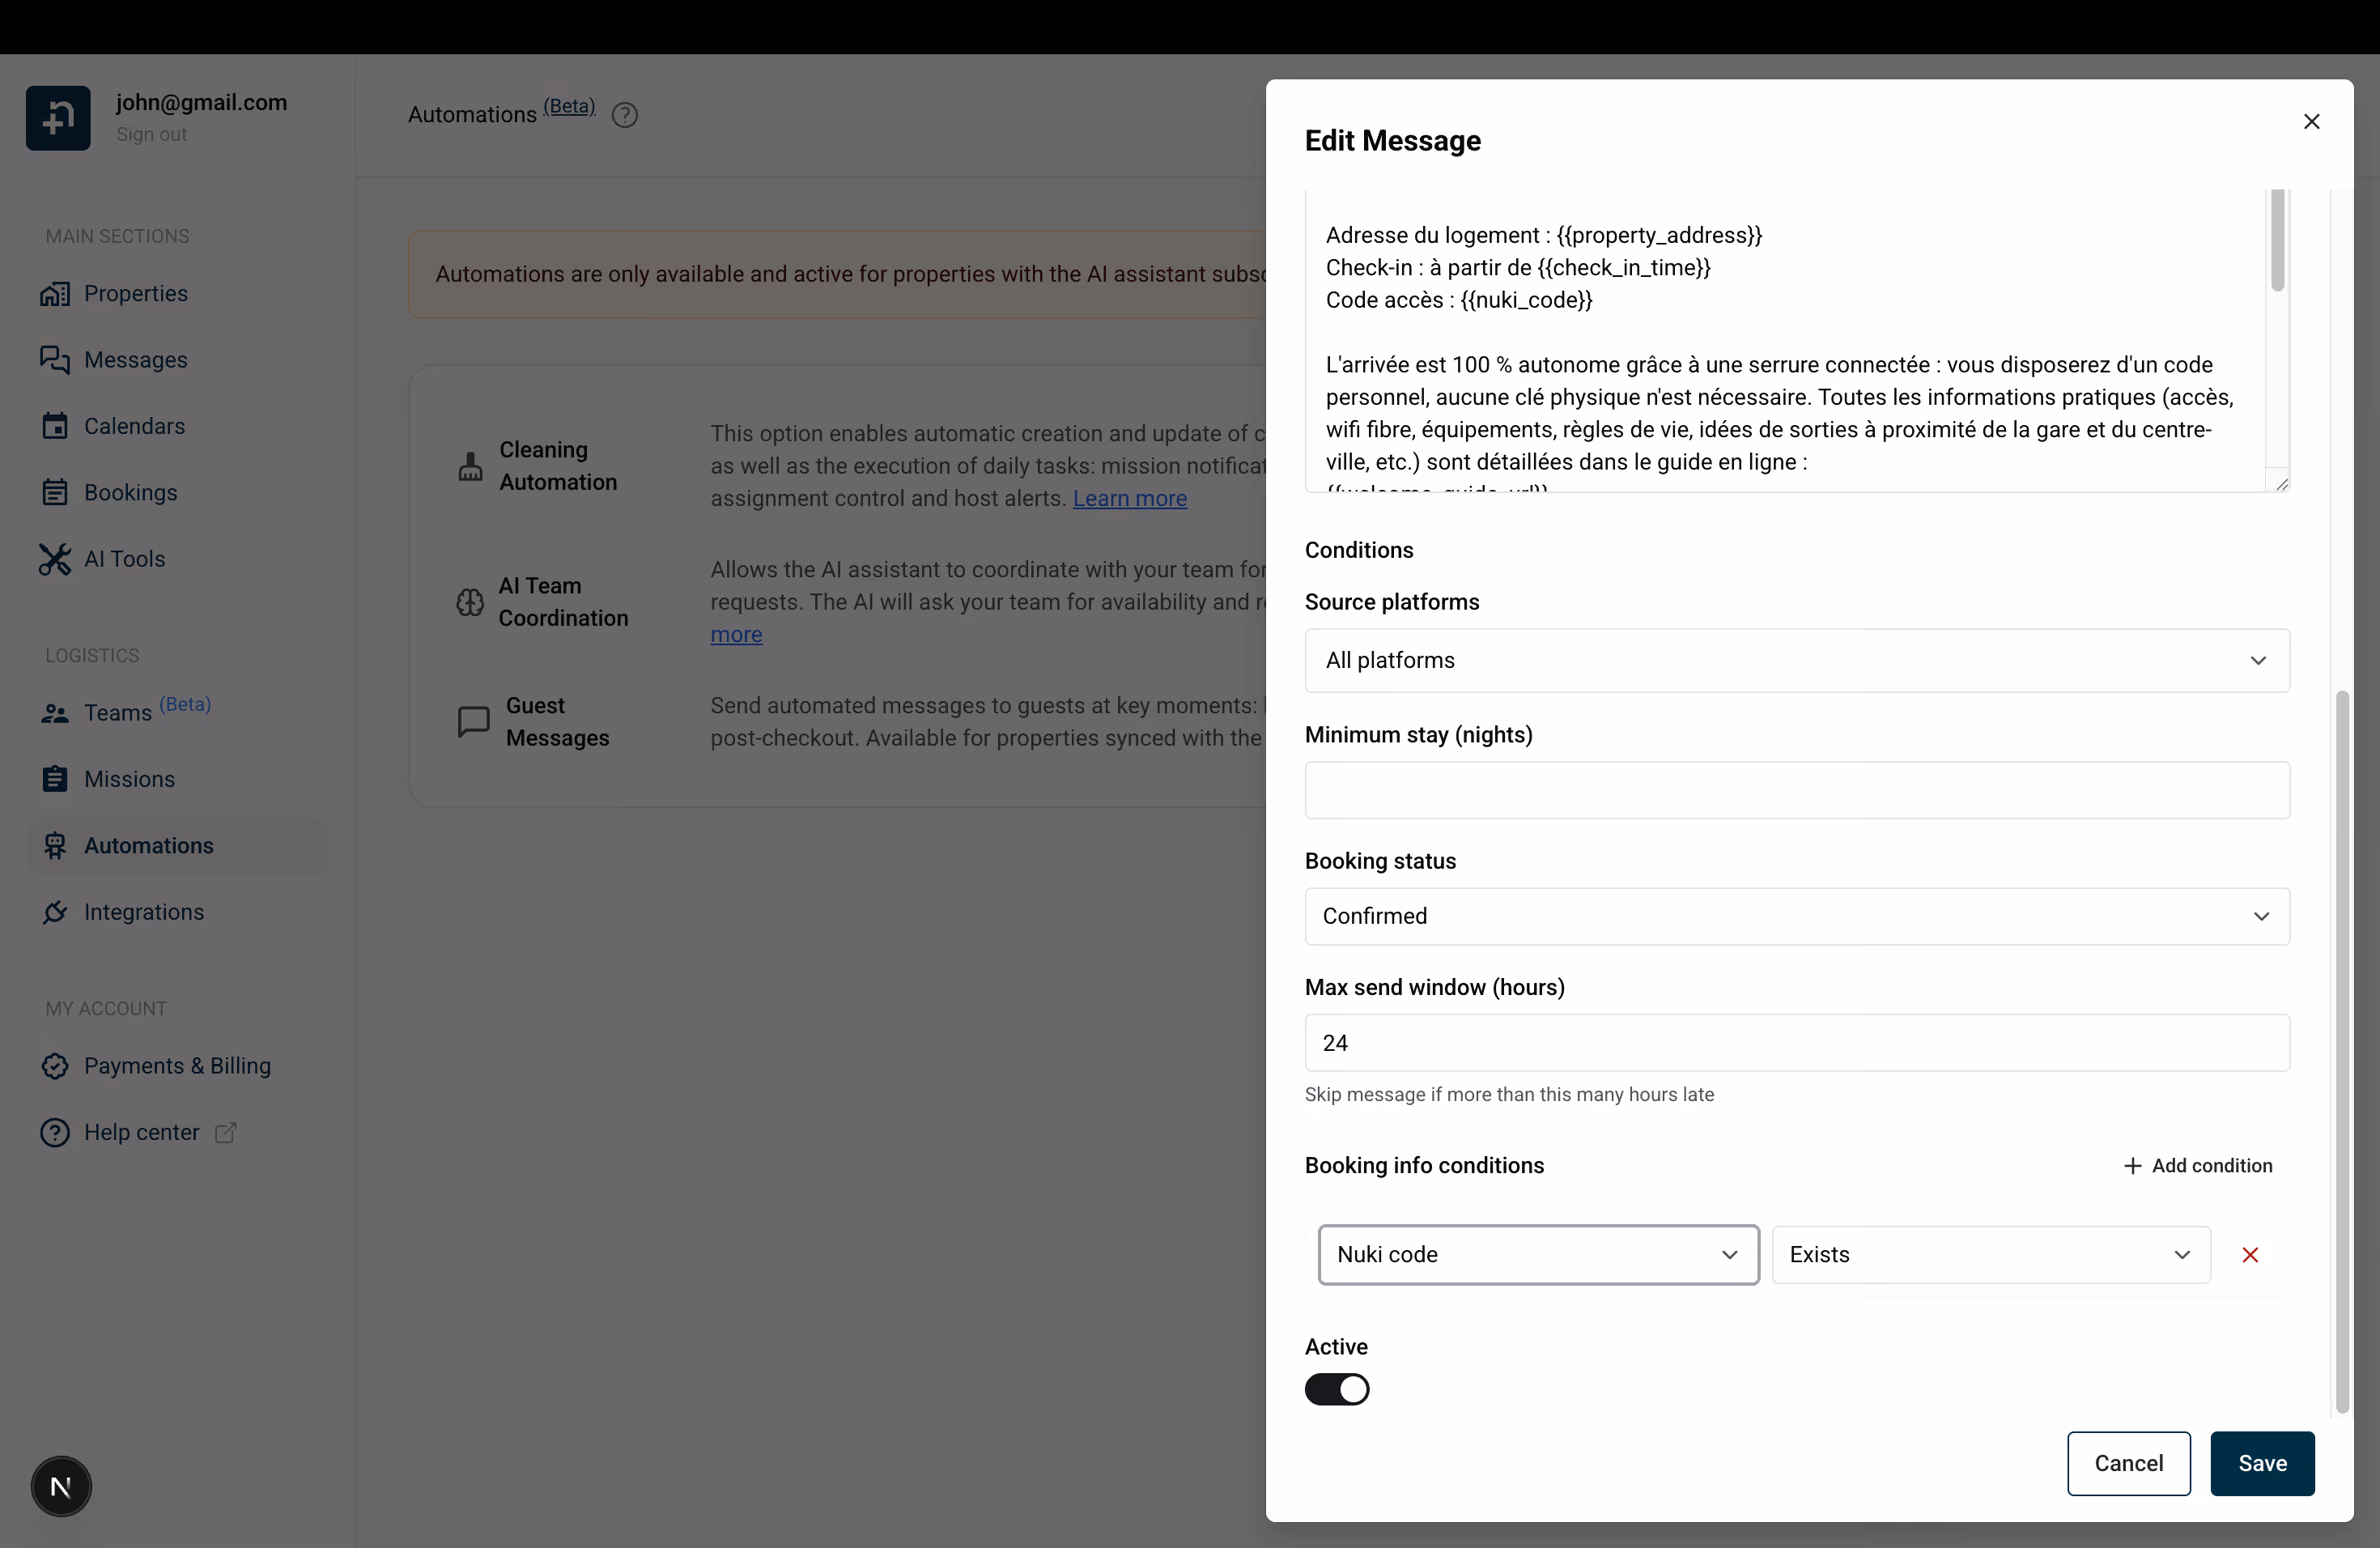
Nowistay’s automated guest messages let you create templates that send automatically at key moments — booking confirmation, check-in, check-out. When Vrbo provides the guest’s email address with the reservation, these messages are delivered by email.
To create a template specifically for VRBO guests:
This lets you write VRBO-specific messages — for example, different check-in instructions since VRBO guests won’t receive messages through the booking platform.
For the most complete solution, connect the WhatsApp channel. This effectively fills the messaging gap that Vrbo’s API limitation creates.
In the template editor, use the “Send via” dropdown to control how each message is delivered:
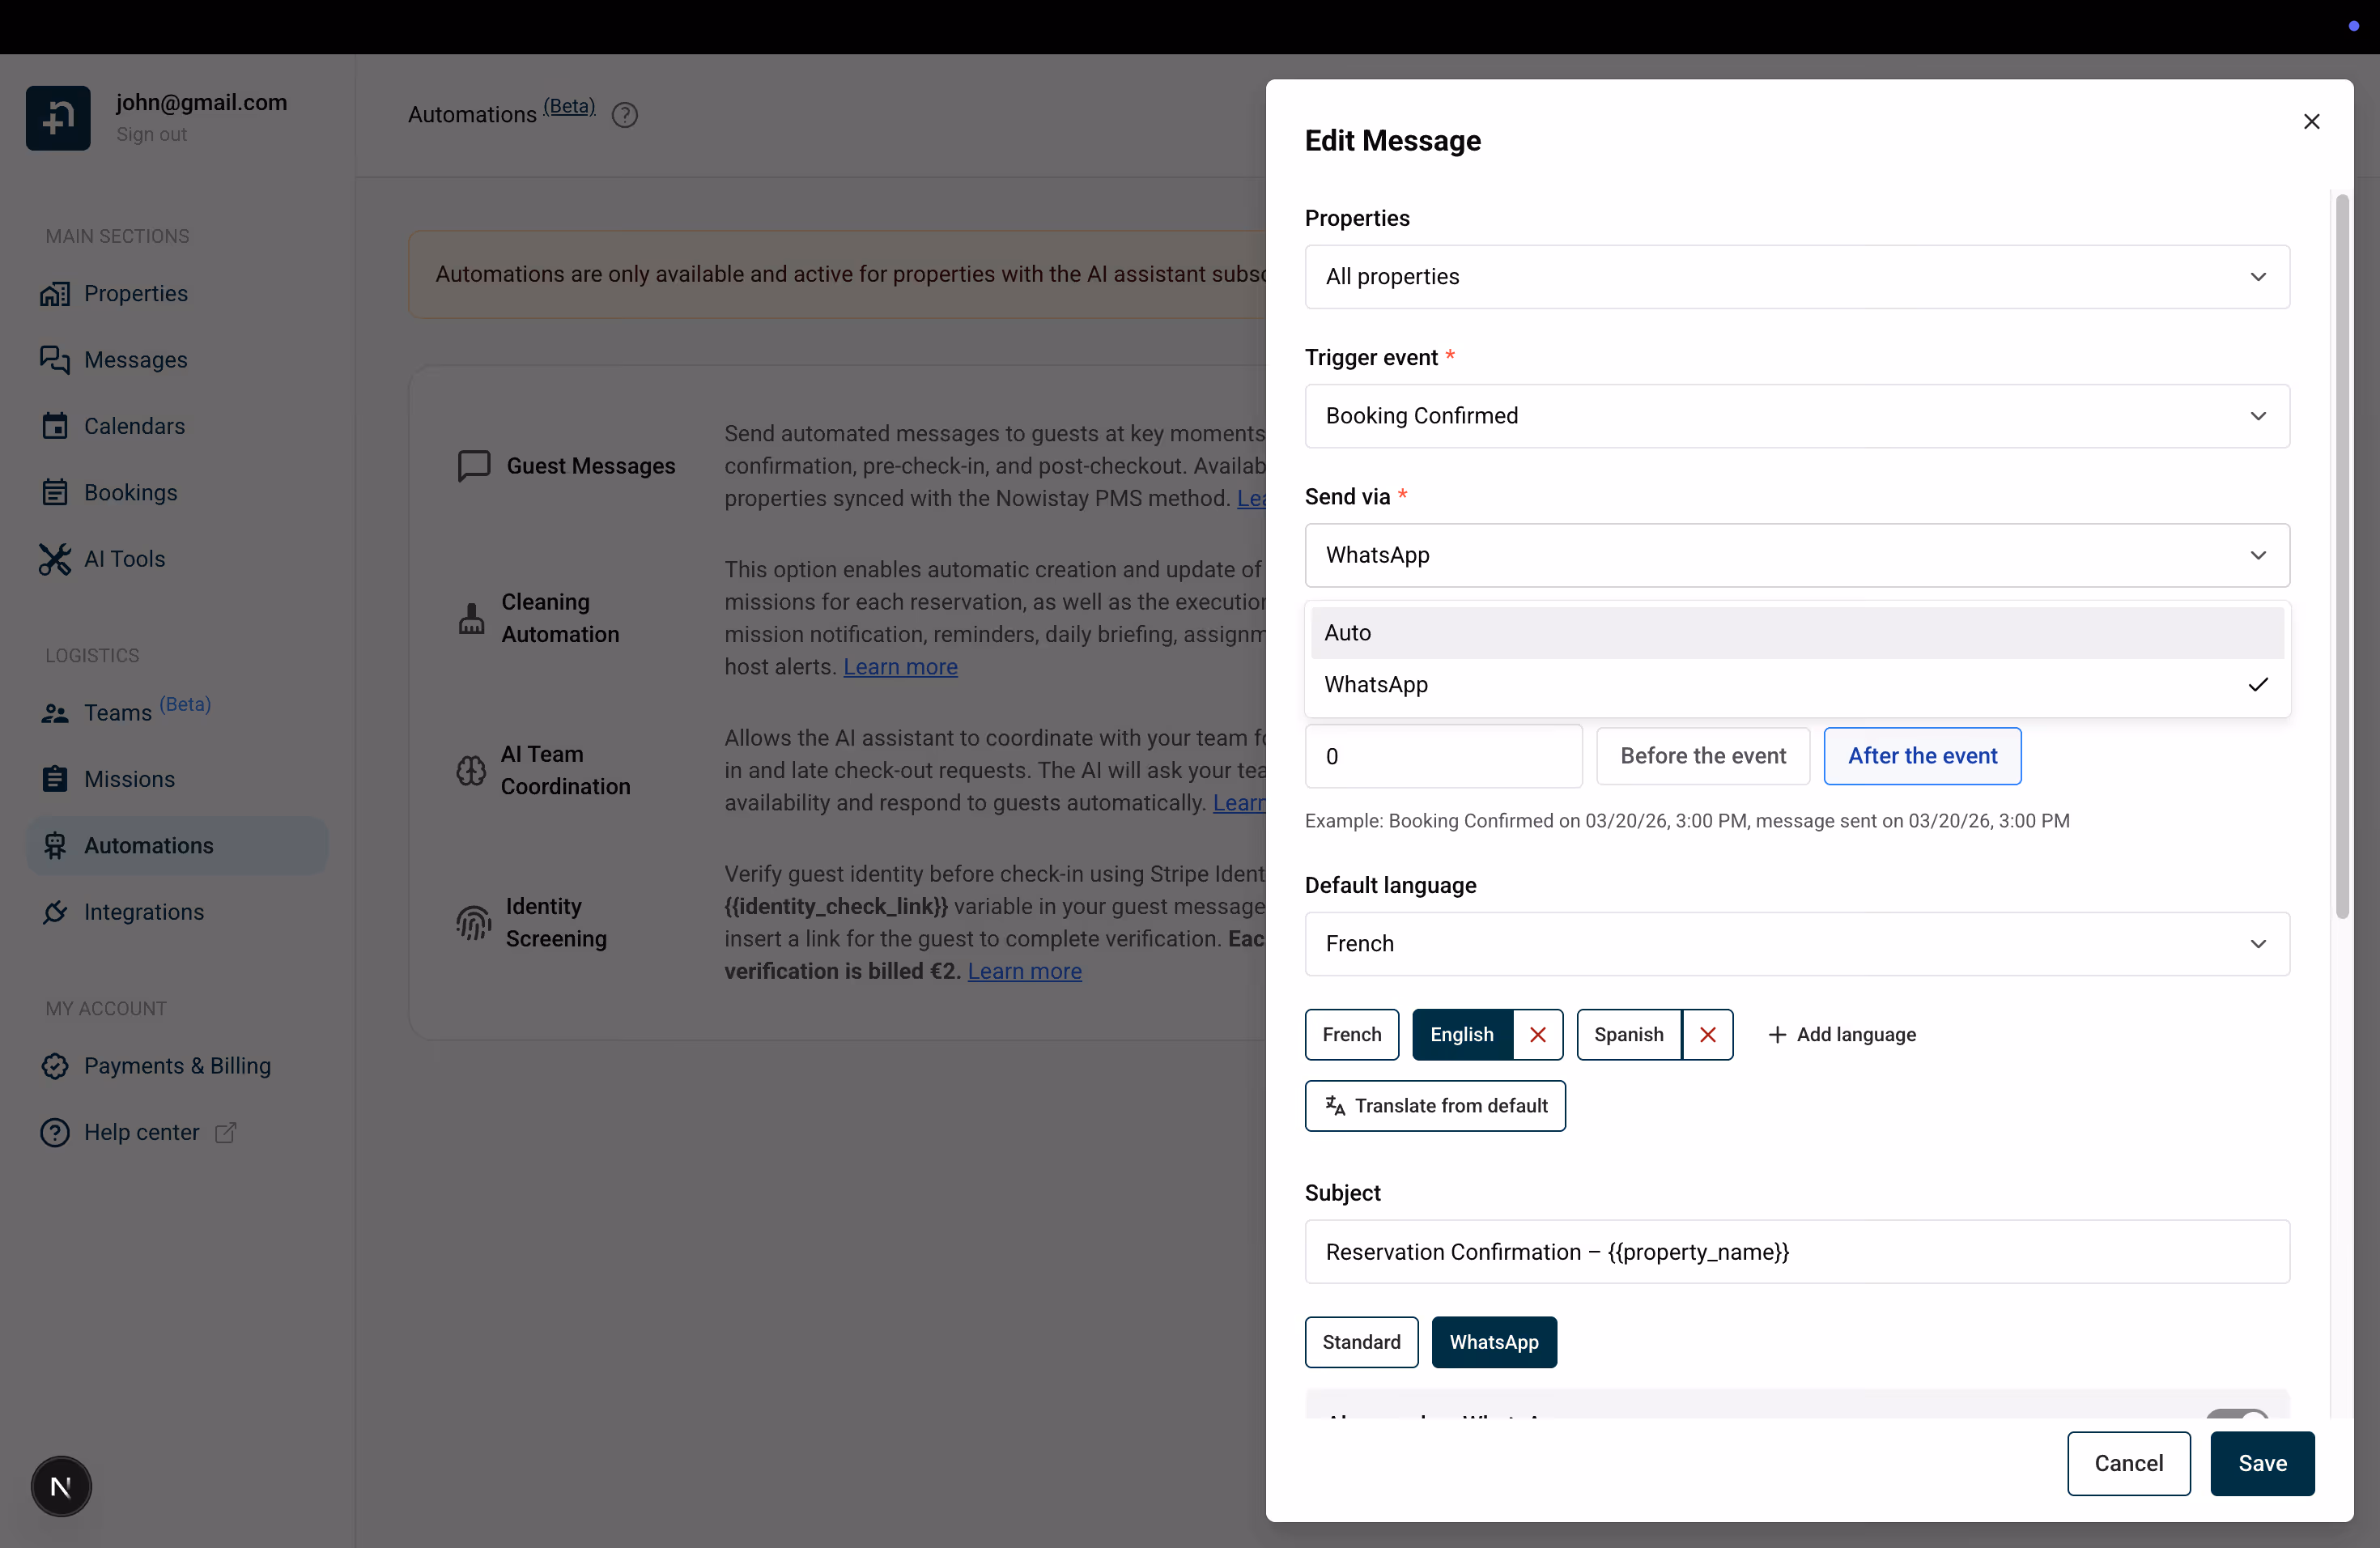
When your VRBO guest receives an automated WhatsApp message, a conversation thread is created in Nowistay. From that point:
This means that even though Vrbo doesn’t support messaging natively, your VRBO guests get the same level of automated, AI-powered communication as your Airbnb and Booking.com guests.