Tired of paying 15-20% in commissions to Airbnb, Booking.com, and other OTAs on every reservation? With Nowistay’s Direct Booking feature, you can accept reservations directly on your own website, keeping full control of your business, your guest relationships, and your revenue.
This guide walks you through the complete setup: configuring your booking widget, setting up payments and taxes, embedding it on your website, and managing direct bookings.
Before you can use Direct Booking, make sure you have:
You can verify and set up all of these from the Integrations page in your Nowistay dashboard.
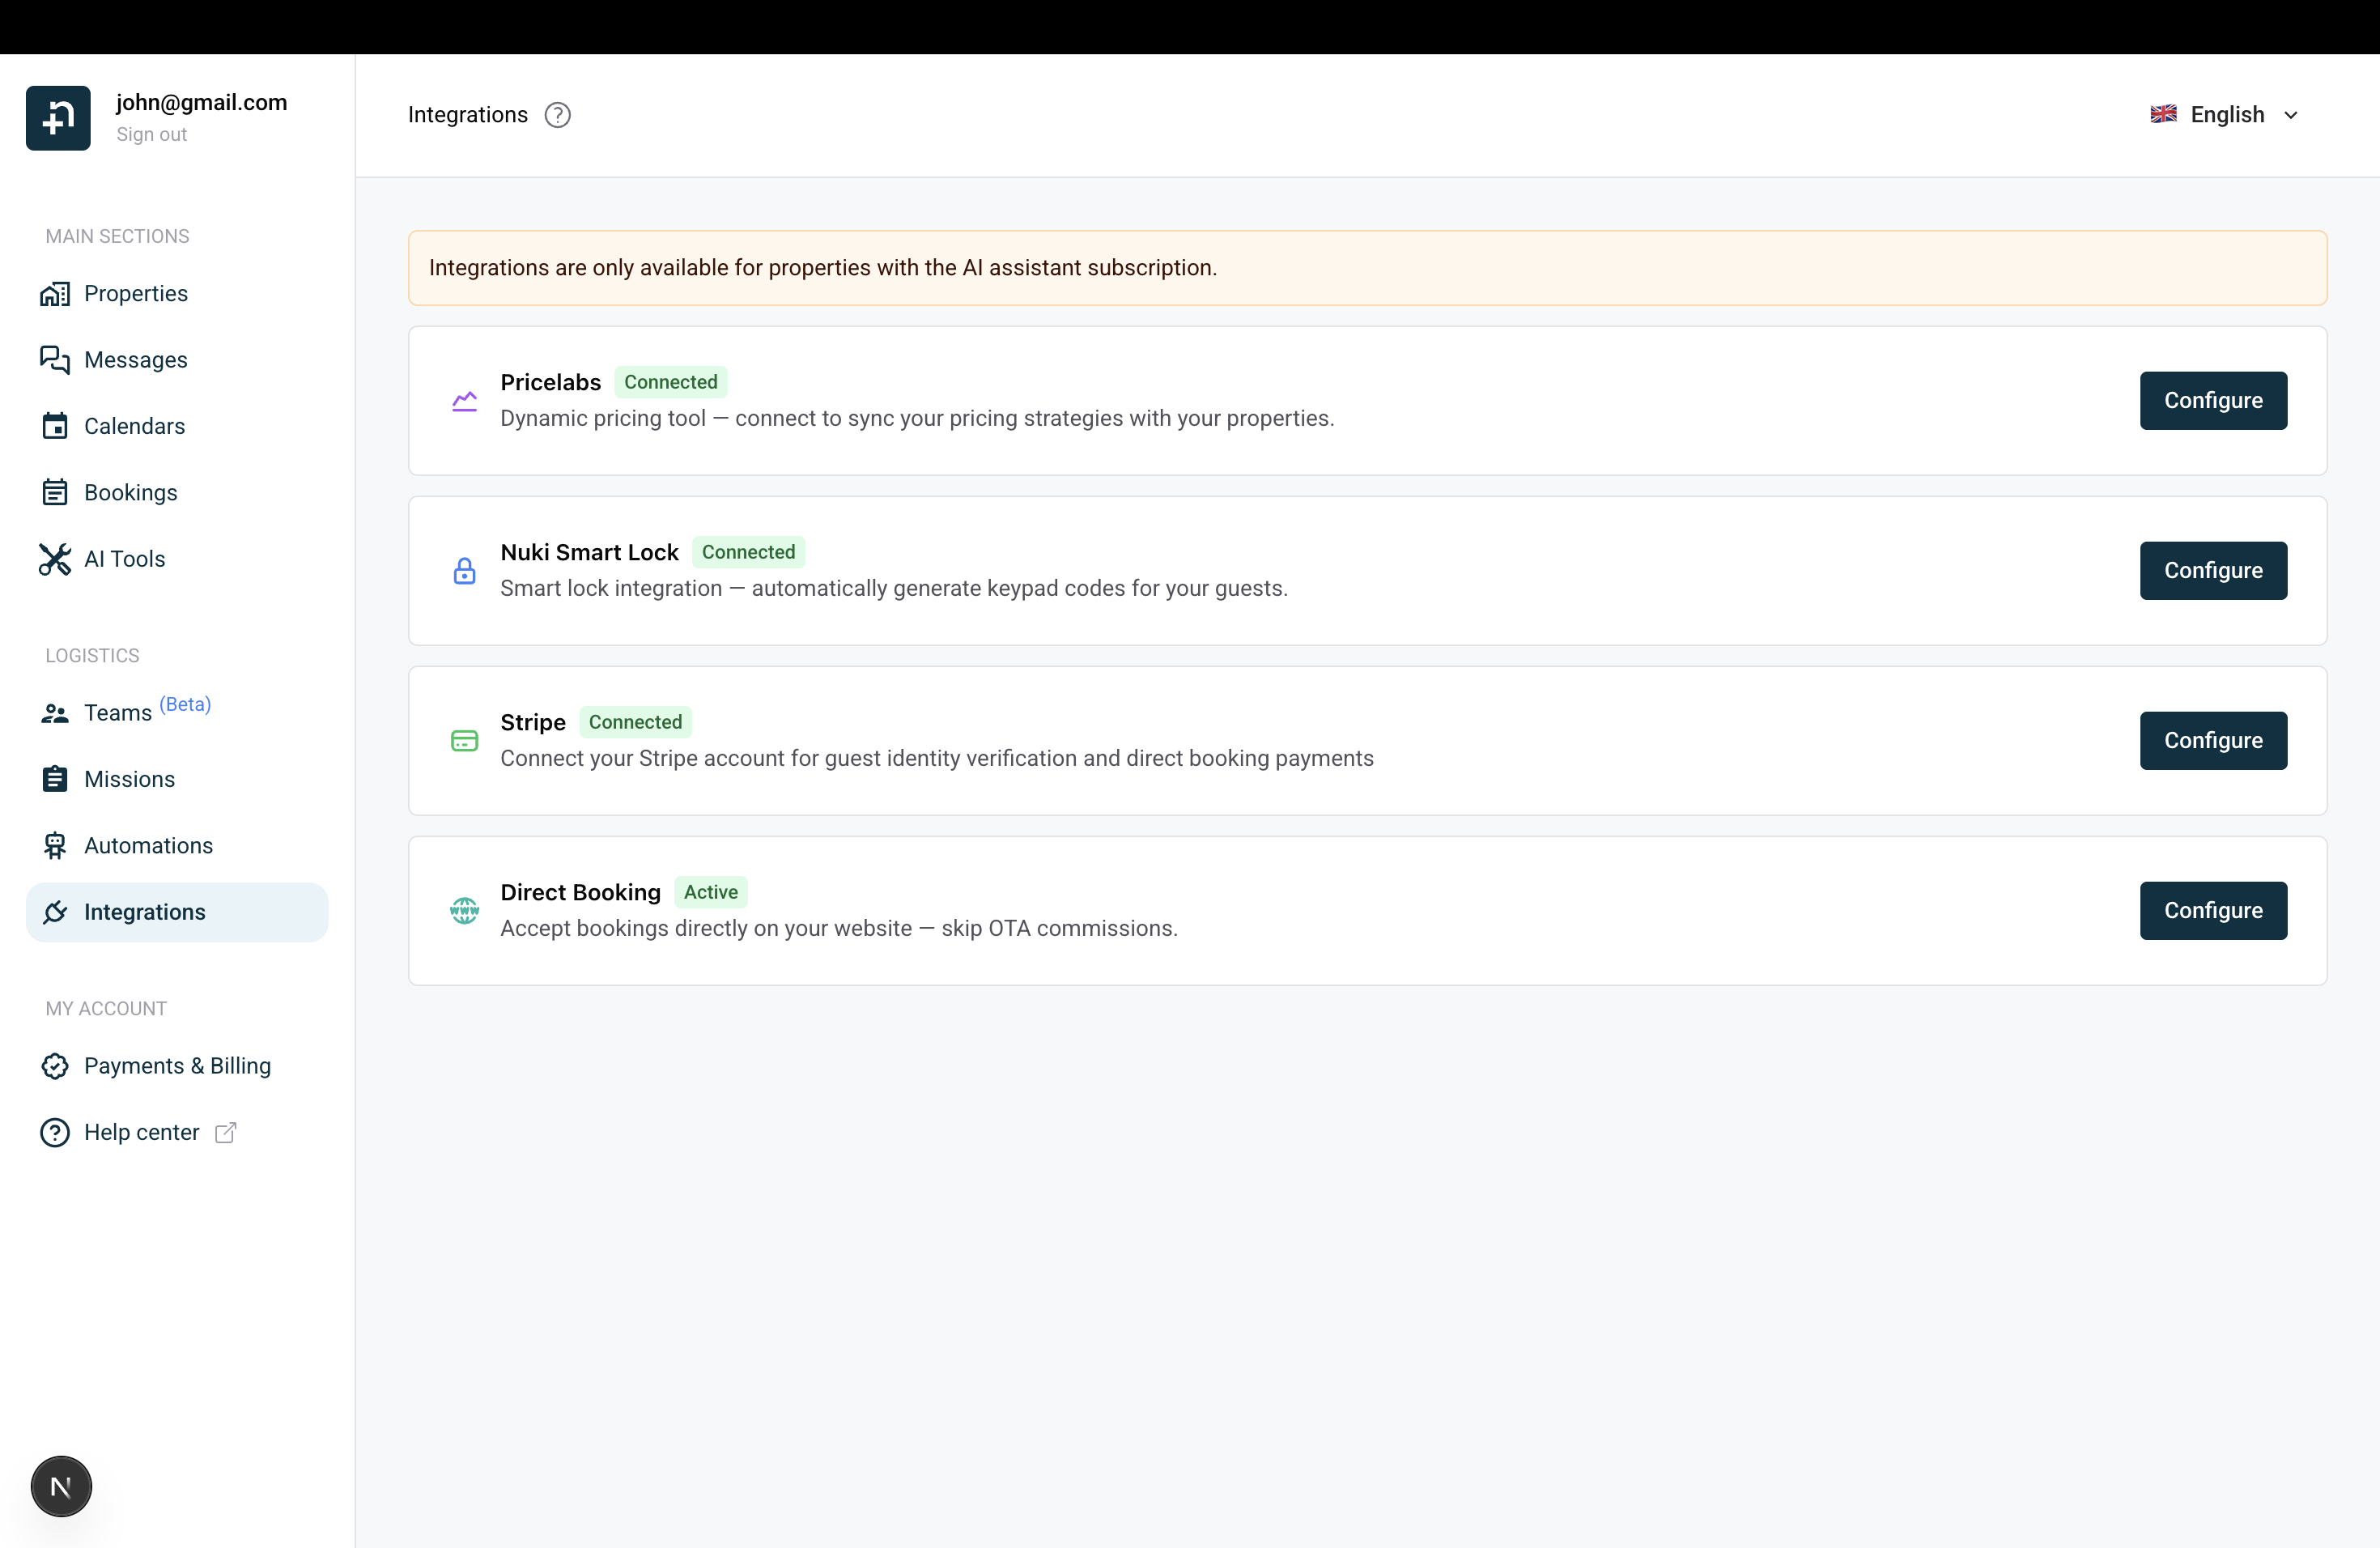
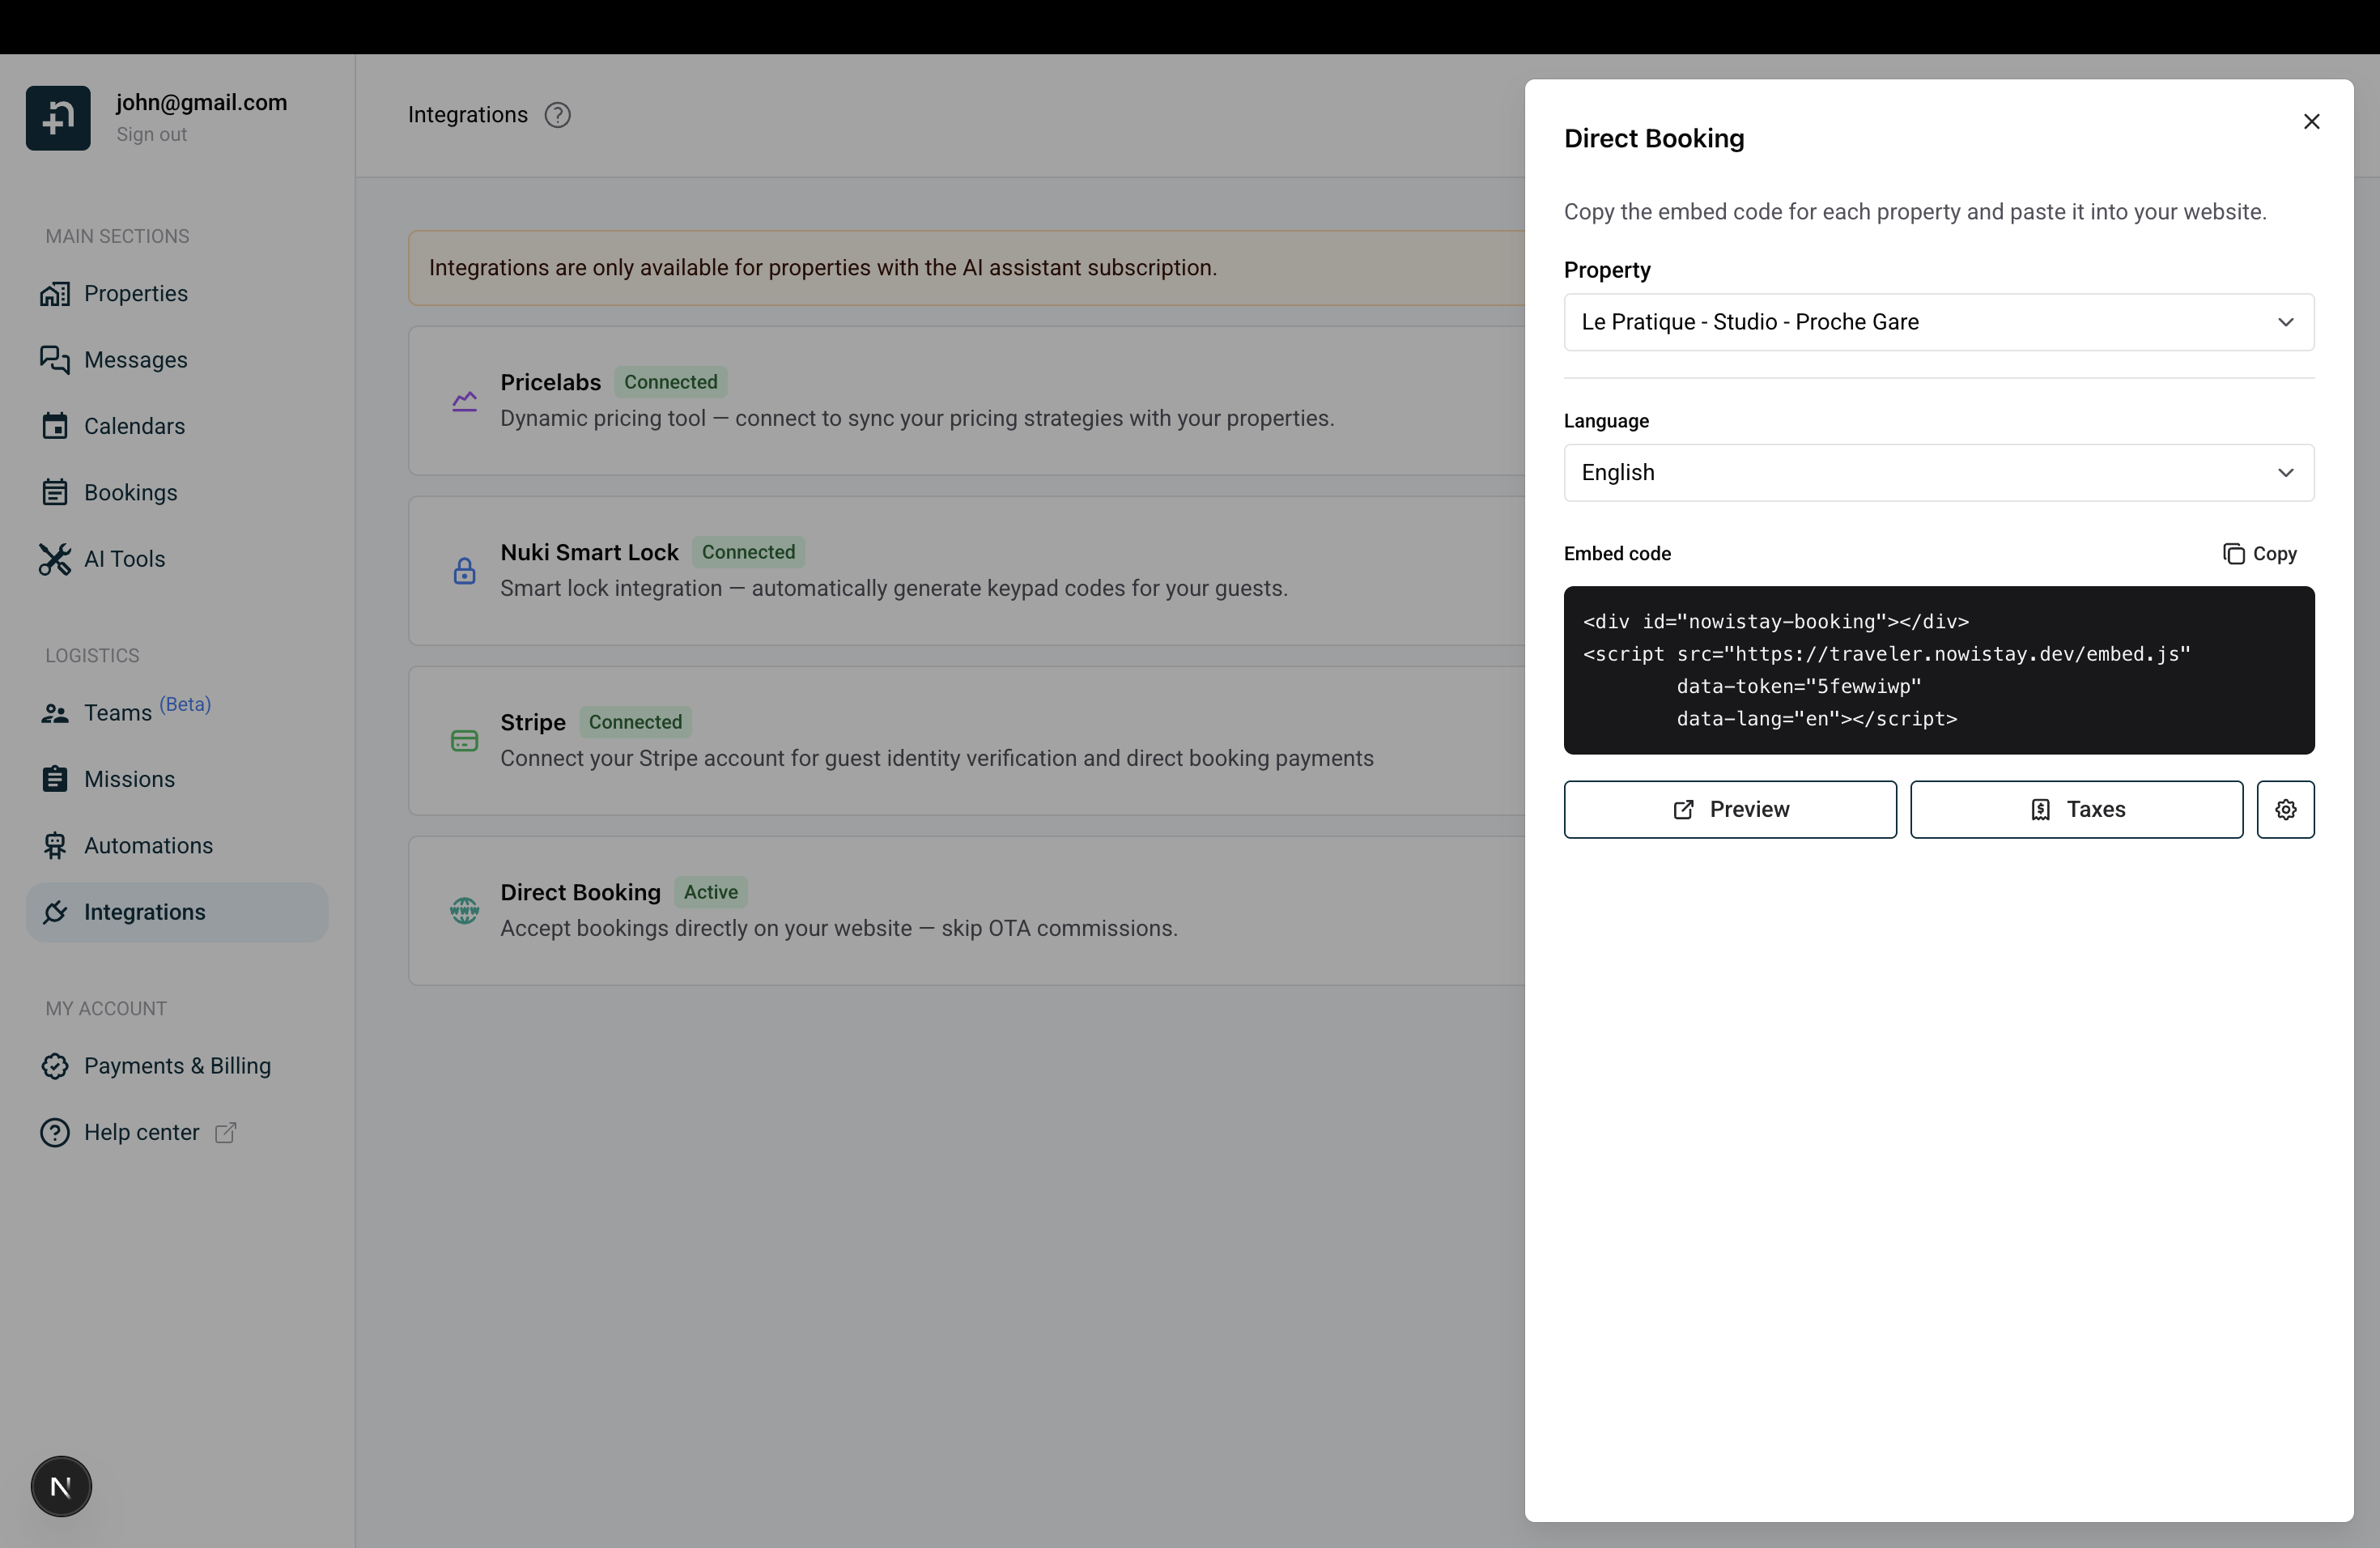
The panel lets you select a property, choose a language, and copy the embed code for your website.
Click the settings icon (gear icon) at the top-right of the Direct Booking panel to customize your widget.
Choose how guests pay for their booking:
If you choose Split payment, you can configure:
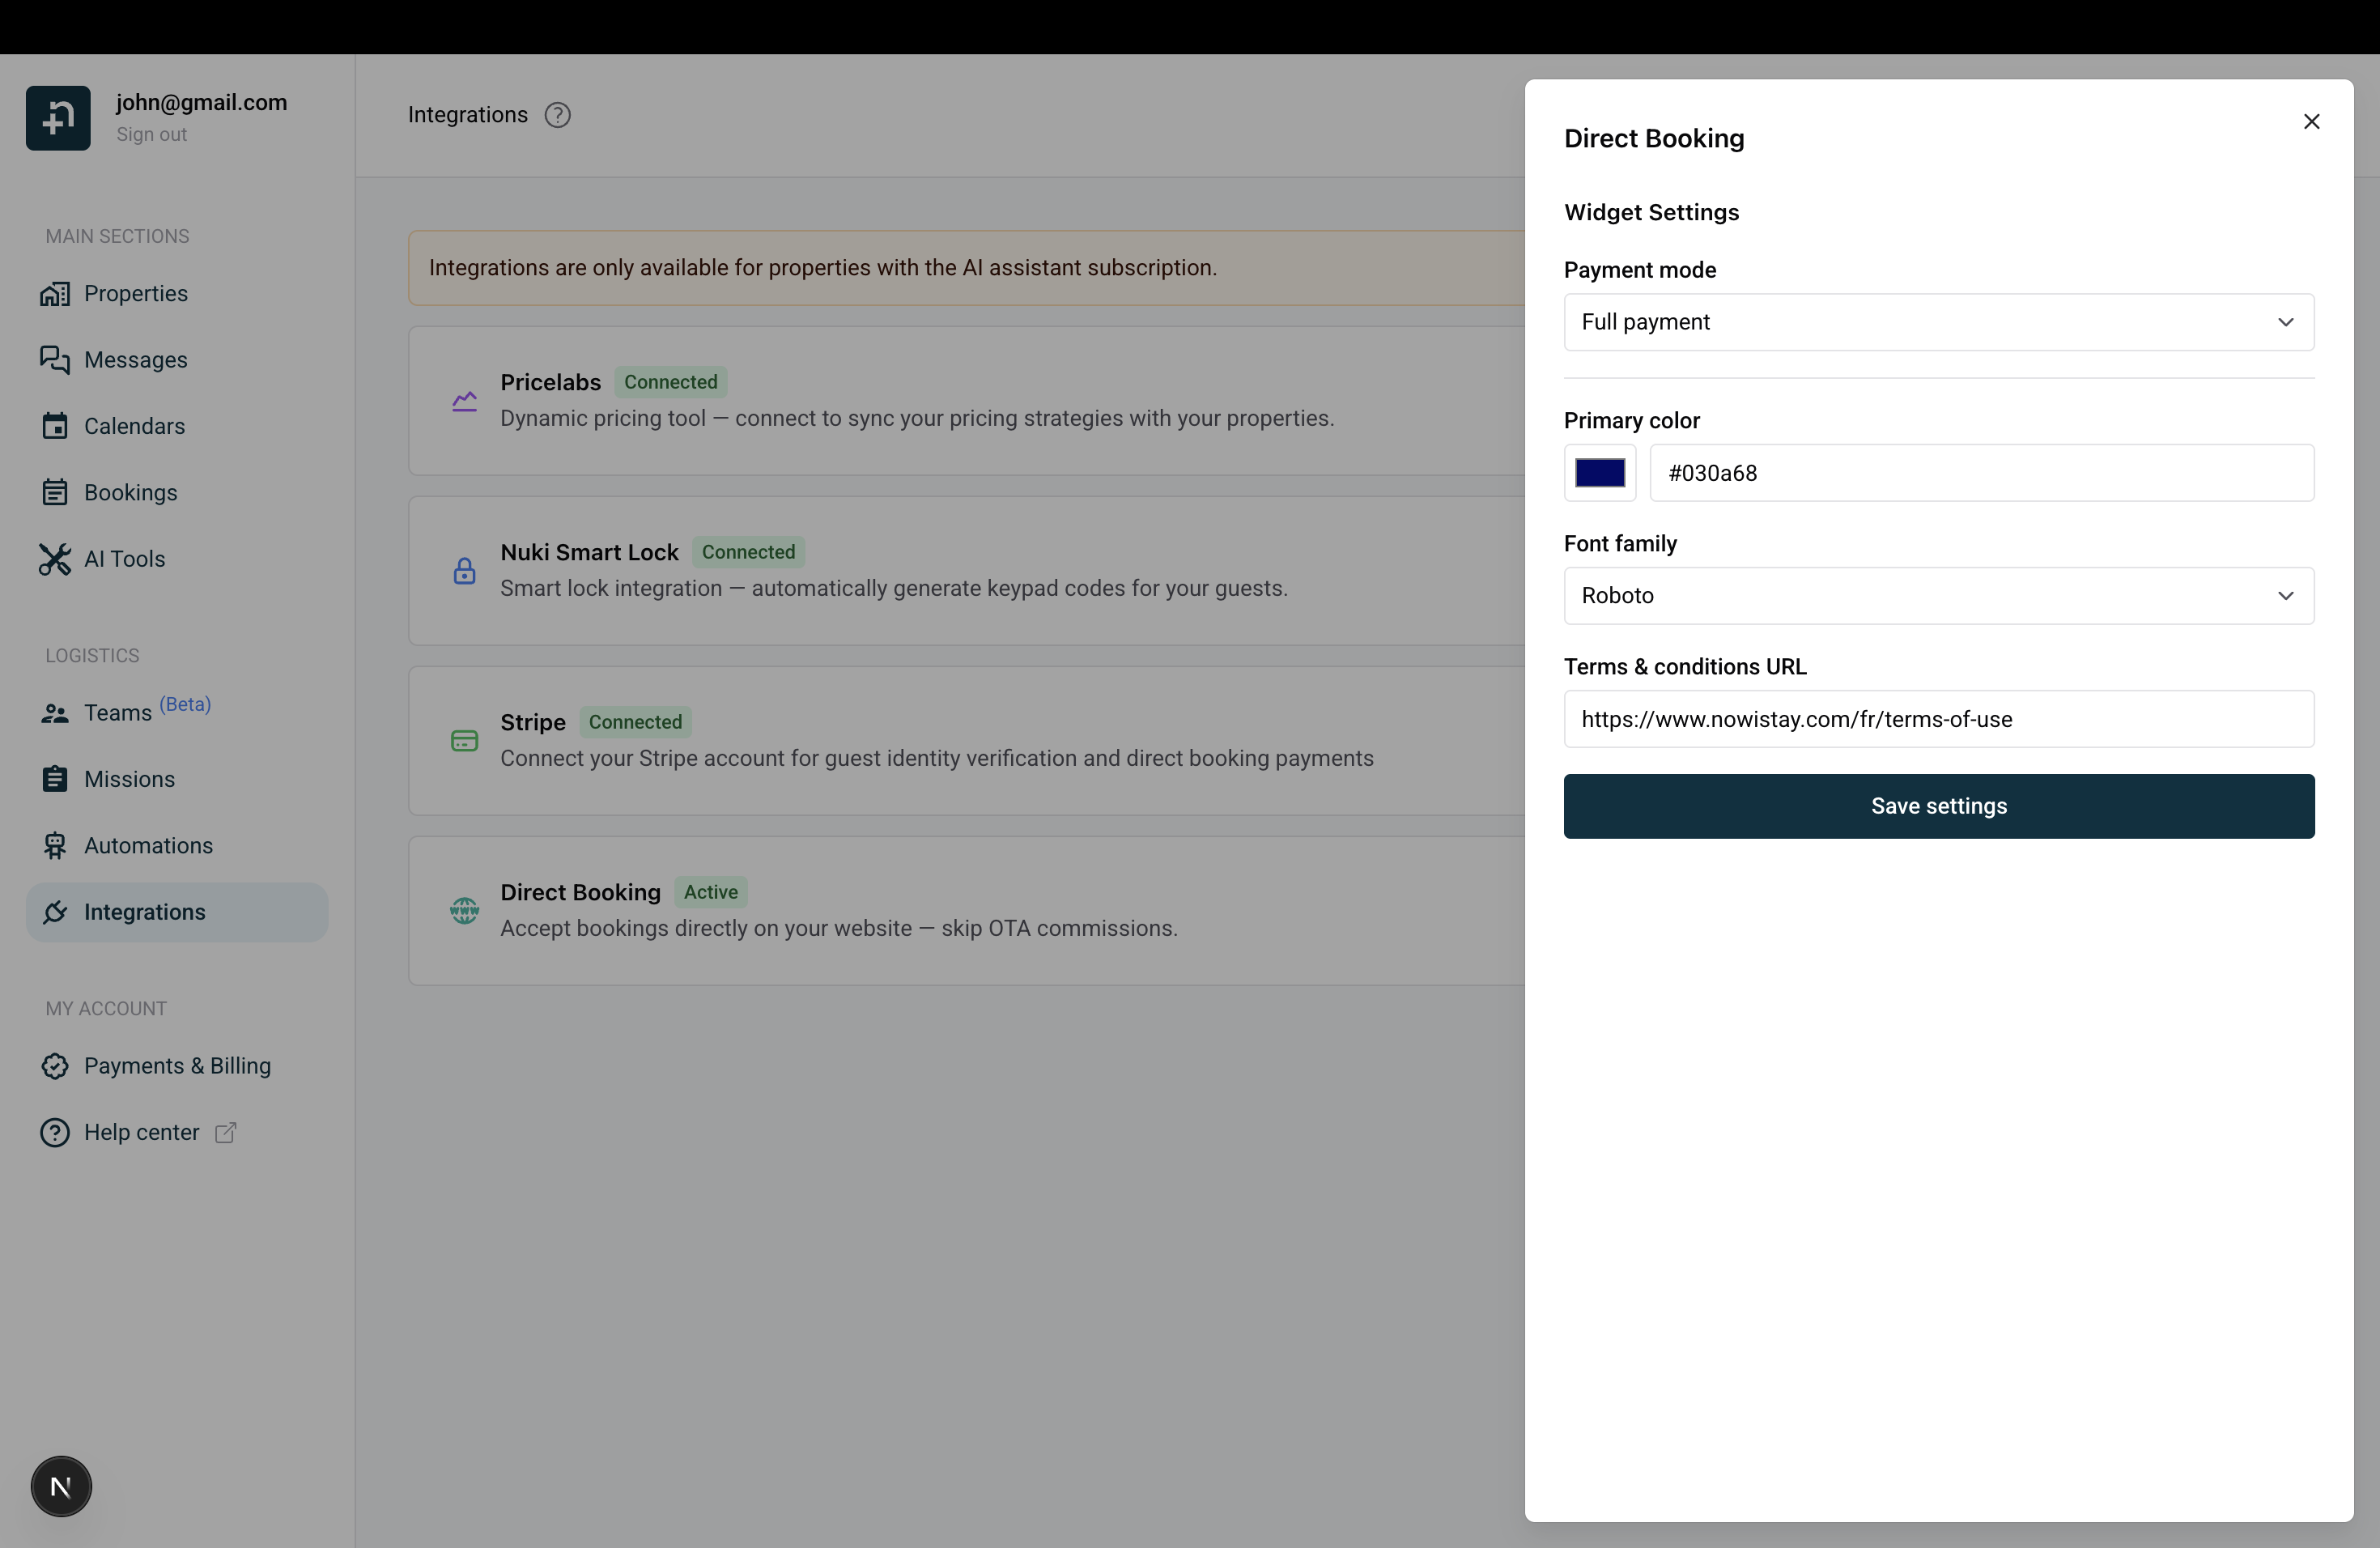
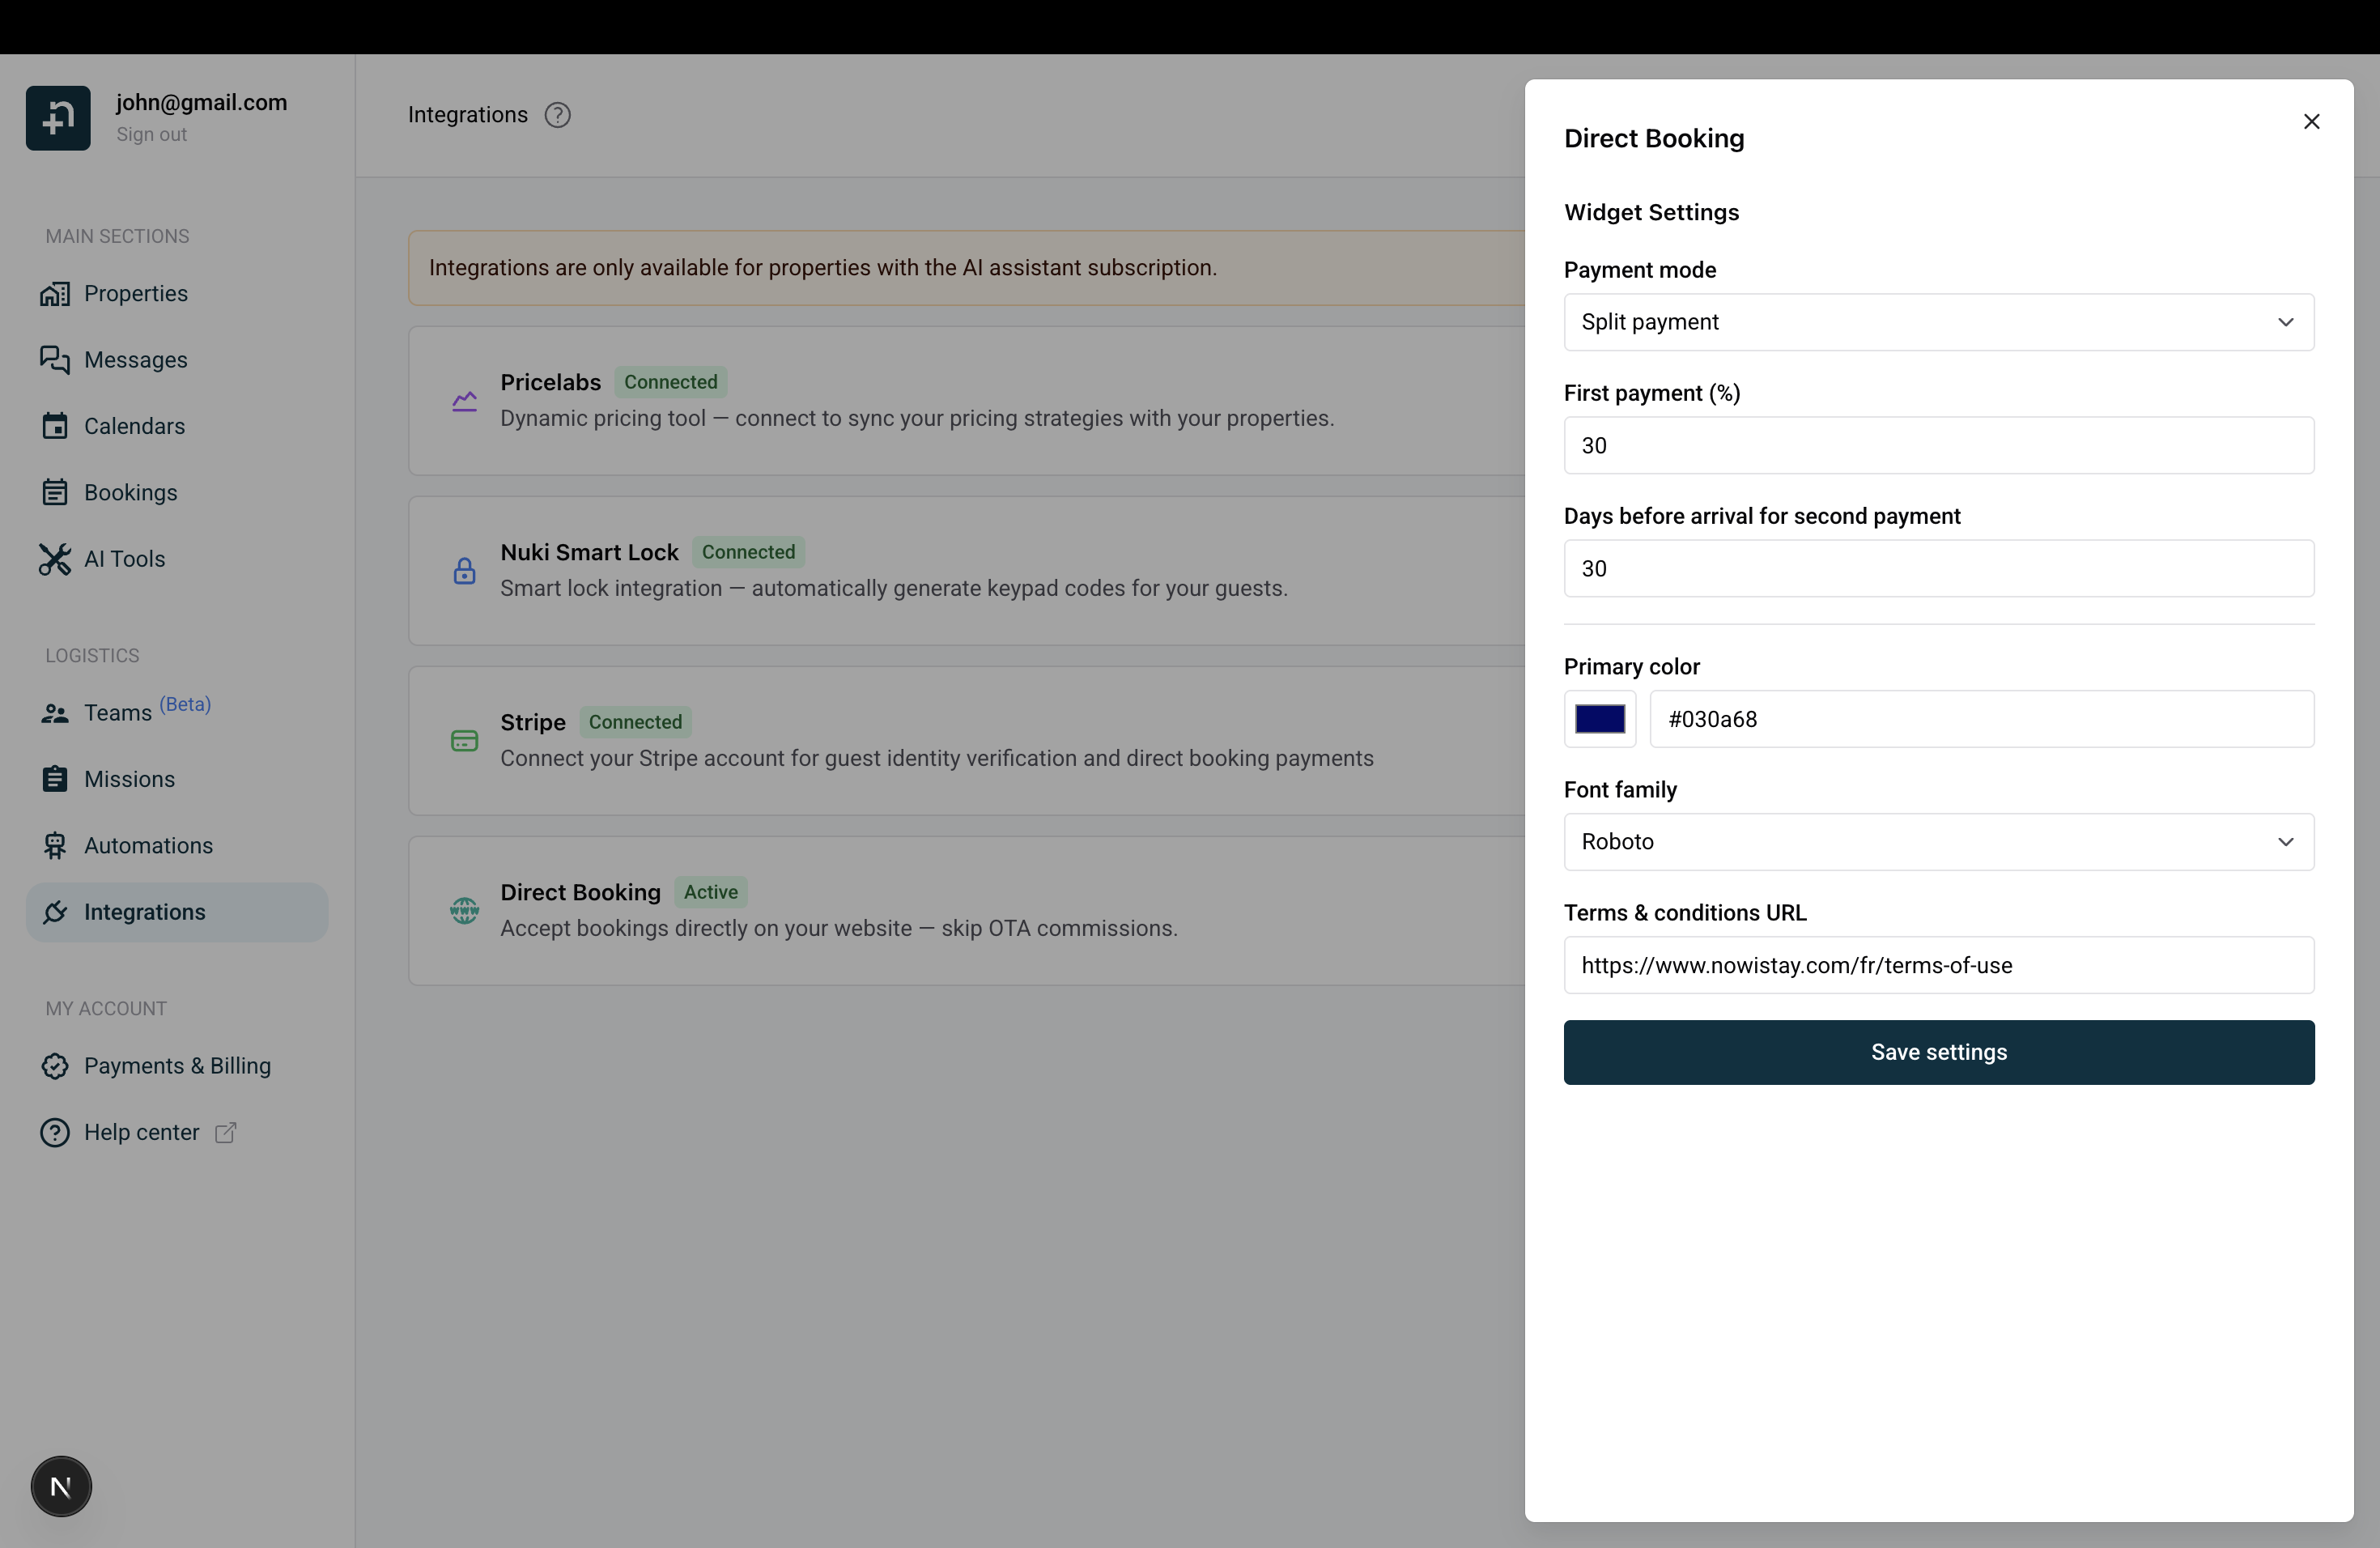
Add your Terms & conditions URL to display a mandatory checkbox in the booking form. Guests will need to accept your terms before completing their reservation.
Click "Save settings" when done.
You can configure taxes for each property individually. These taxes are automatically calculated and added to the booking total shown to your guests.

For each tax, you need to configure:
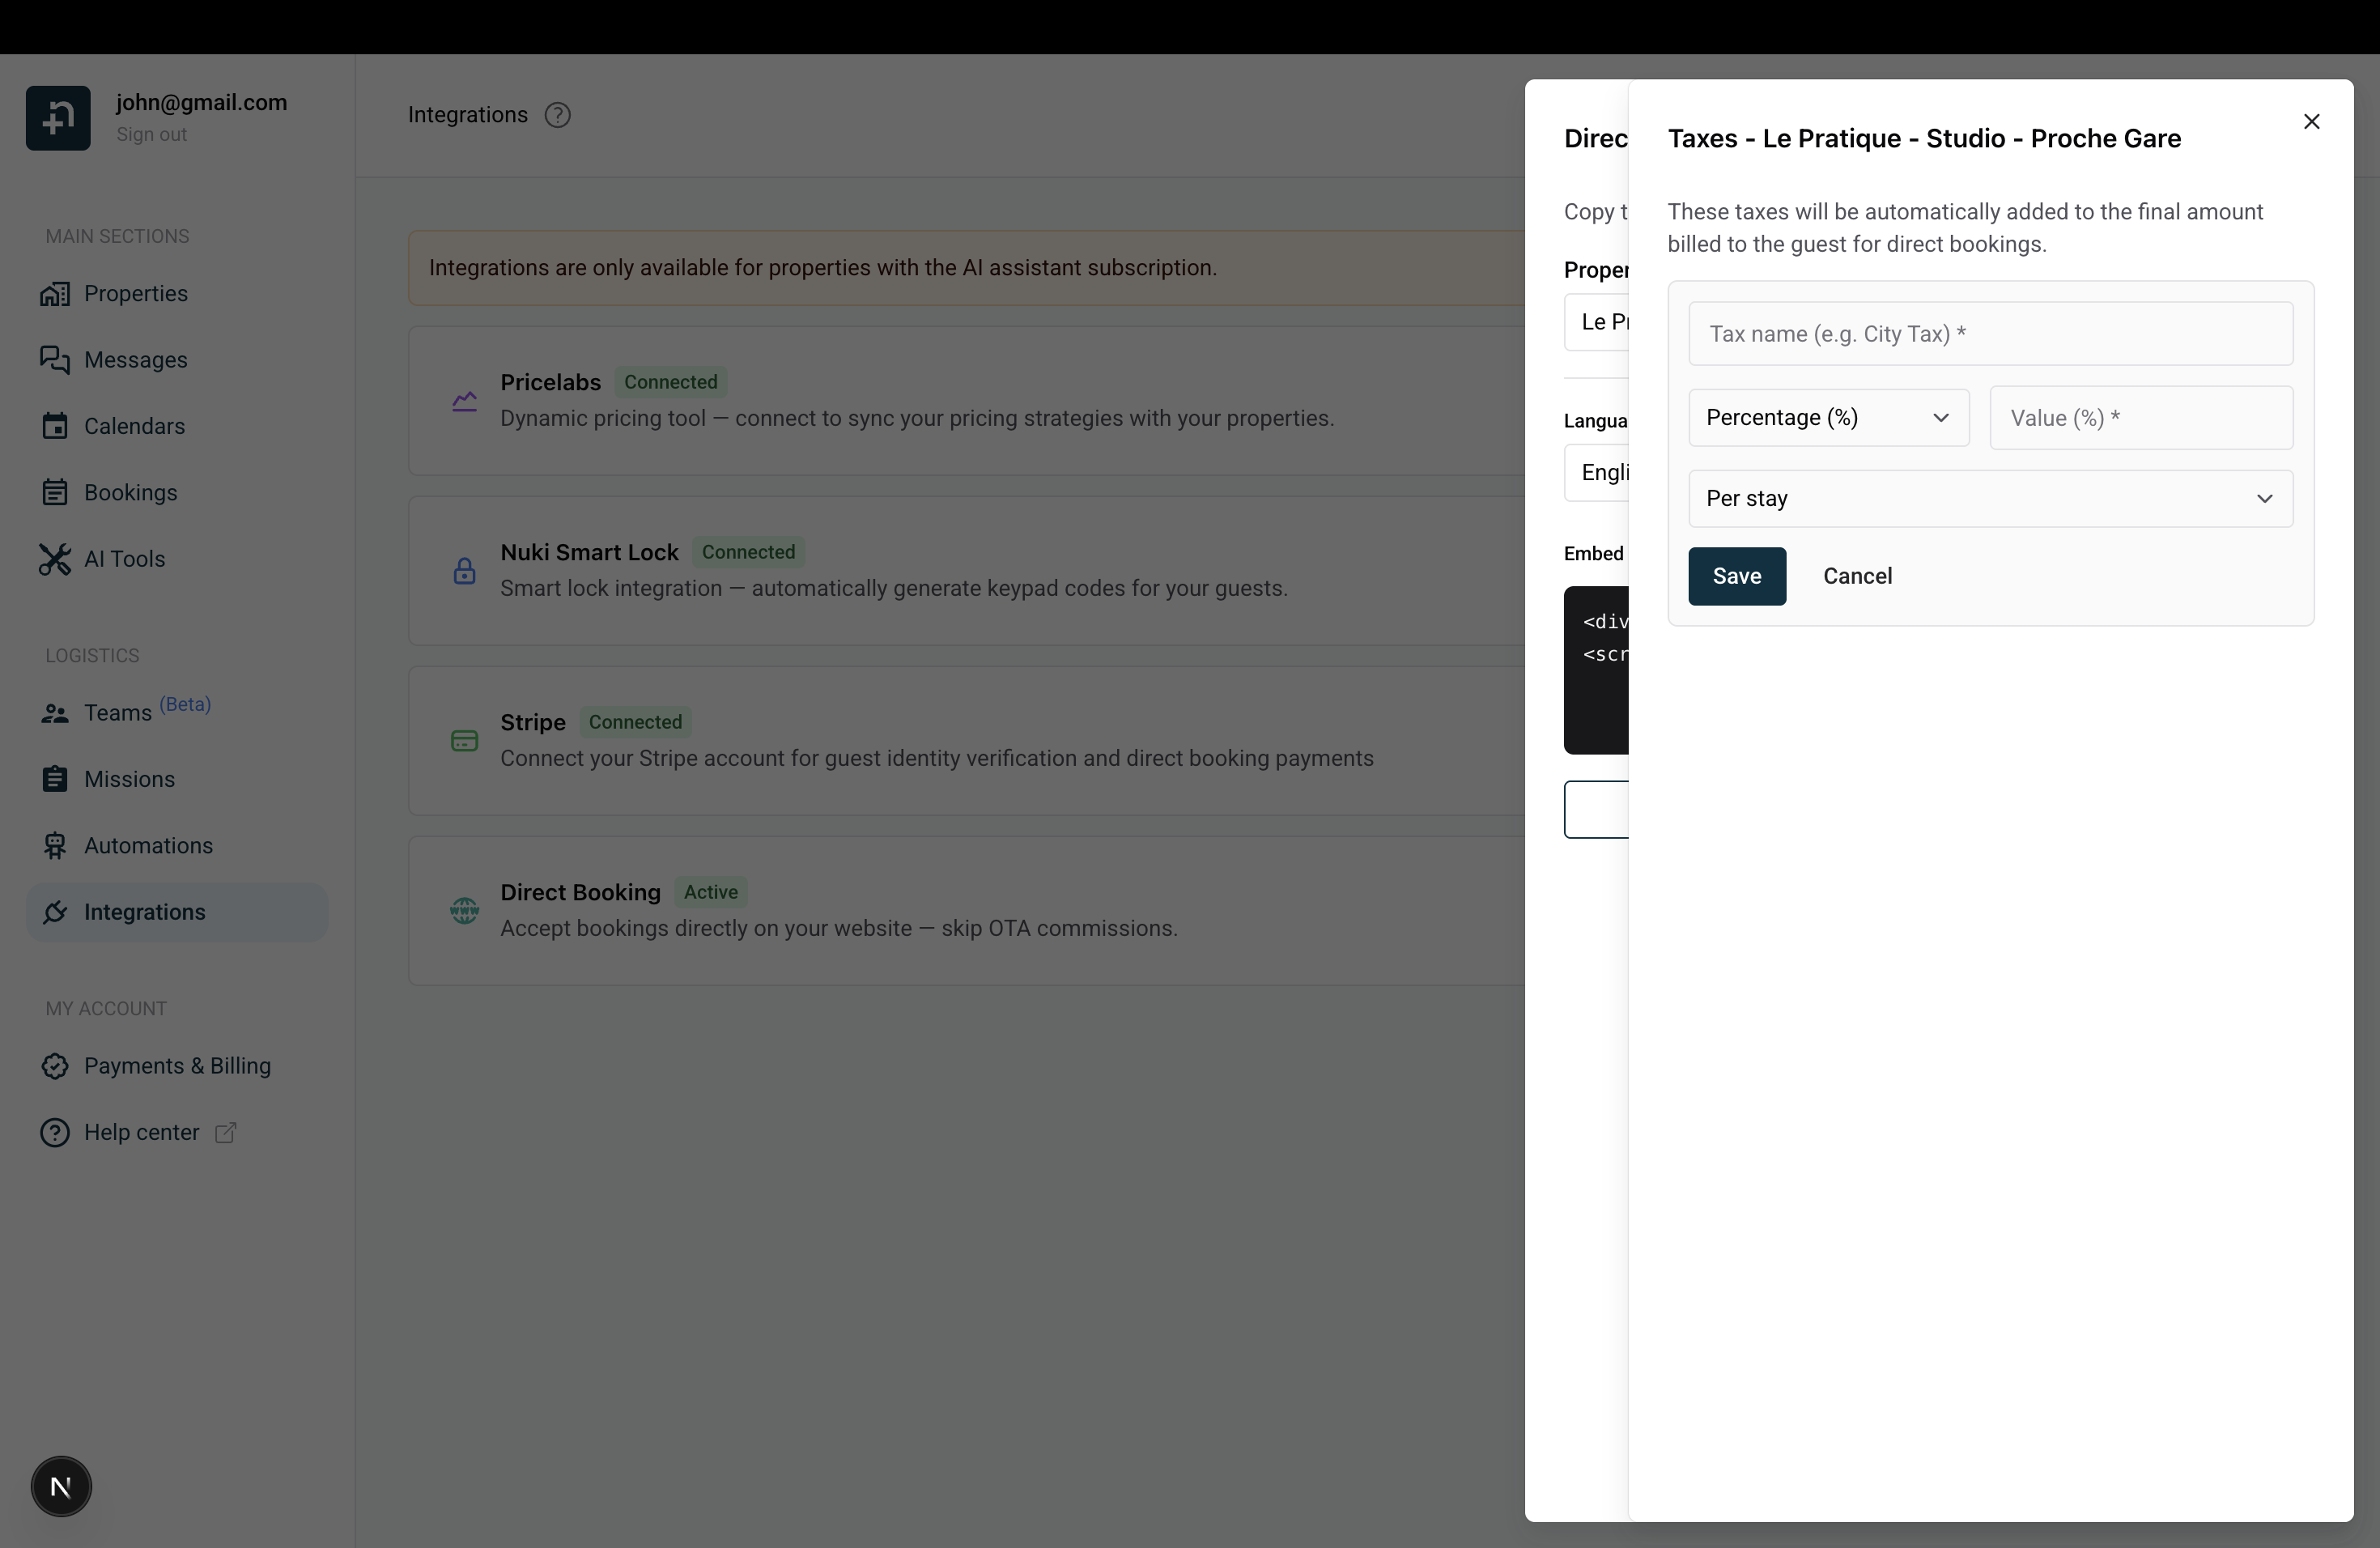
You can add as many taxes as needed. They will all appear in the price breakdown shown to your guests during the booking process.
Back in the main Direct Booking panel:
The embed code looks like this (<REPLACE_WITH_YOUR_TOKEN> will be your own token):
To display the widget in a different language, simply change the Language dropdown: the embed code updates automatically with the correct language.
You can embed multiple widgets in different languages on separate pages of your website. For example, use an English widget on your English page and a French widget on your French page. Each uses the same property token, just with a different language code.
The embed code works on any website that supports custom HTML. Here's how to add it on the most popular website builders:
If you have access to the HTML source of your website, simply paste the embed code wherever you want the booking widget to appear. The script will automatically create an iframe and load the booking form.
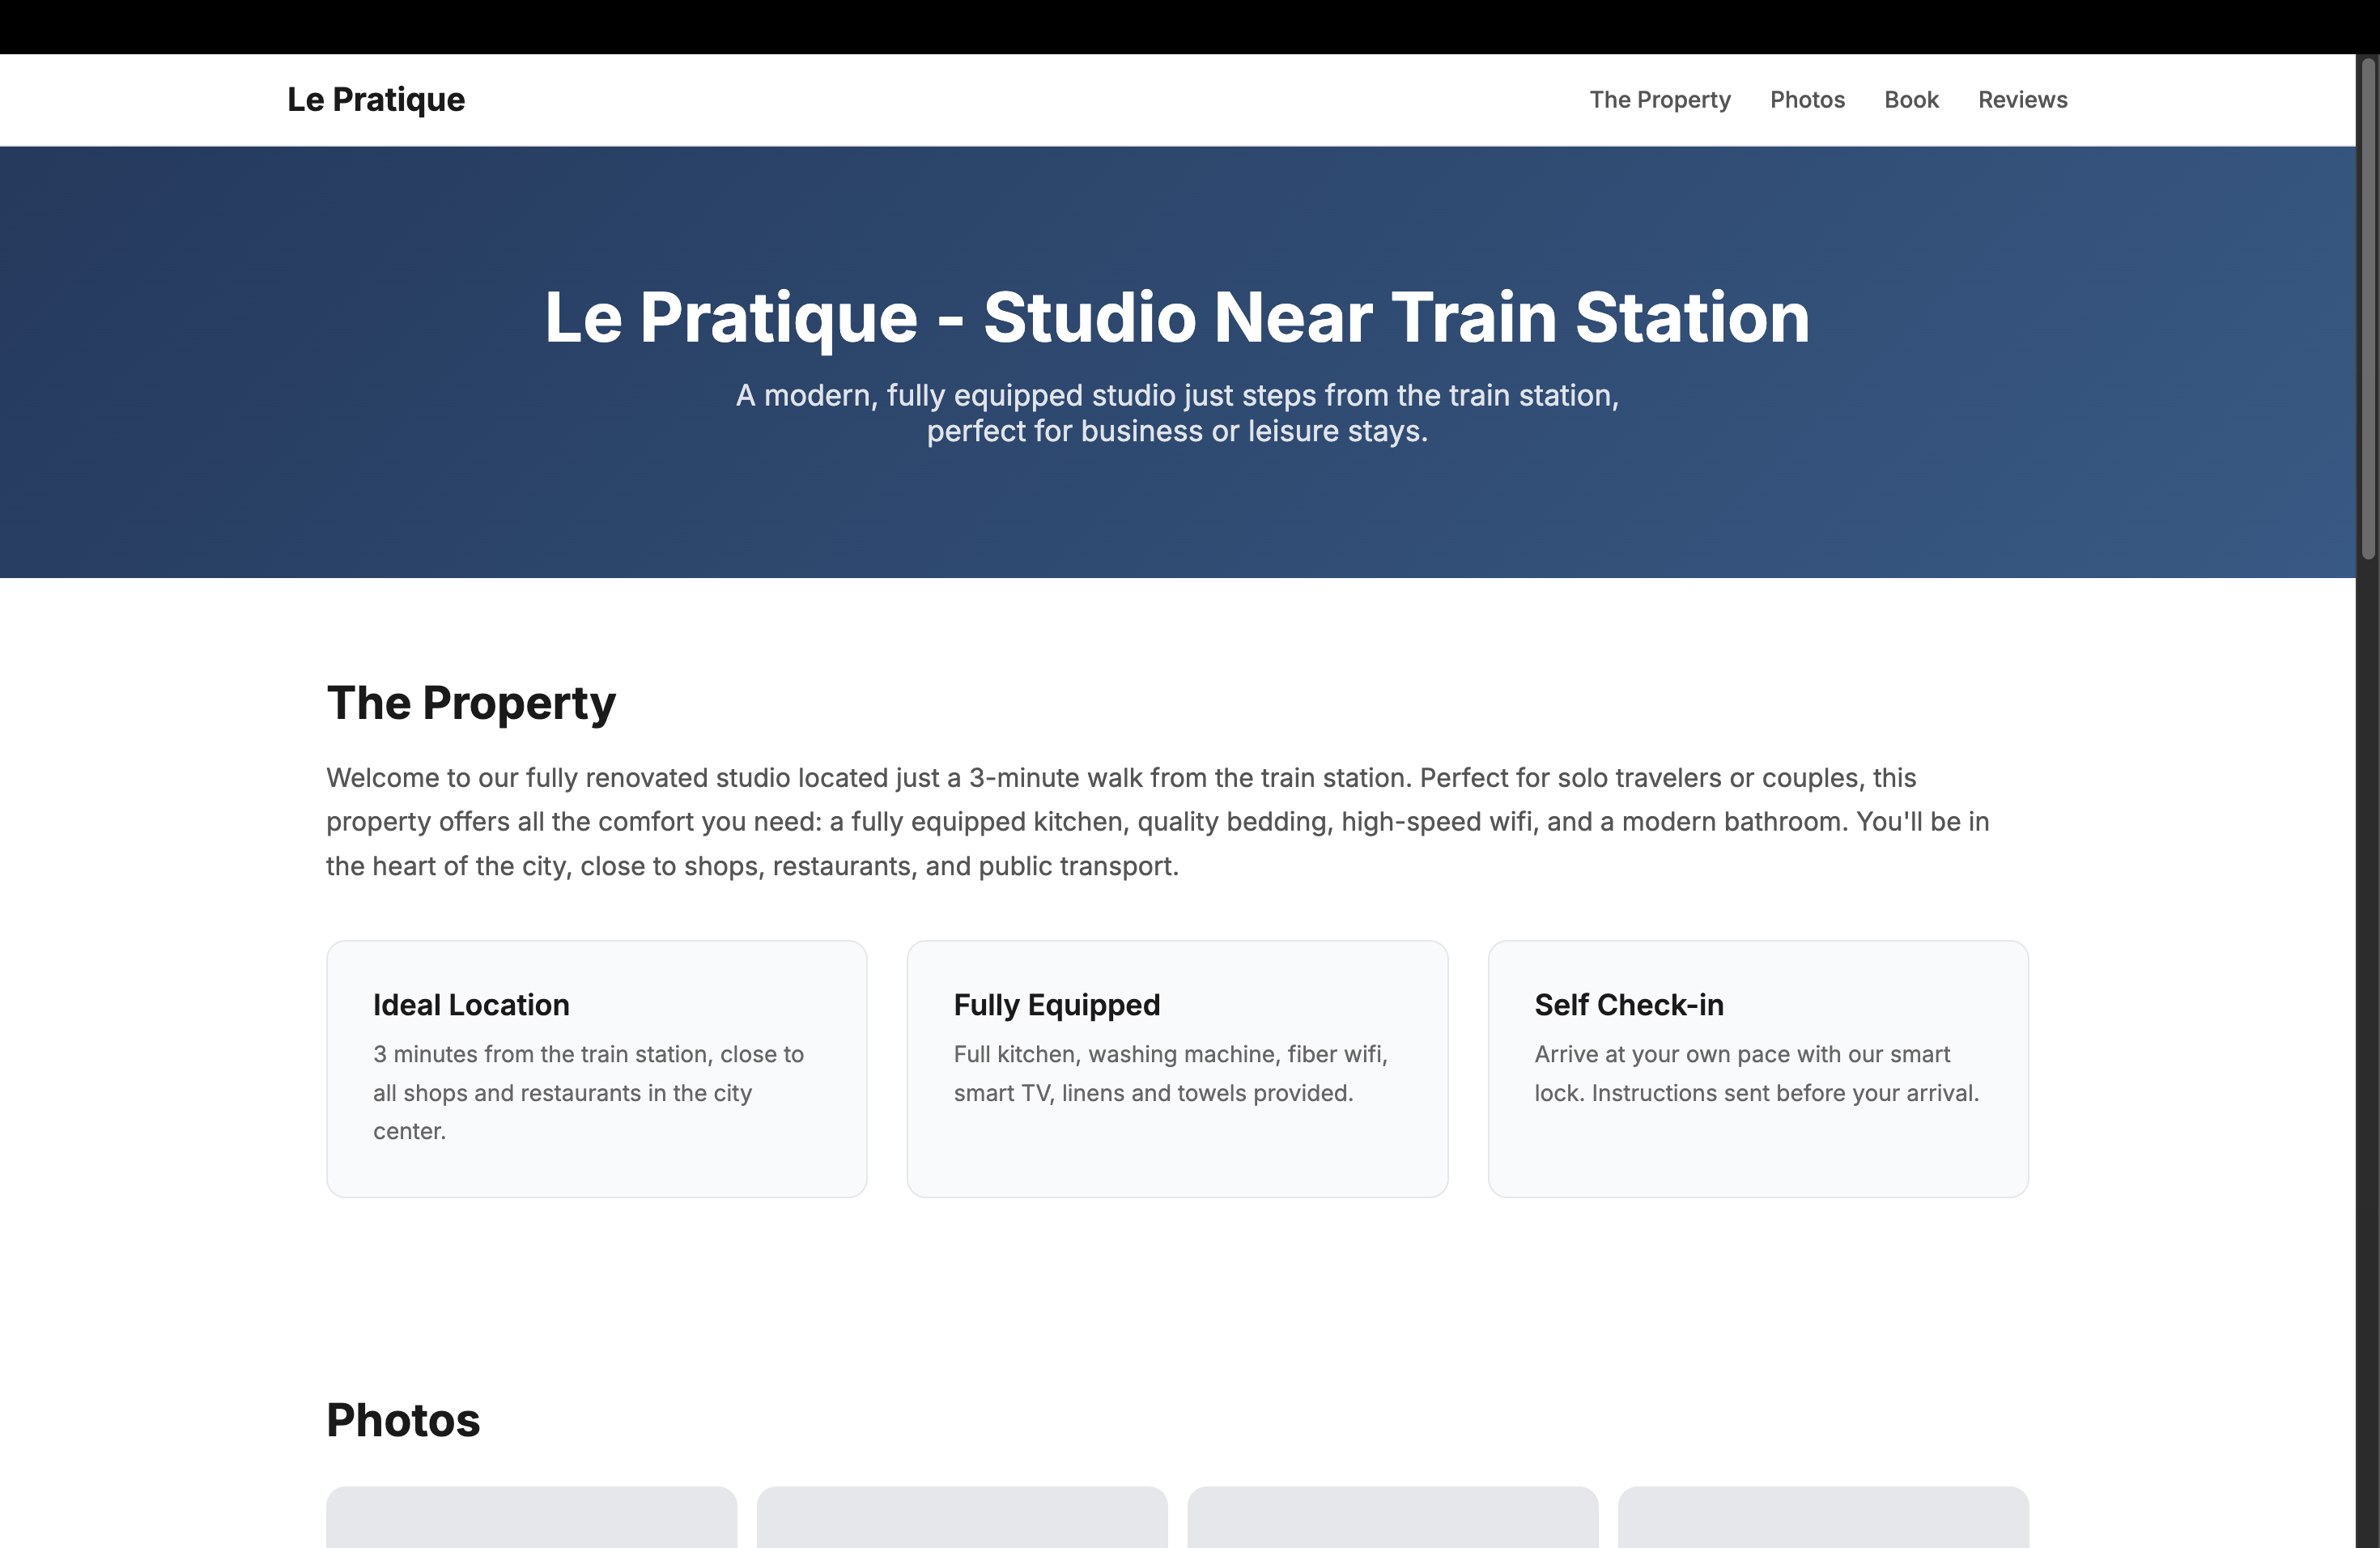
Here's an example of a property website with the Direct Booking widget embedded:
You can set up discounts depending on the length of the stay:
Discounts will be automatically applied to the booking total. Discount is applied to the total nights net rate before adding cleaning fees and taxes. The guest sees the discount in the total breakdown.
If you manage several properties, you don't need to embed a separate widget for each one. The Direct Booking panel also offers an "All properties" mode that generates a single widget showing all your properties on one page.
The widget displays all the selected properties with their photo, city, capacity, and a "from X/night" starting price, so visitors can see the budget for each property at a glance.
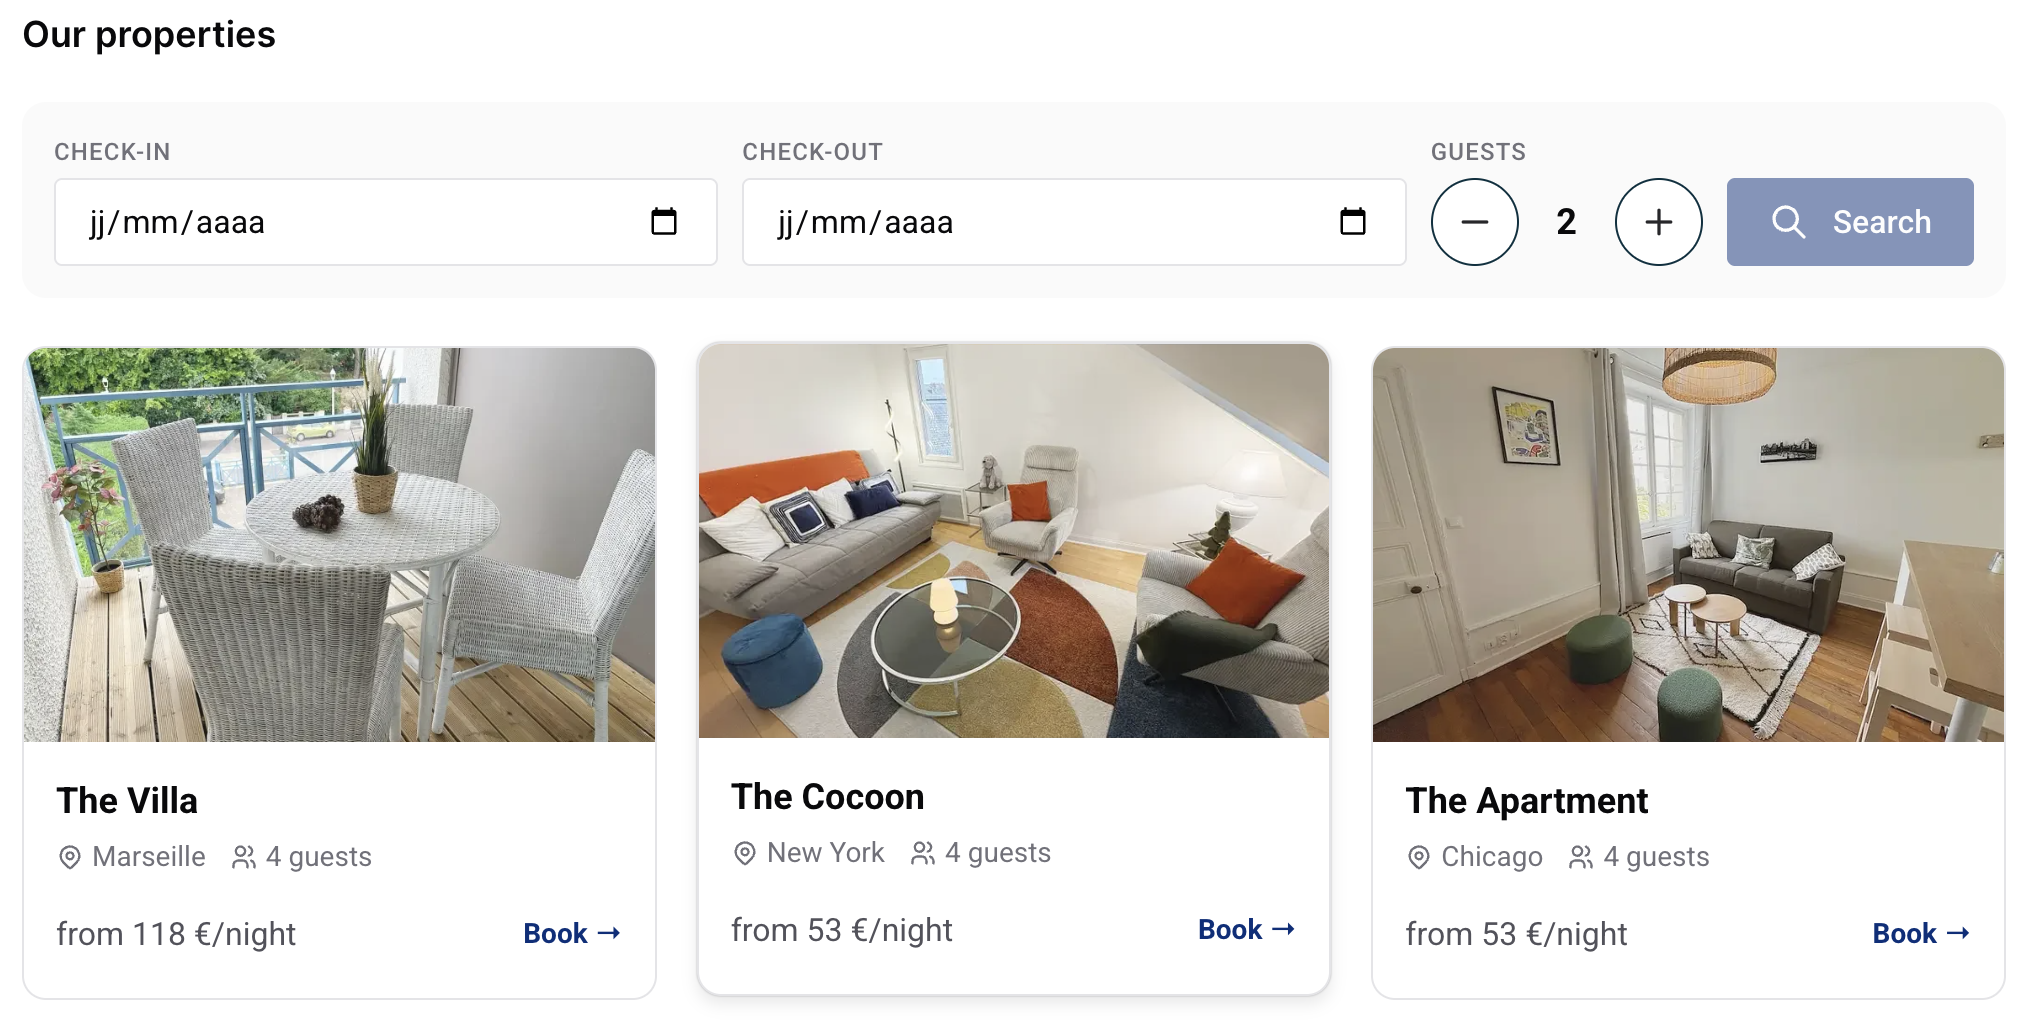
A search bar lets visitors pick their check-in and check-out dates and the number of guests. The widget then shows which properties are available for those dates, each with the total price for the stay, so visitors can compare and choose. Properties that are too small for the group or not free on those dates are clearly marked as unavailable.
Clicking "Book" on a property opens its booking flow with the dates and number of guests already filled in. The guest reviews the price breakdown and completes the payment, exactly like with the single-property widget. They can also return to the list at any time to pick another property.
The appearance settings (color and font), payment mode, taxes, and discounts you configured in the previous steps apply to this widget too.
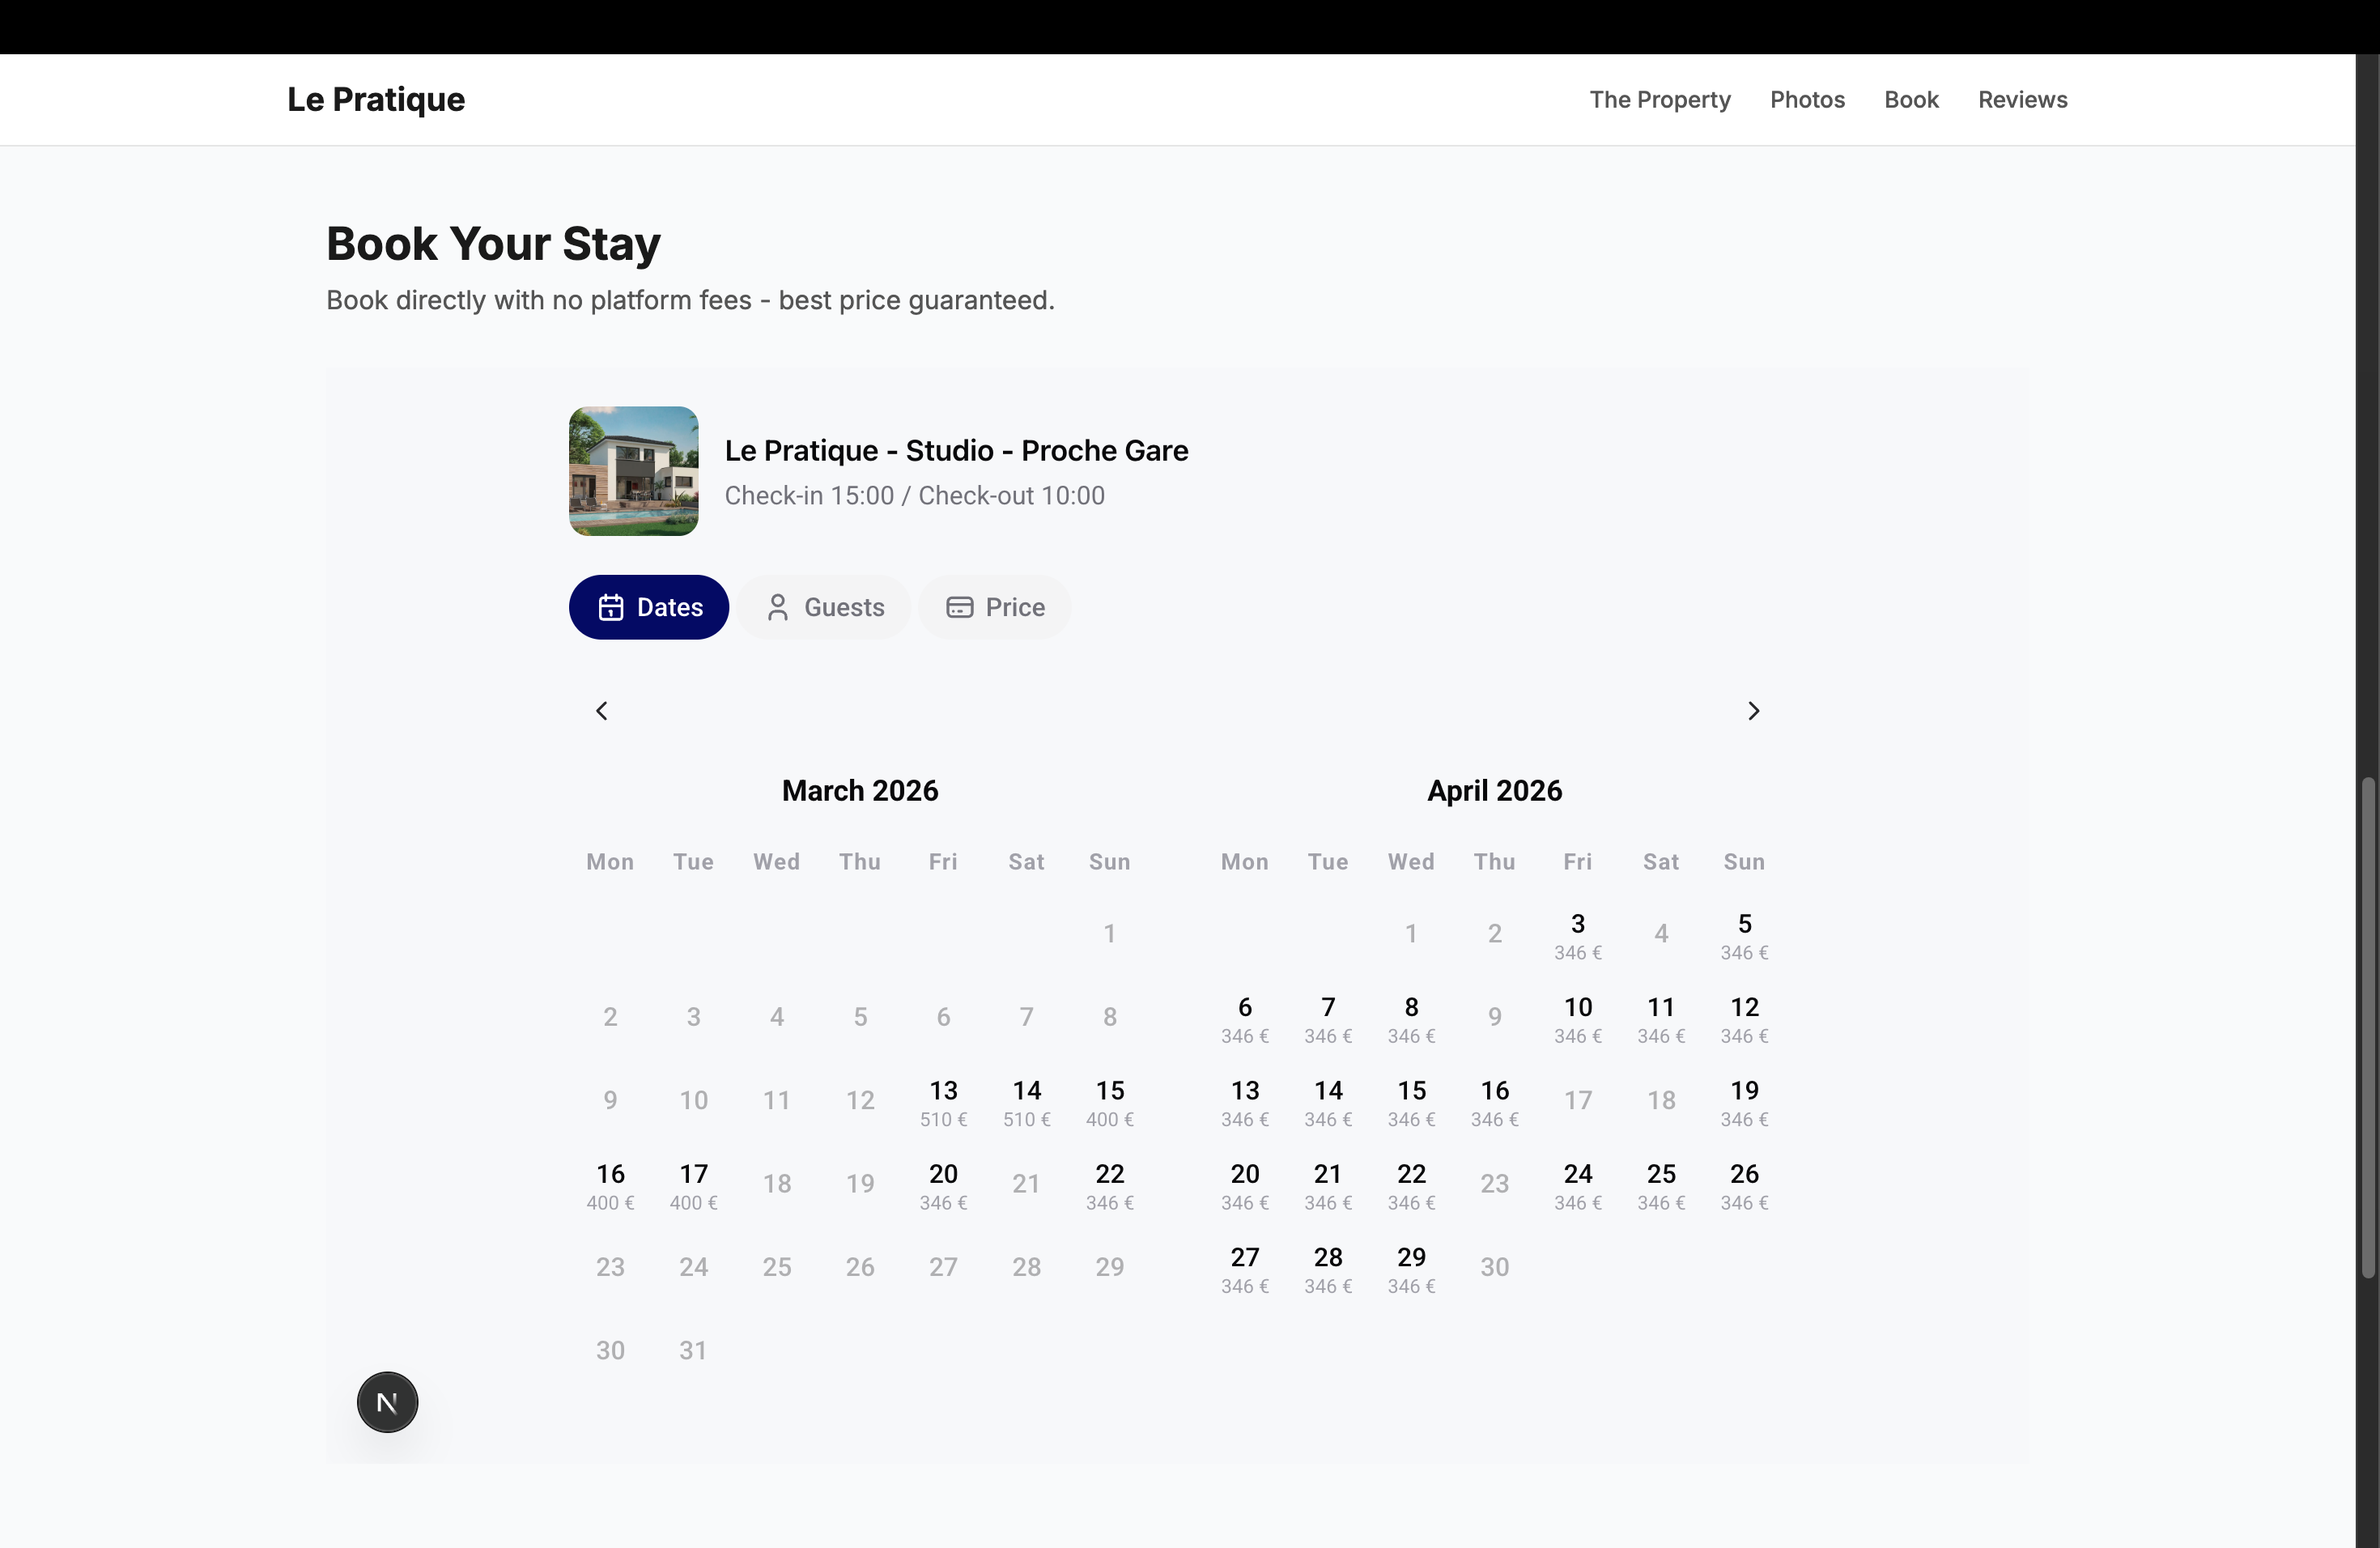
Here's the step-by-step experience for a guest booking directly on your website:
The widget displays a calendar with available dates and nightly prices. Your guest selects their check-in and check-out dates. Unavailable dates are automatically grayed out, and minimum/maximum stay restrictions are enforced.
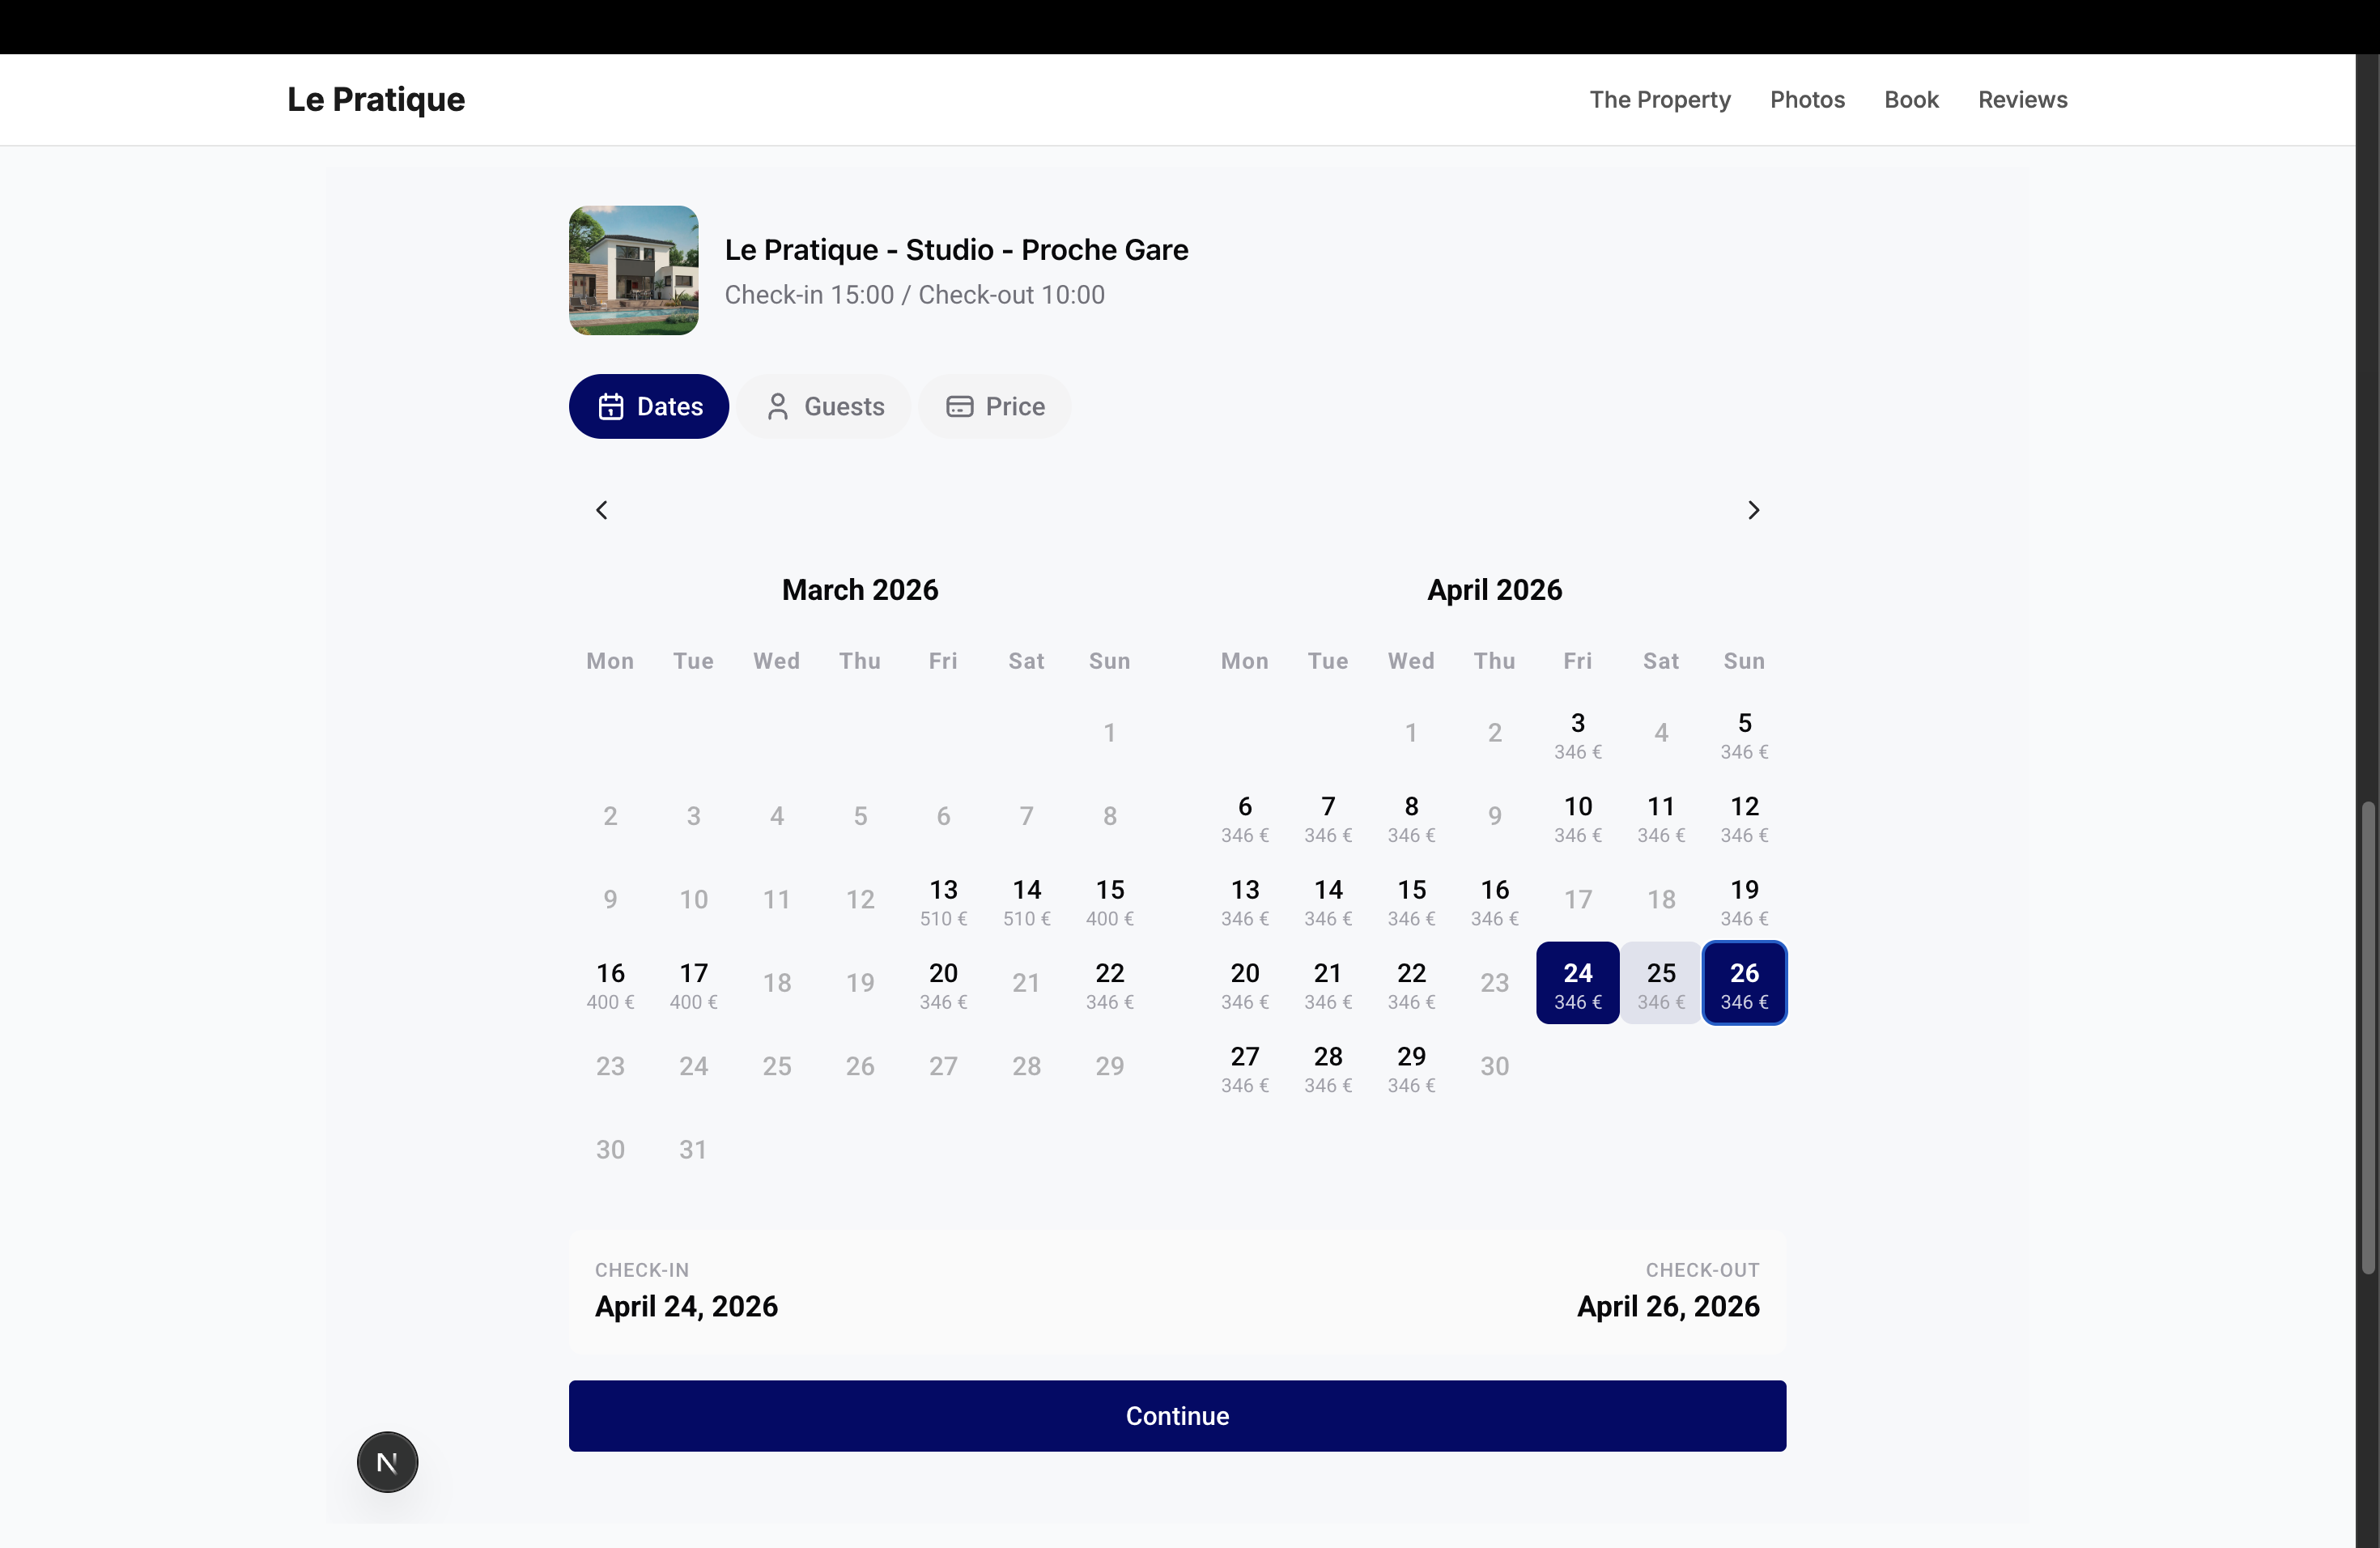
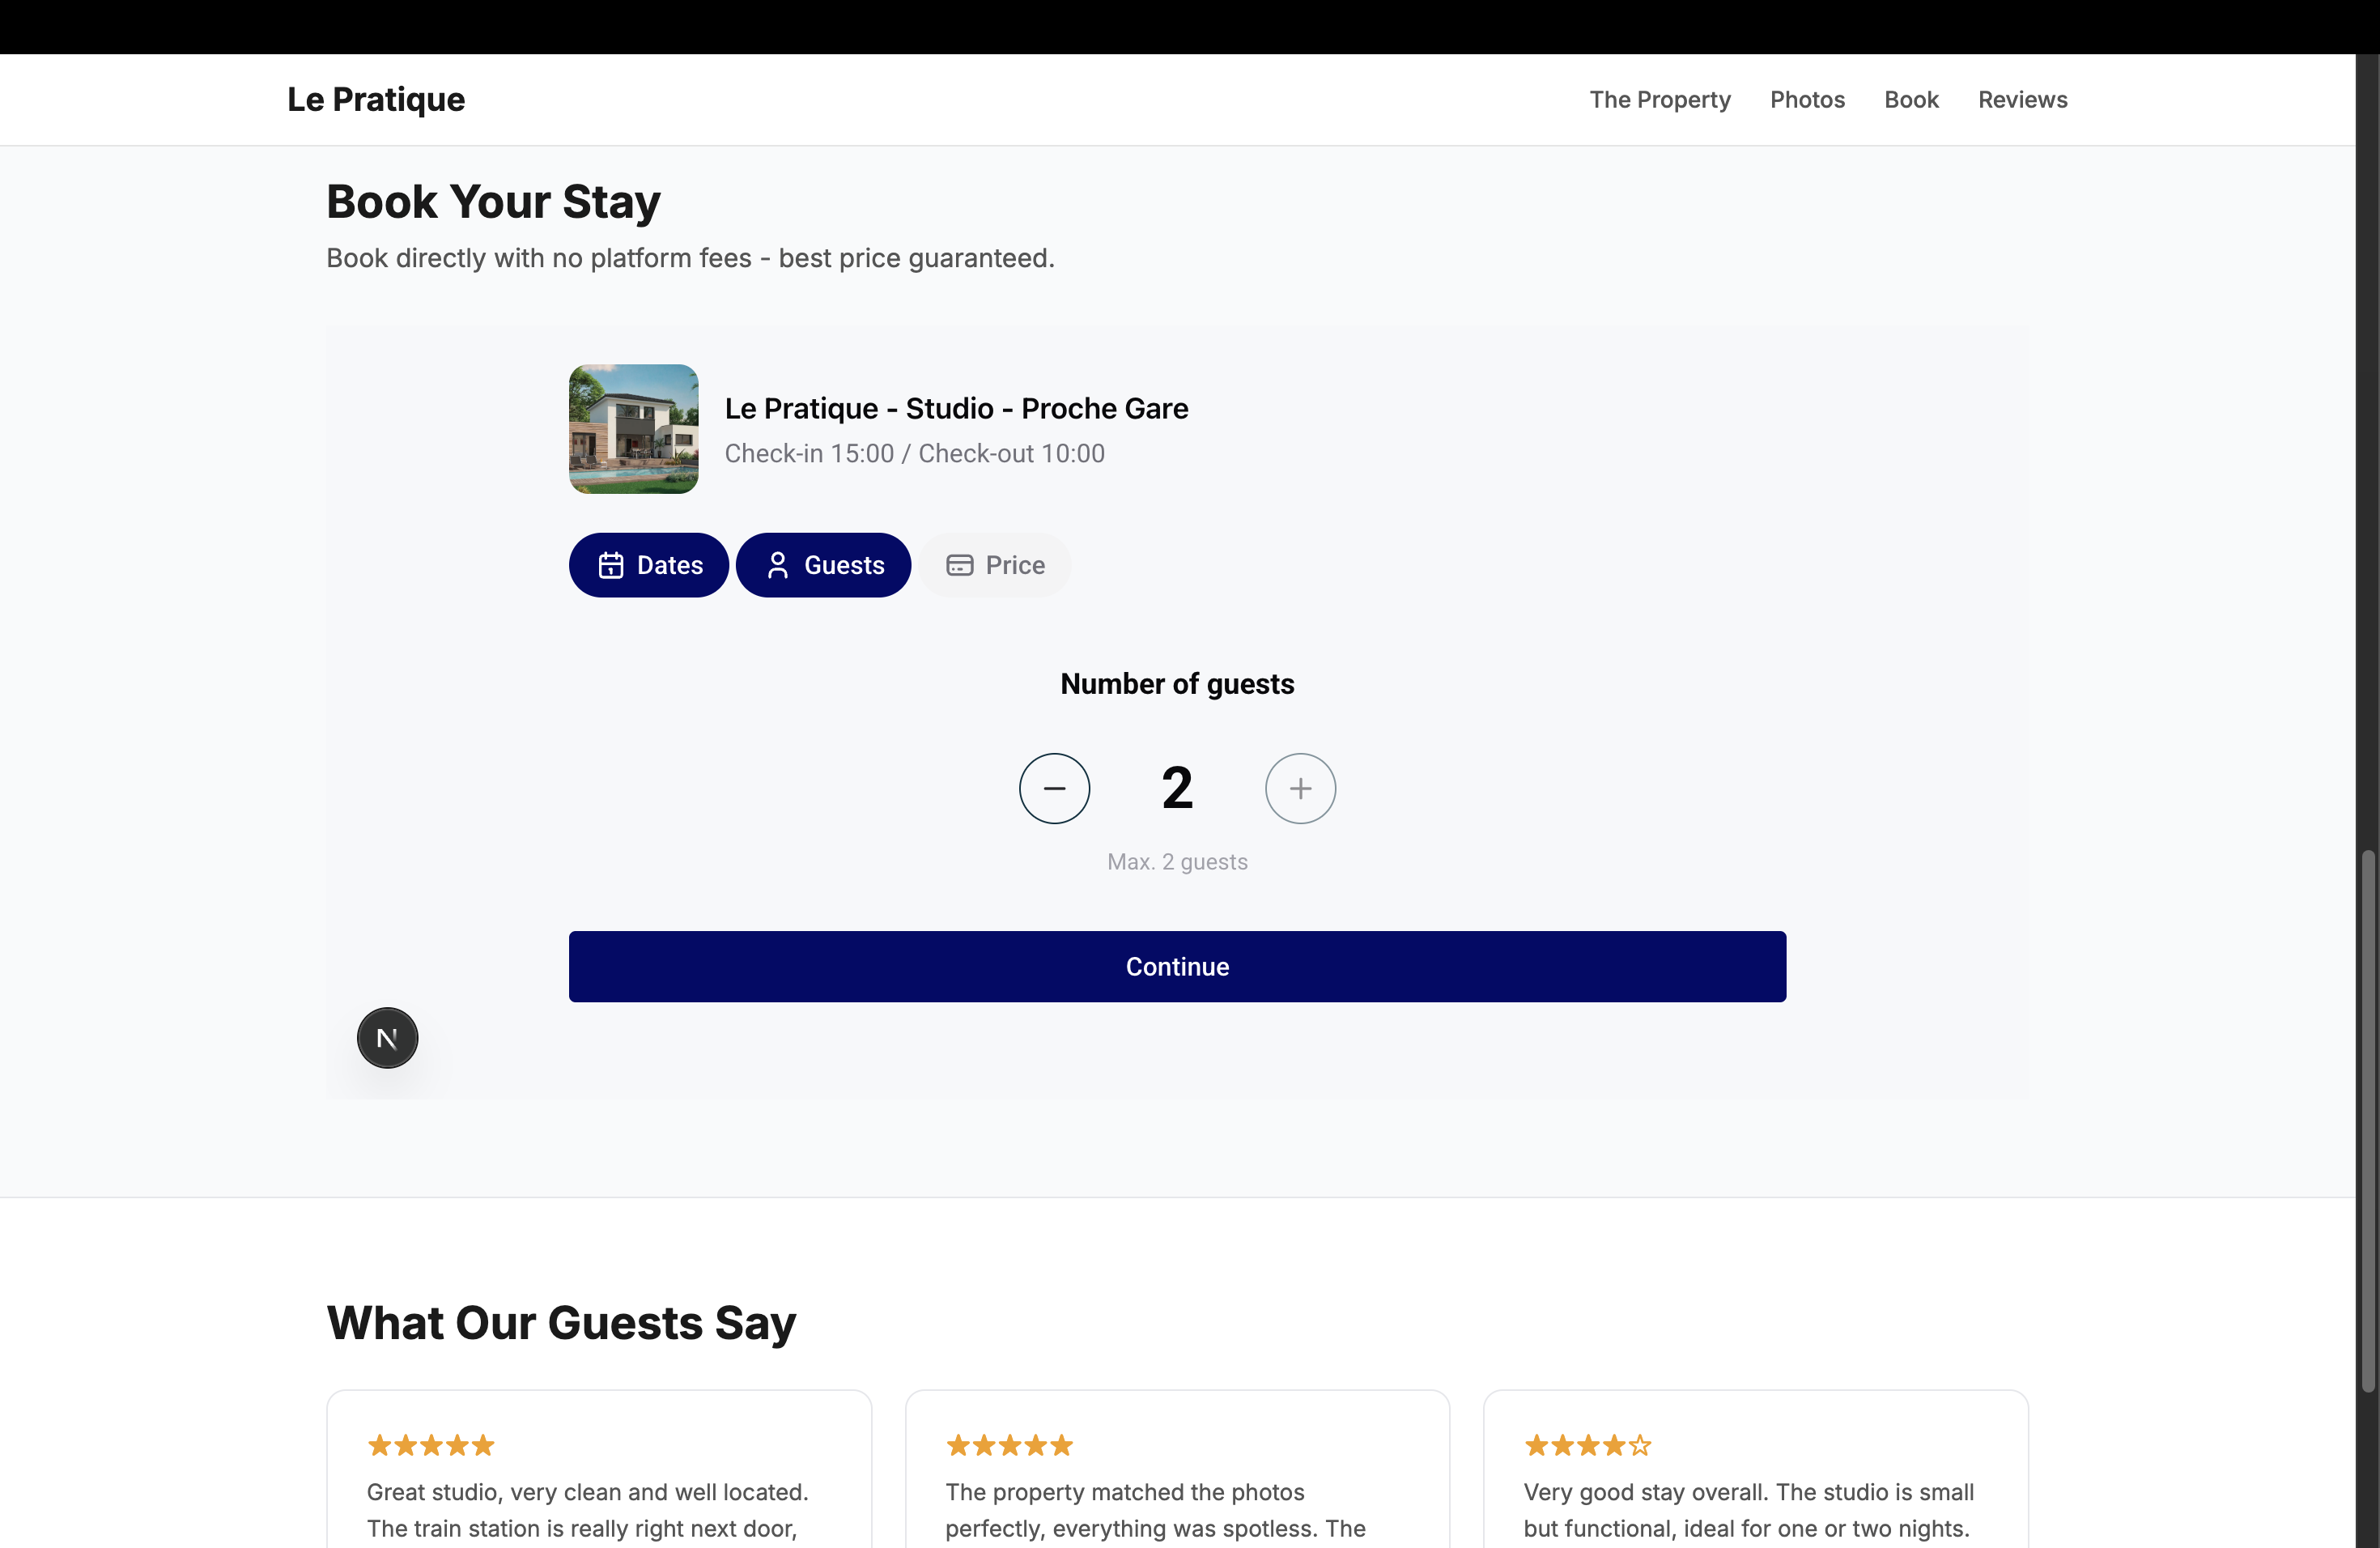
The guest selects how many people will be staying, up to the maximum capacity you've configured for the property.
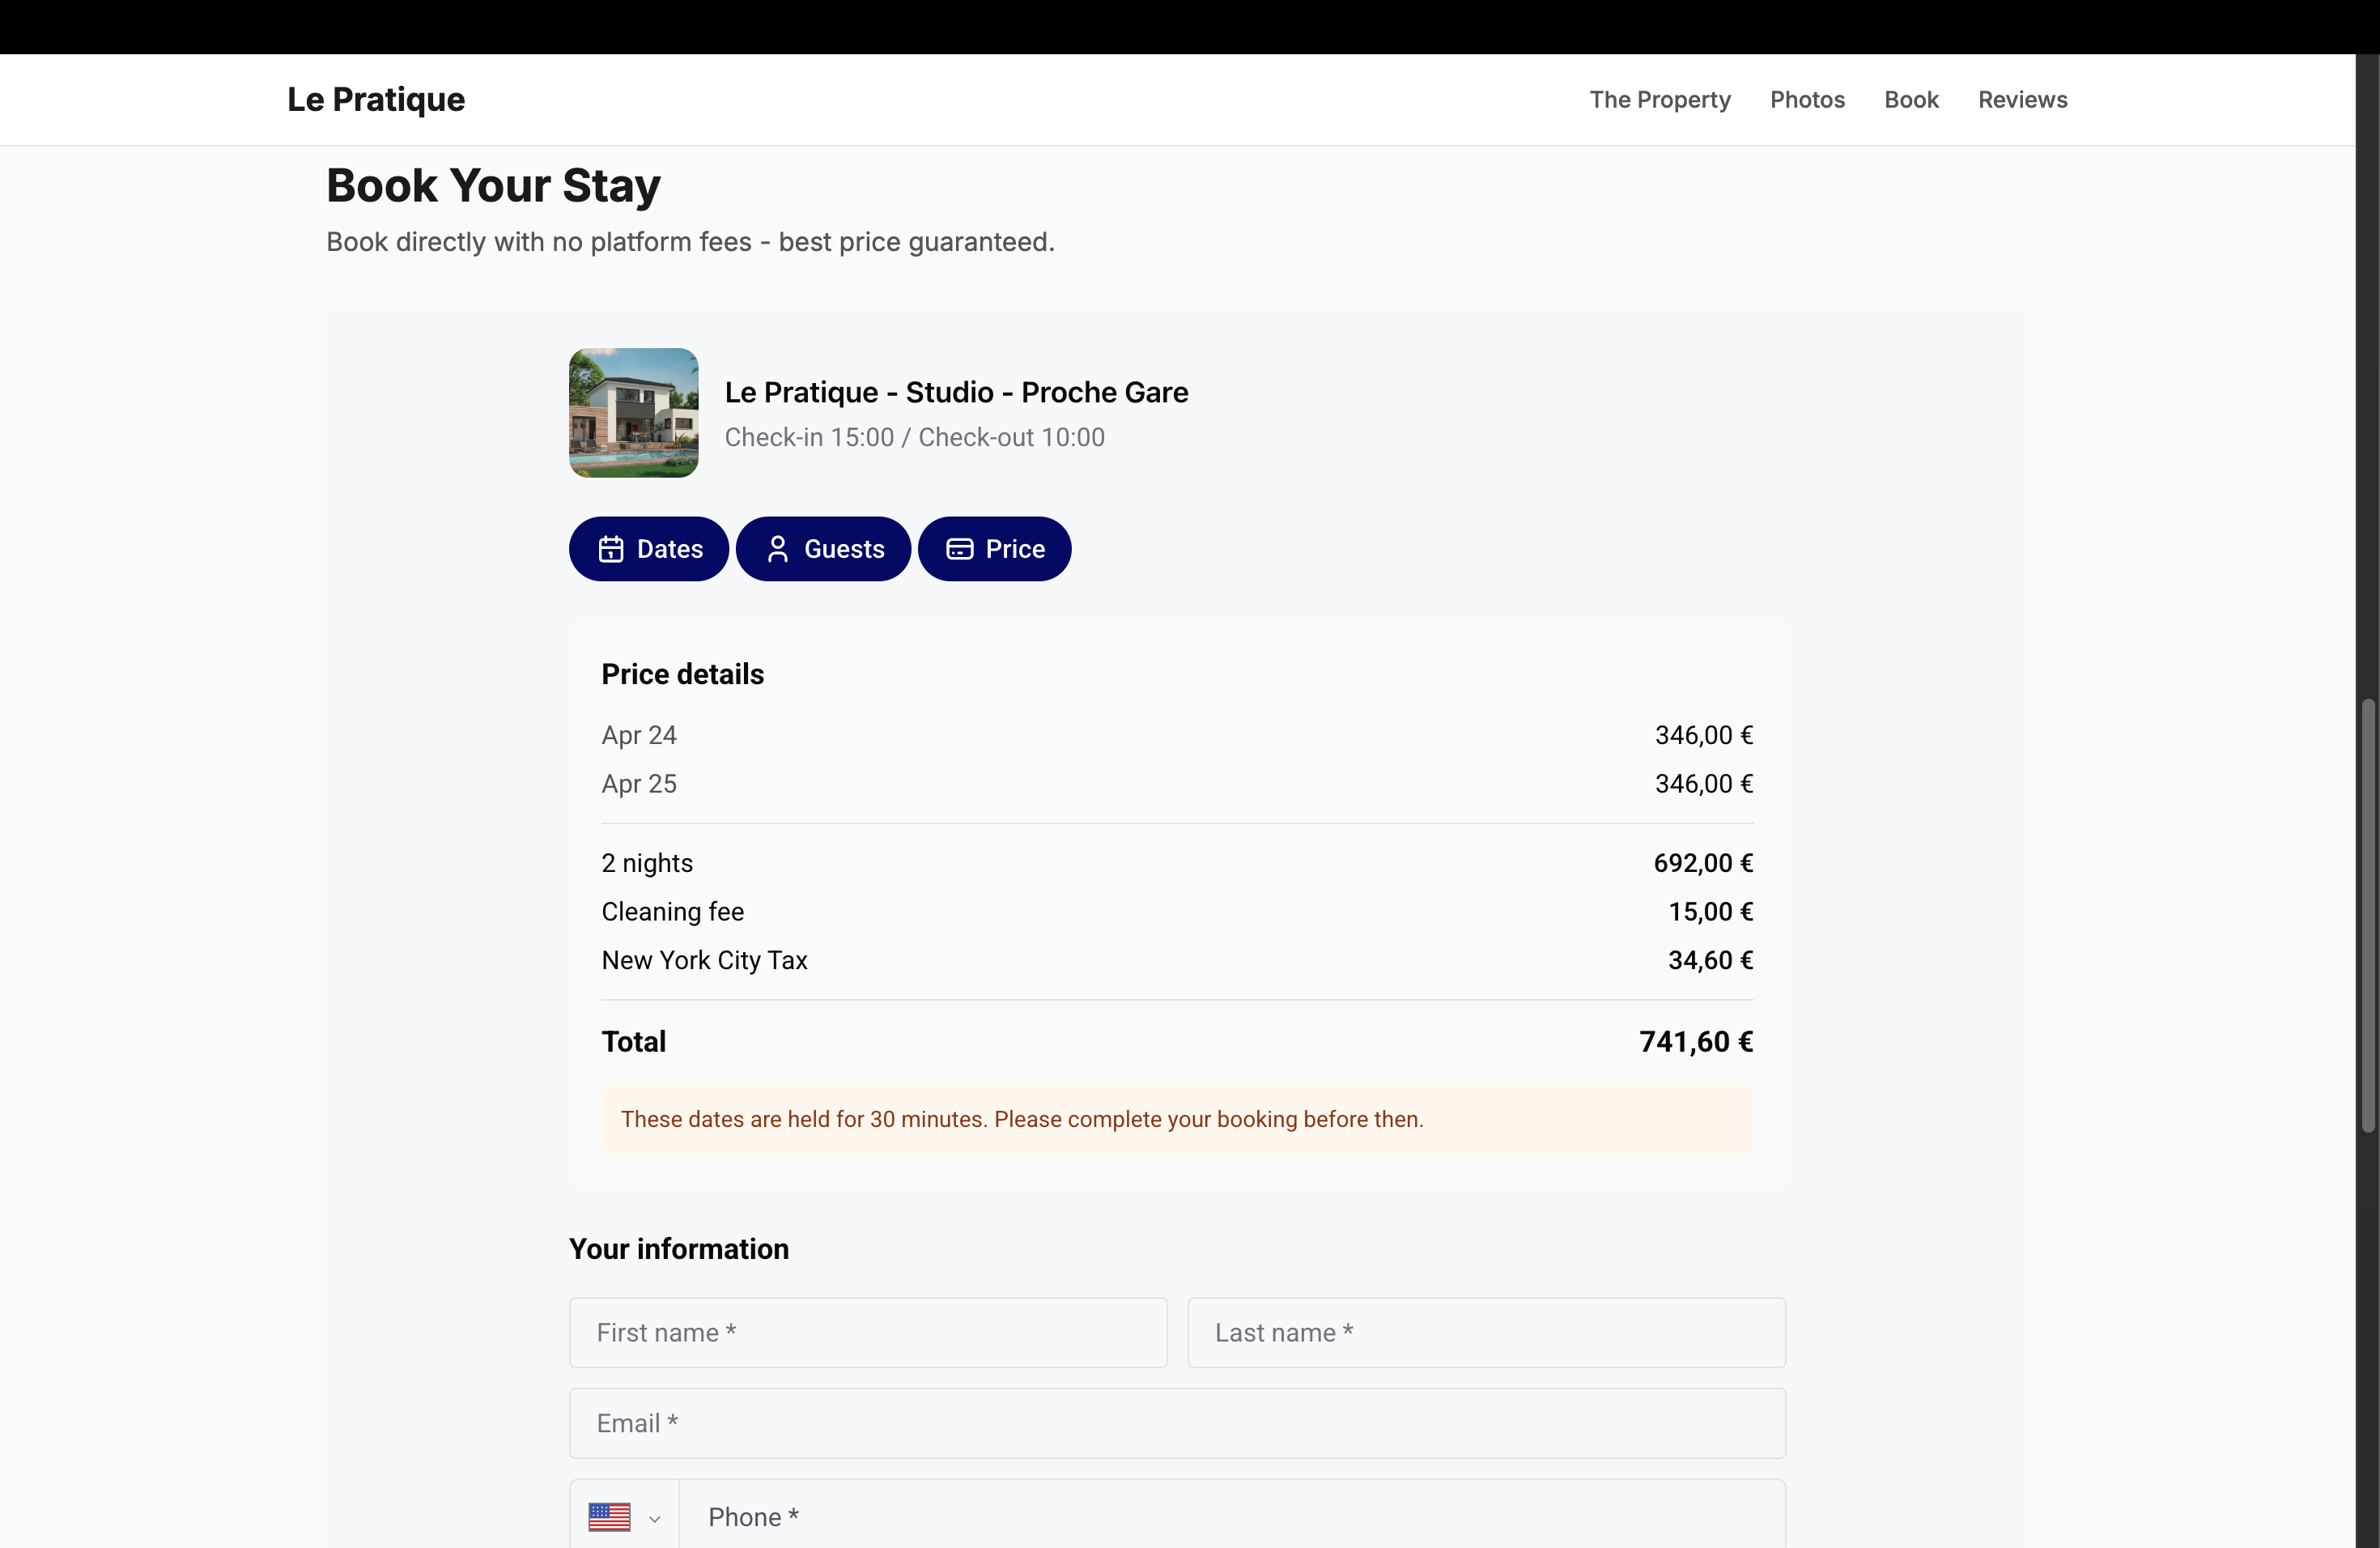
The widget displays a detailed price breakdown: nightly rate for each night, discounts, cleaning fee, applicable taxes, and total amount. The guest then fills in their information: first name, last name, email, phone, and optionally their address.
A notice informs the guest that the dates are held for 30 minutes while they complete the booking.
If you configured a terms & conditions URL, the guest must check the acceptance box before proceeding.
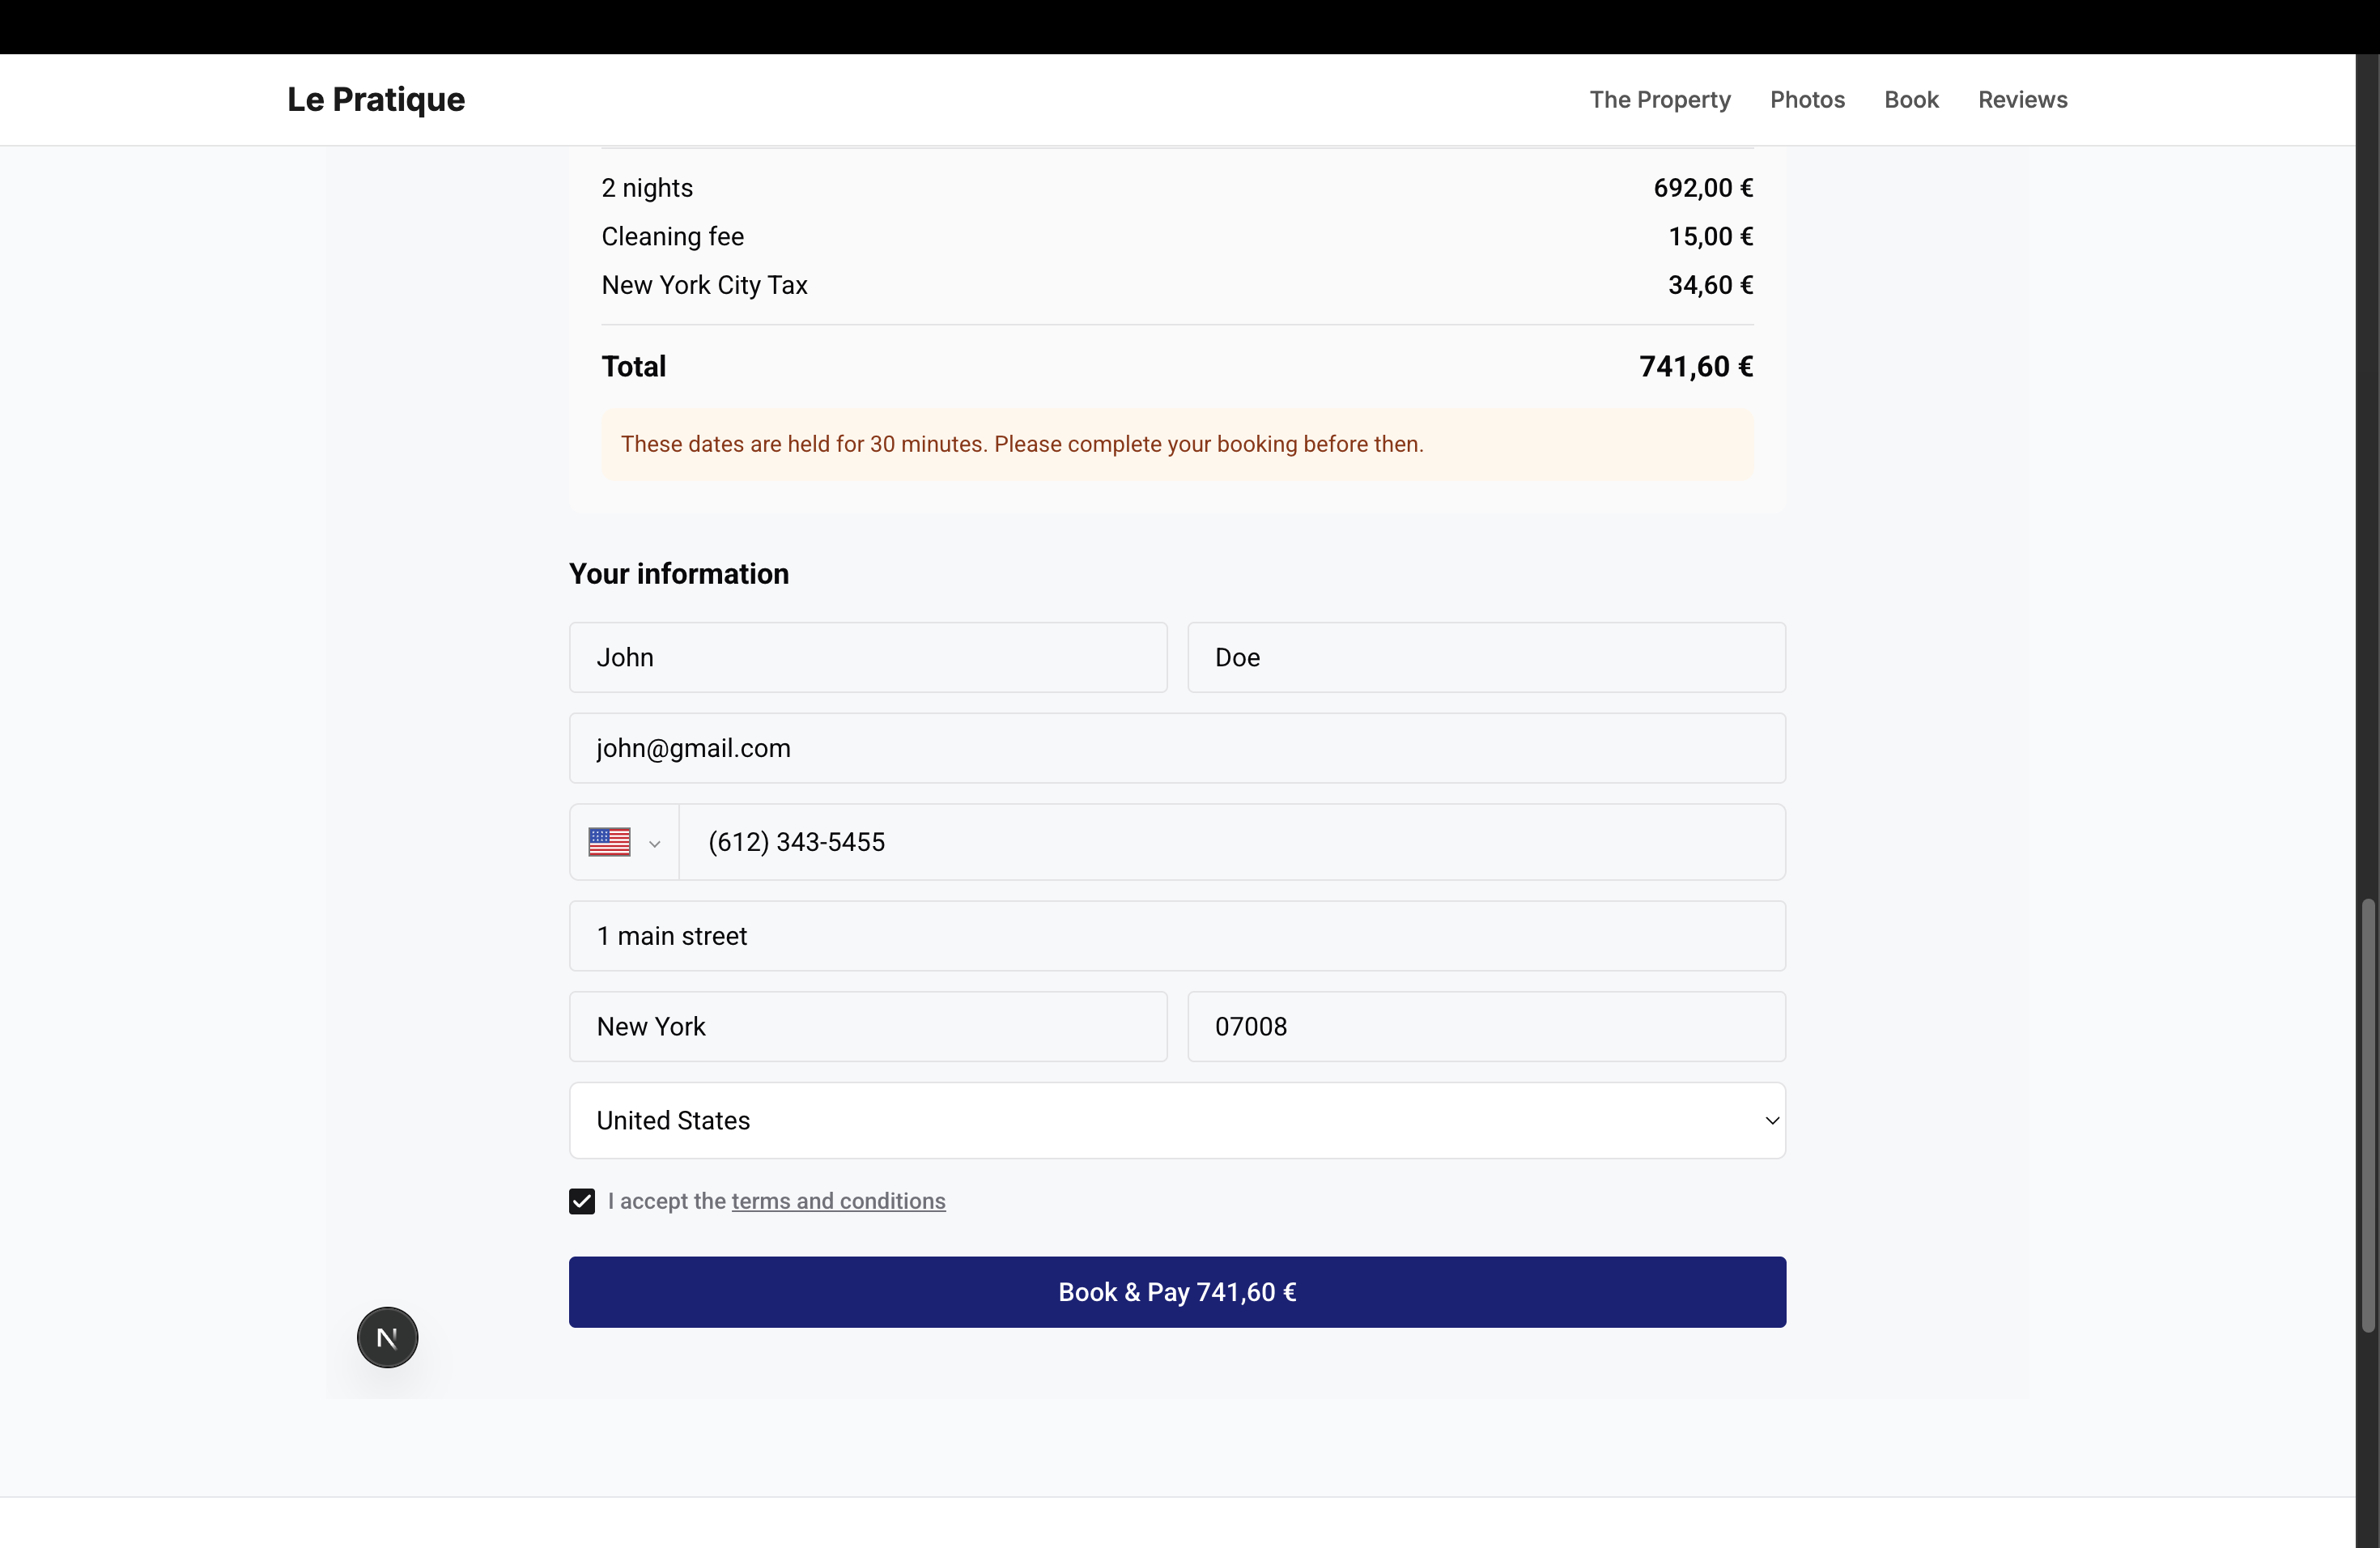
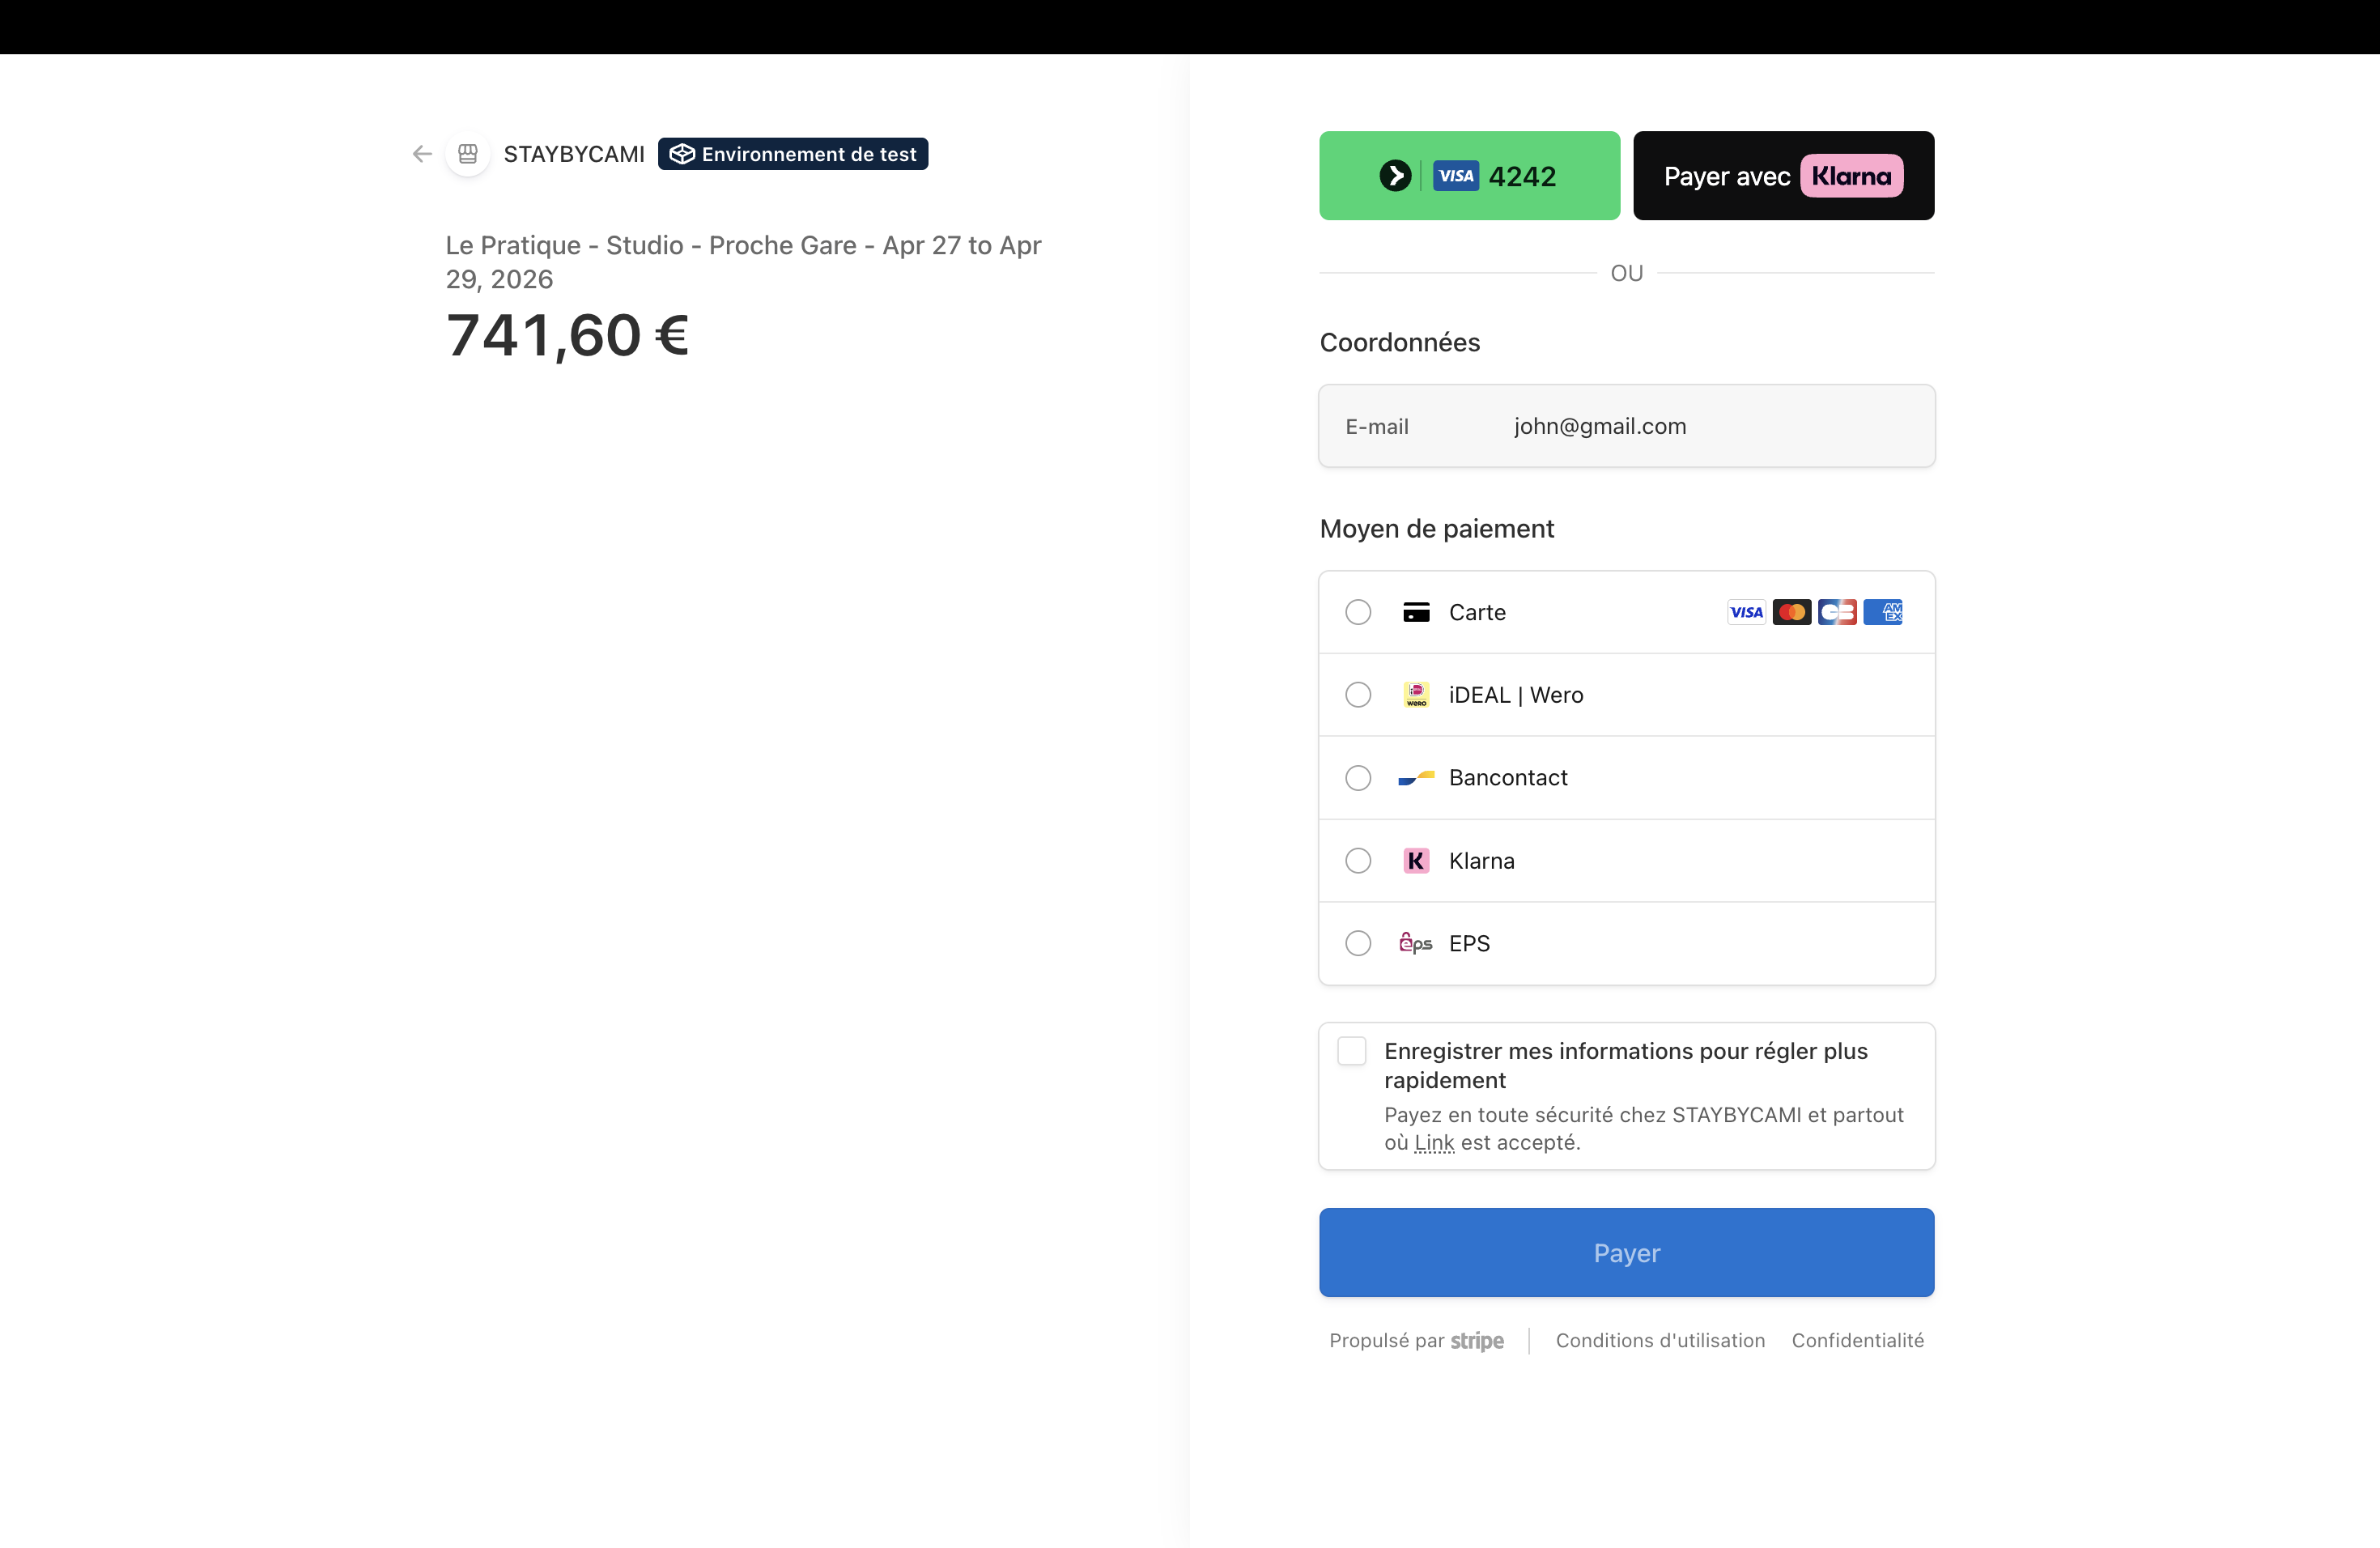
After clicking "Book & Pay", the guest is redirected to a secure Stripe checkout page. They can pay with credit card, debit card, and any other payment methods you have enabled on your Stripe account (Klarna, Bancontact, iDEAL, etc.).
Once the payment is completed, everything happens automatically:
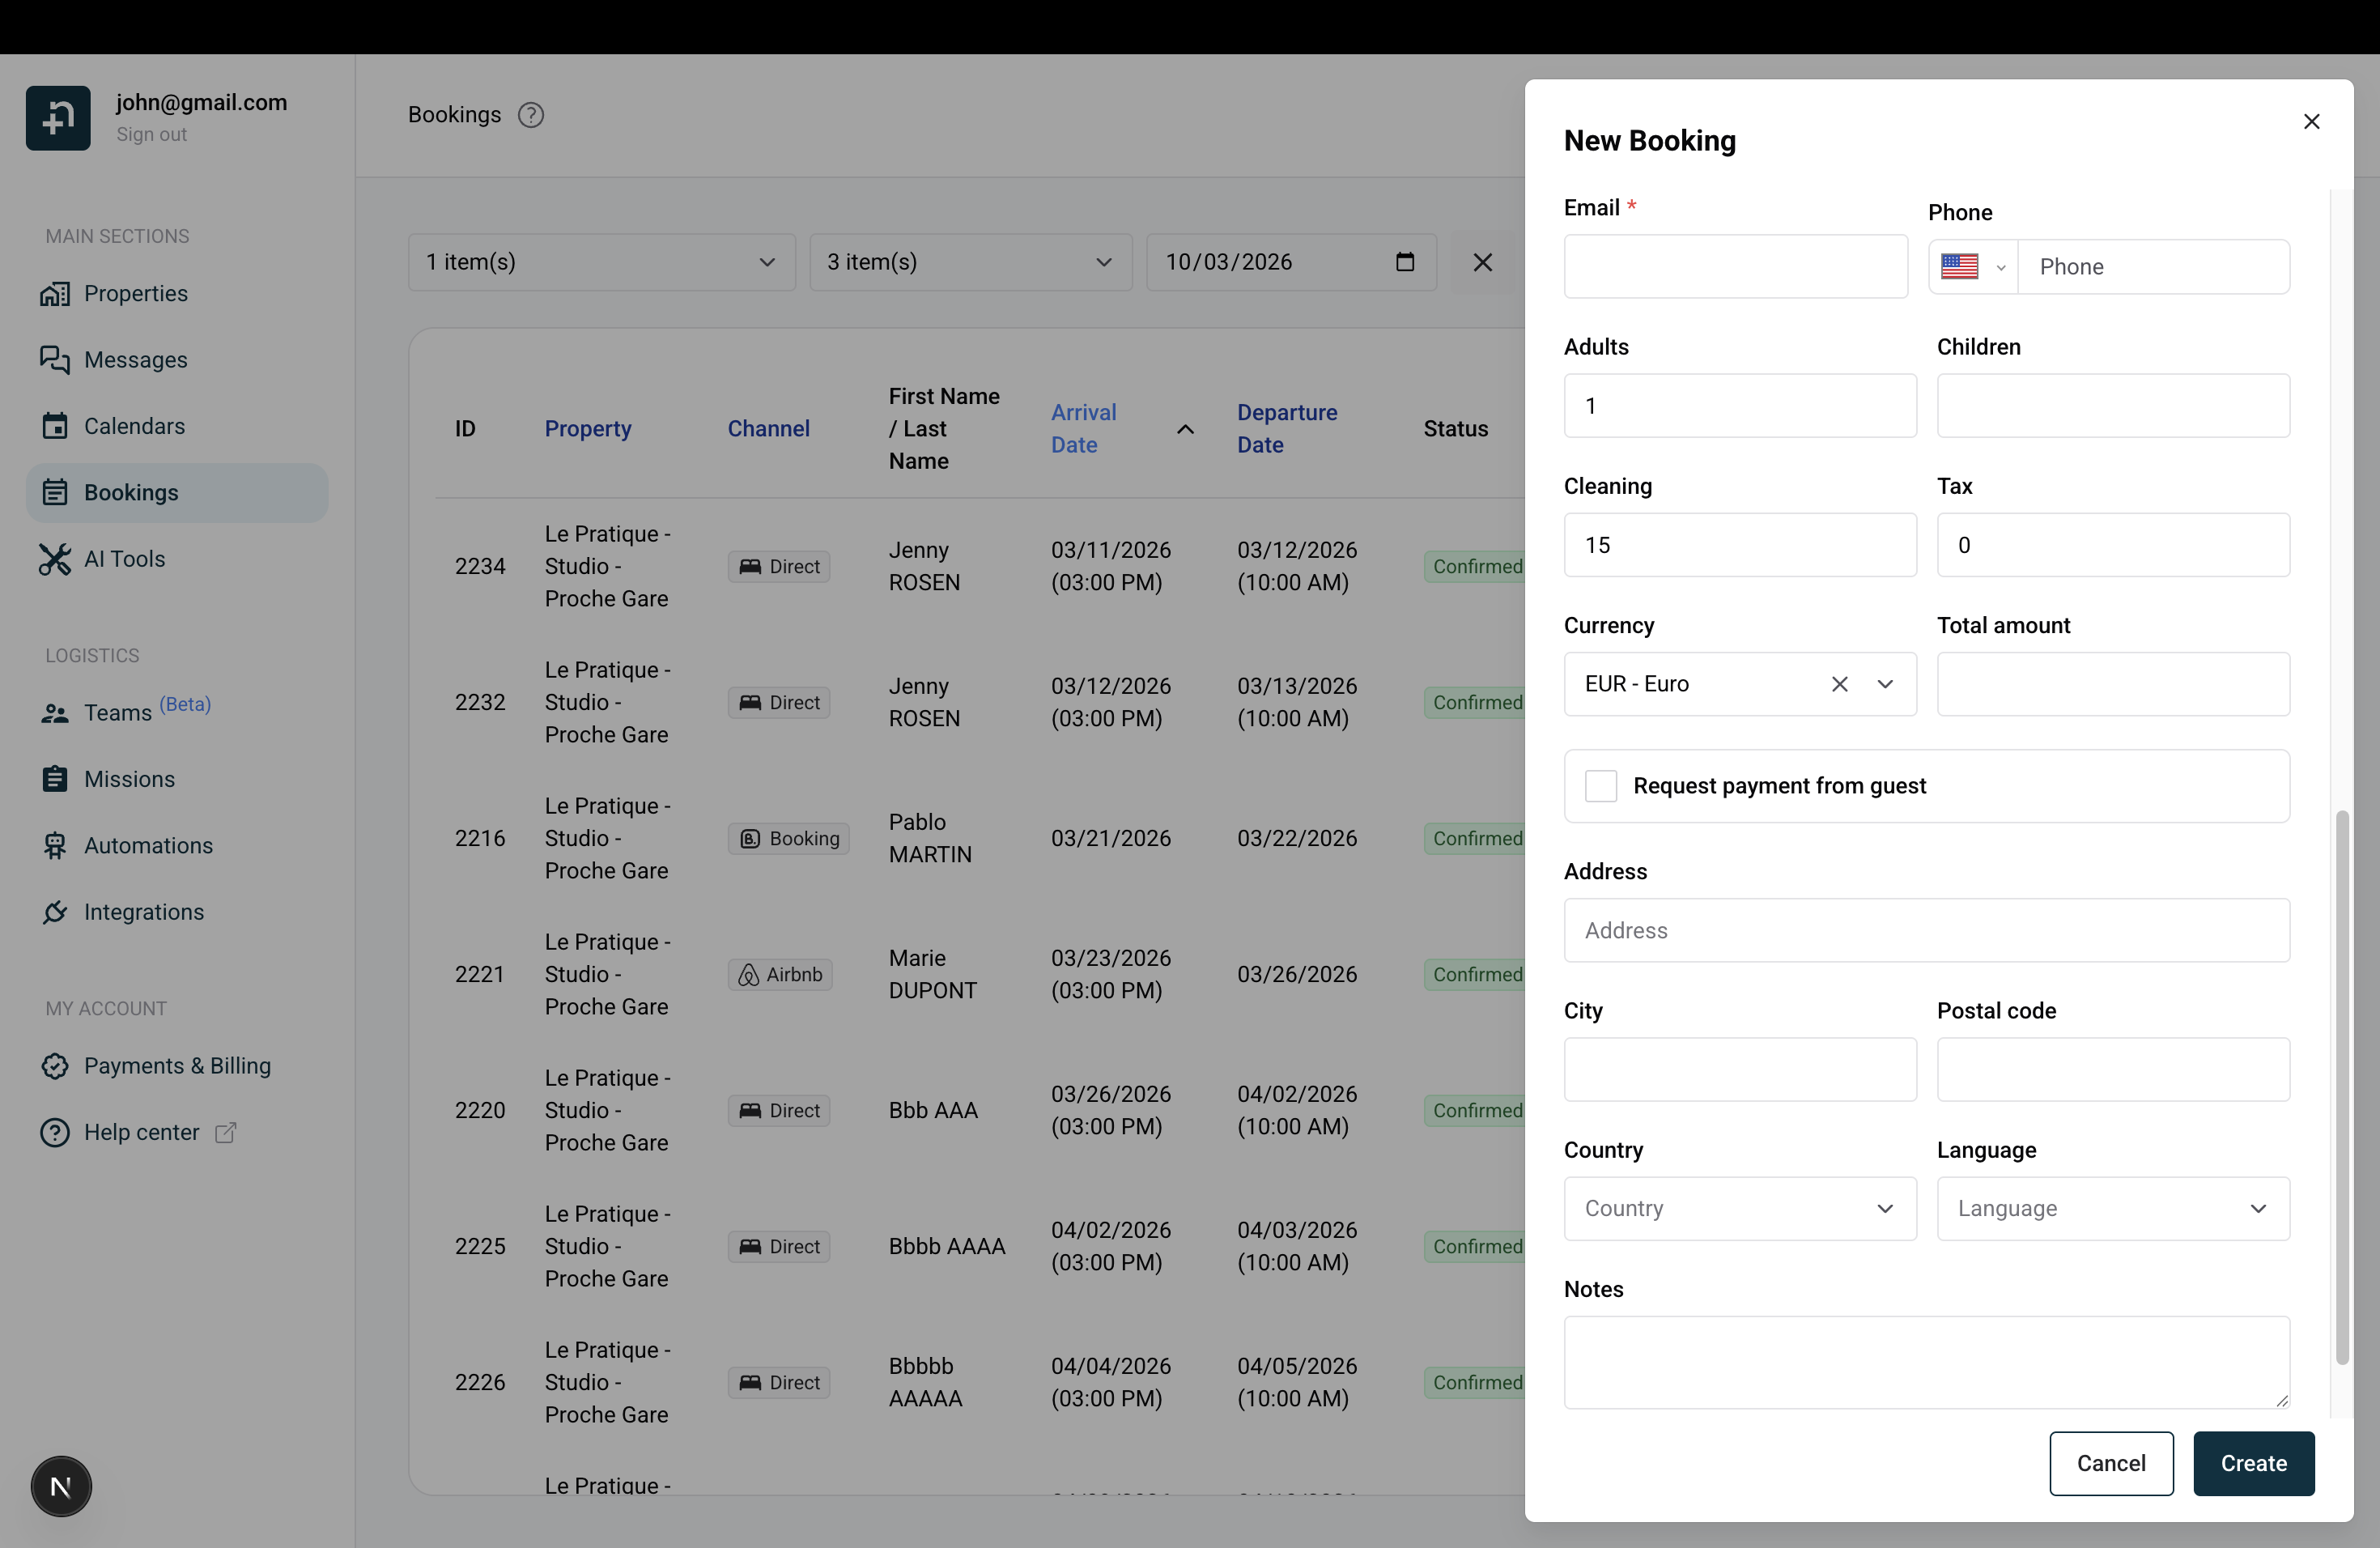
Sometimes a guest contacts you directly (by phone, email, or social media) and wants to book. Instead of having them go through your website widget, you can create a manual booking and send them a payment request by email.
If the guest doesn't complete the payment in time, the link expires. You can generate a new payment link from the booking details. The guest will receive a fresh email with an updated link. This can be done as many times as needed until the guest completes the payment.