Guest identity verification helps you confirm the identity of your guests before check-in using Stripe Identity. By enabling this feature in Nowistay, you can automatically send a verification link to your guests as part of your booking confirmation, and only send check-in instructions once their identity is verified.
This guide walks you through the full setup: connecting your Stripe account, enabling identity screening for your properties, adding the verification link to your messages, and setting up conditional sending.
What you need before you start
A Nowistay account with the AI Channel Manager subscription: identity screening is available for properties with the AI Channel Manager plan.
Properties connected via the Nowistay PMS integration: only properties connected through the Nowistay PMS can use identity verification.
A Stripe account: you'll need an existing Stripe account to connect. Don't have one? You can create a free Stripe account.
Step 1: Connect your Stripe account
First, connect your Stripe account to Nowistay to enable identity verification:
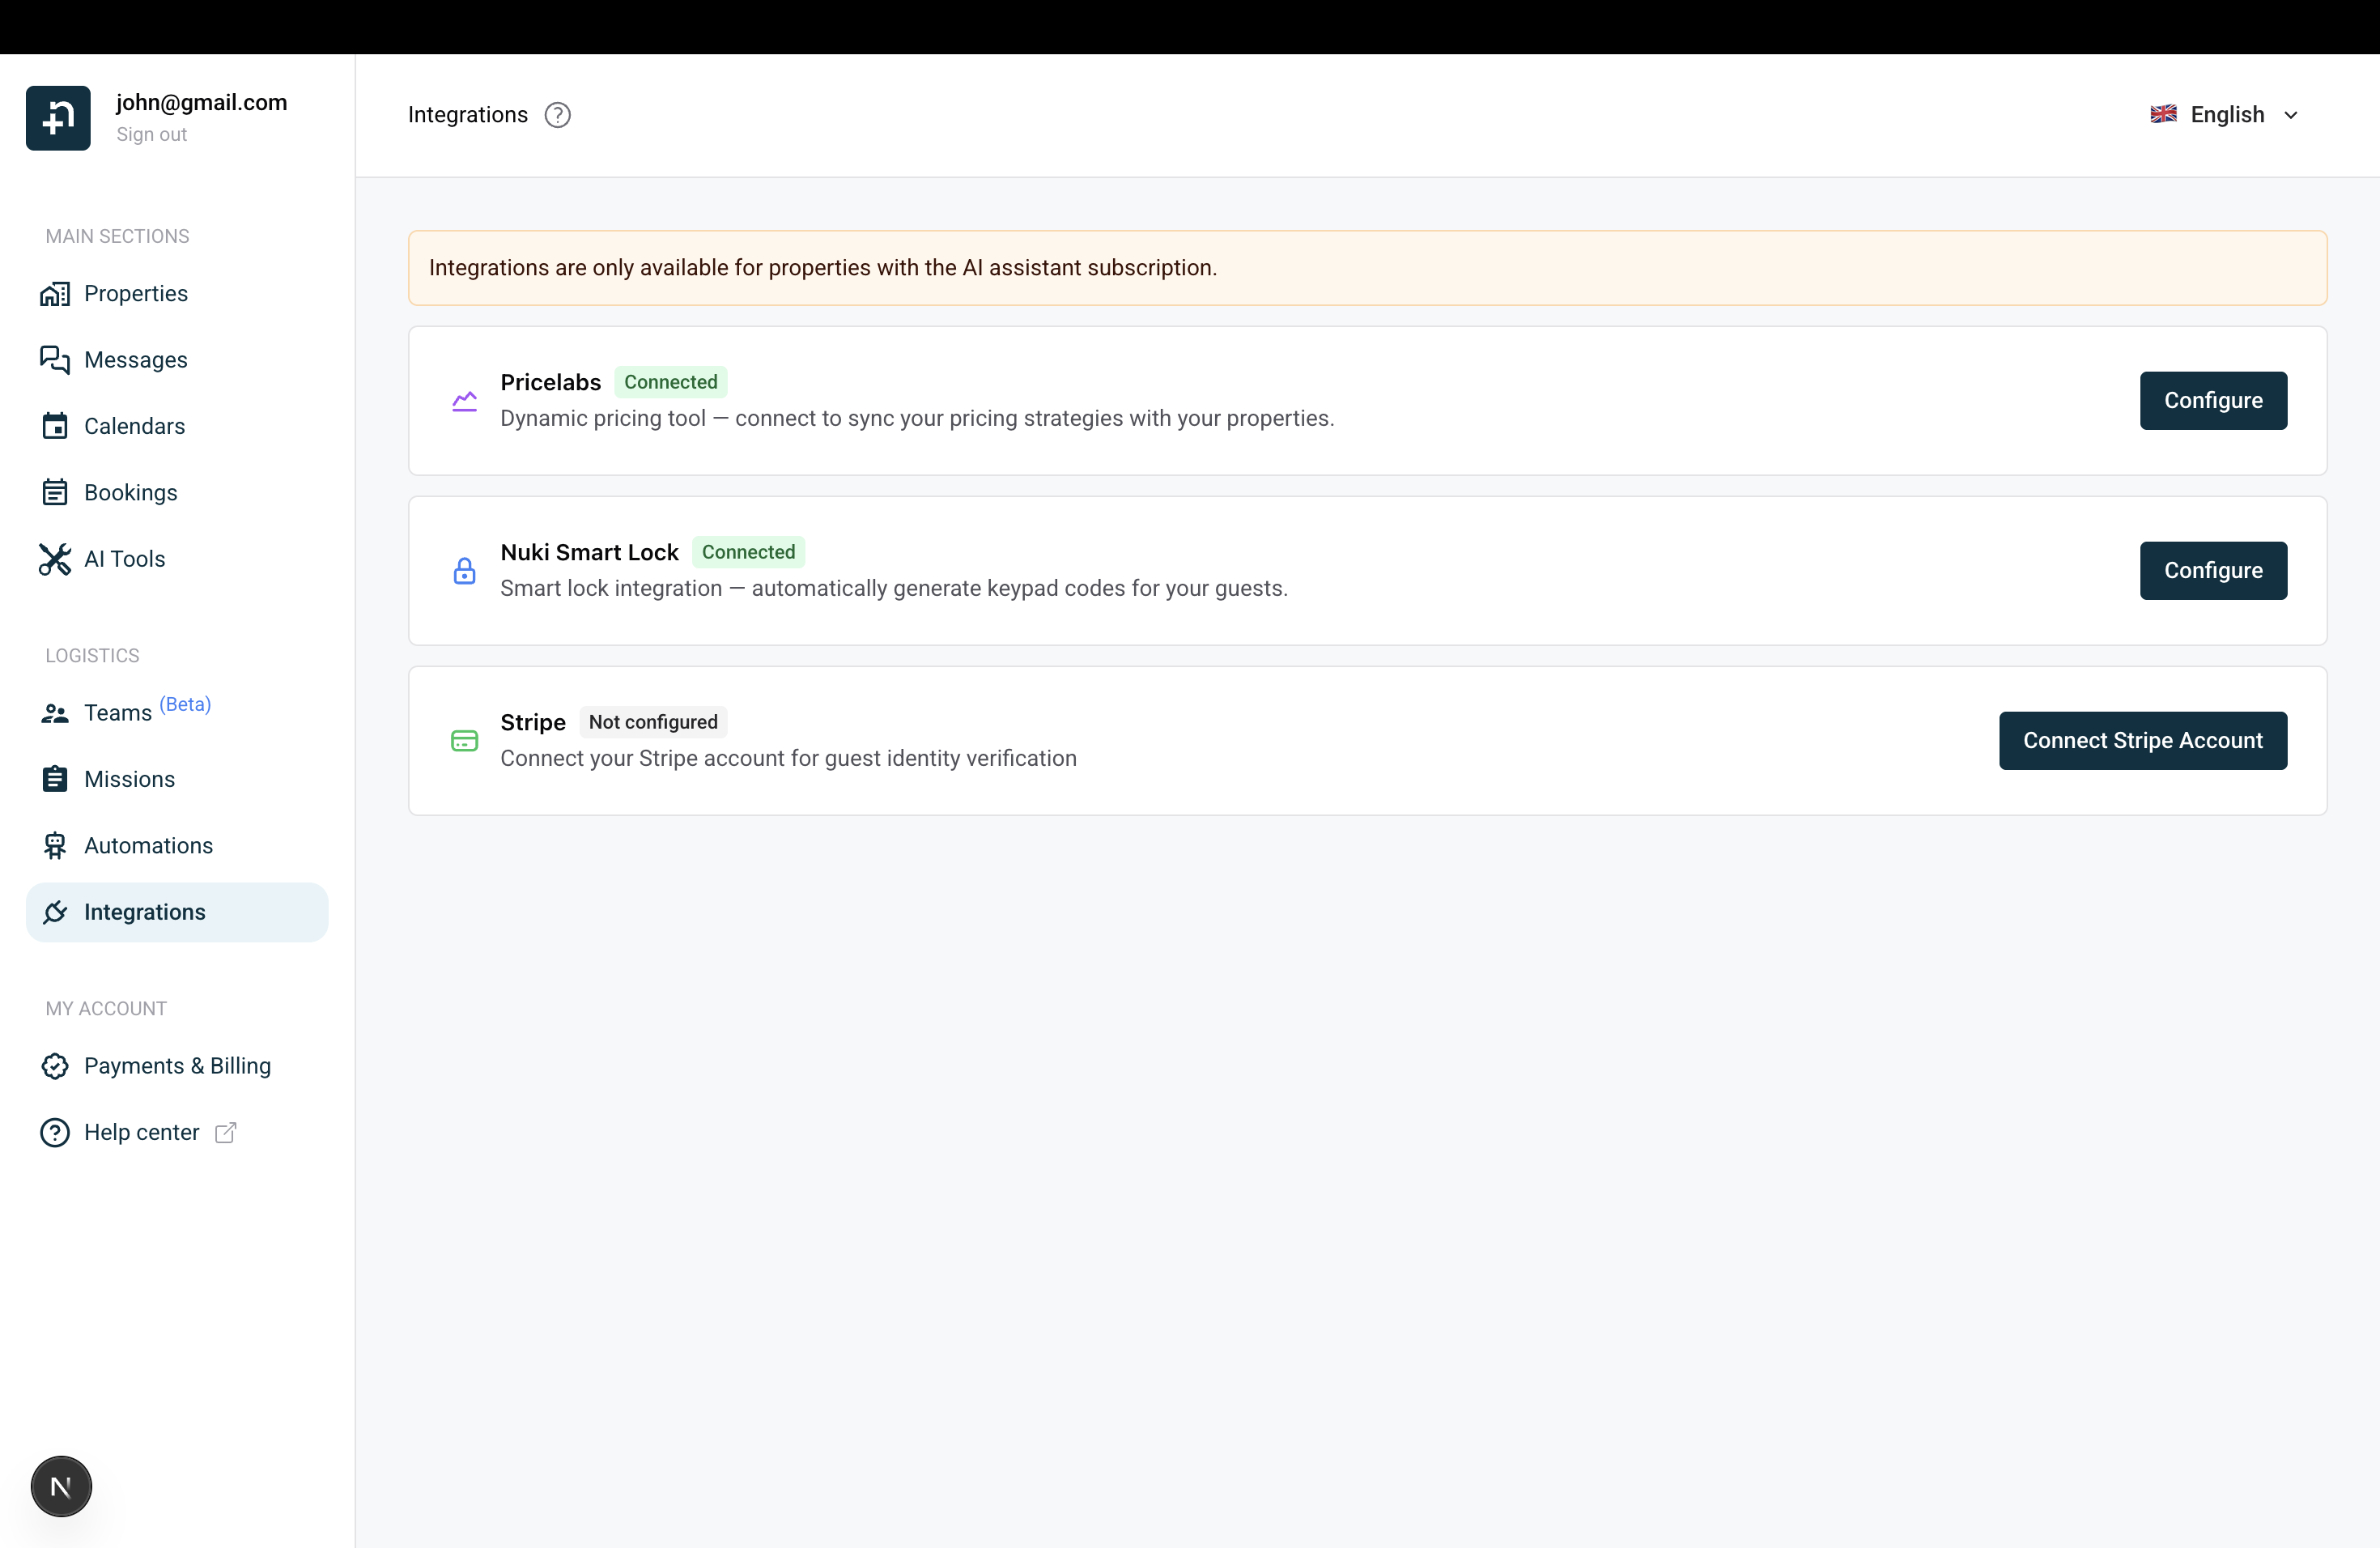
Log in to your Nowistay dashboard and go to "Integrations" from the sidebar menu.
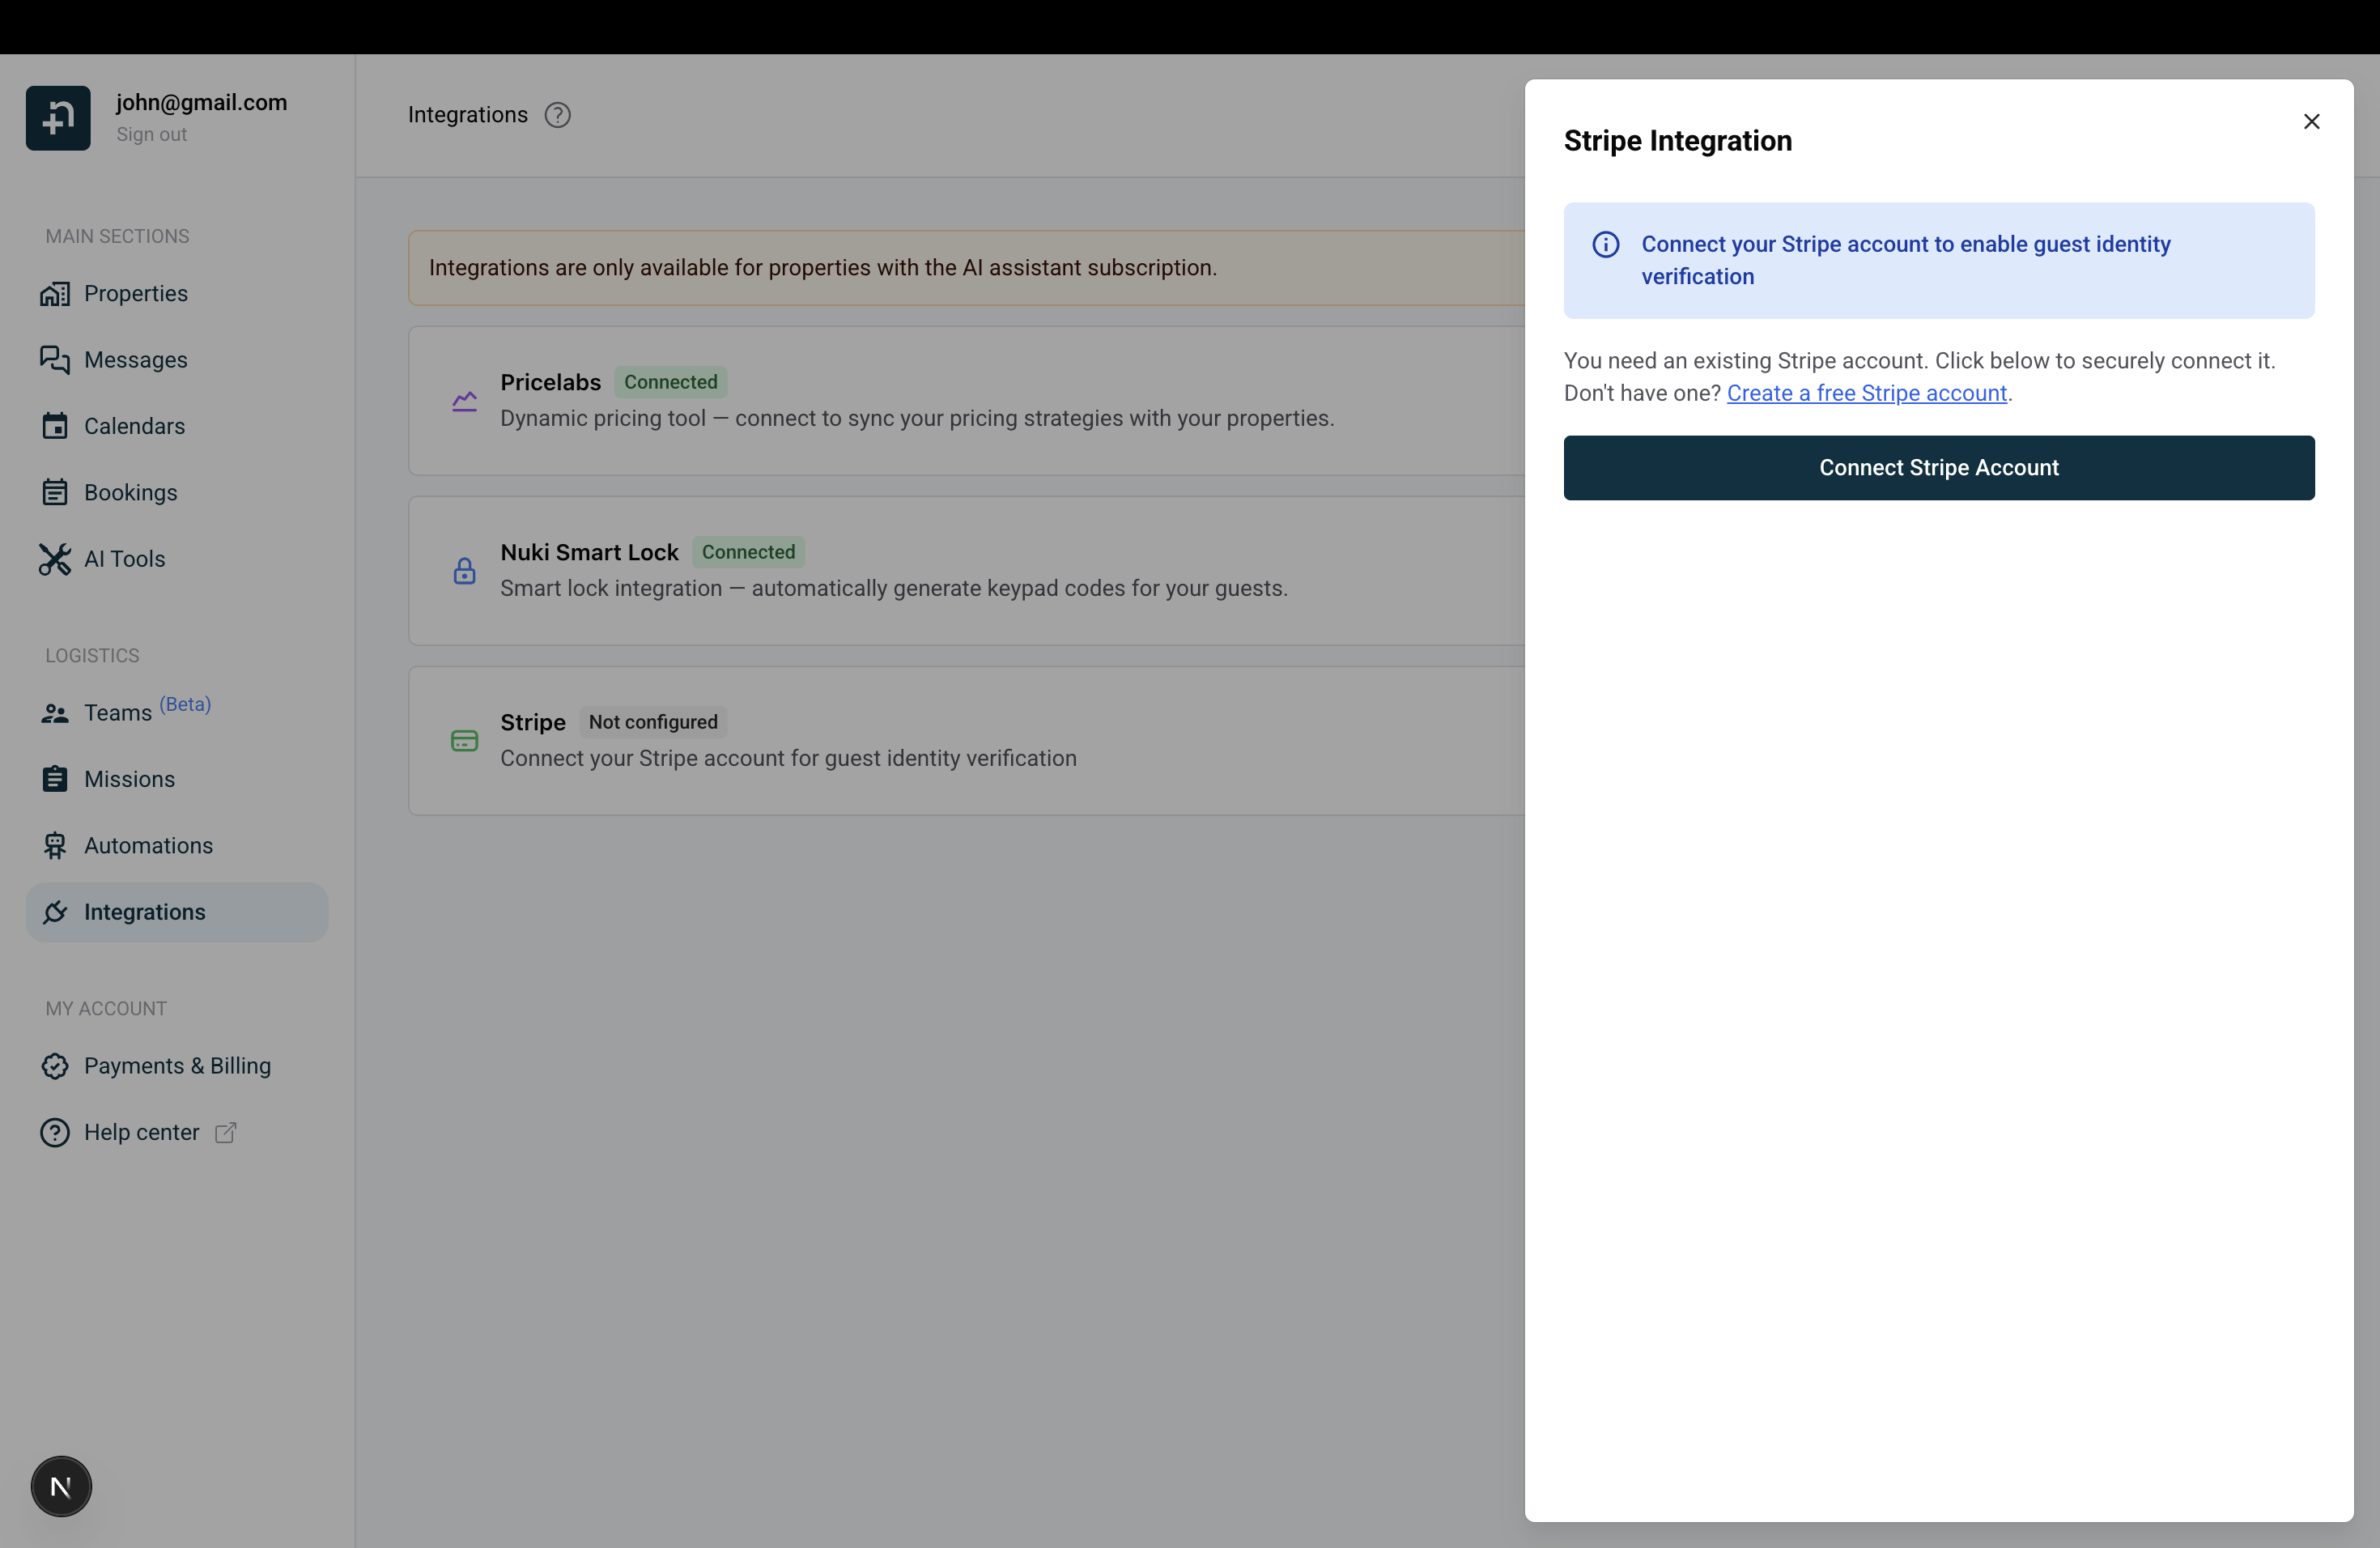
Find the Stripe card and click "Connect Stripe Account".
In the drawer that opens, click "Connect Stripe Account". You'll be redirected to Stripe to authorize the connection.
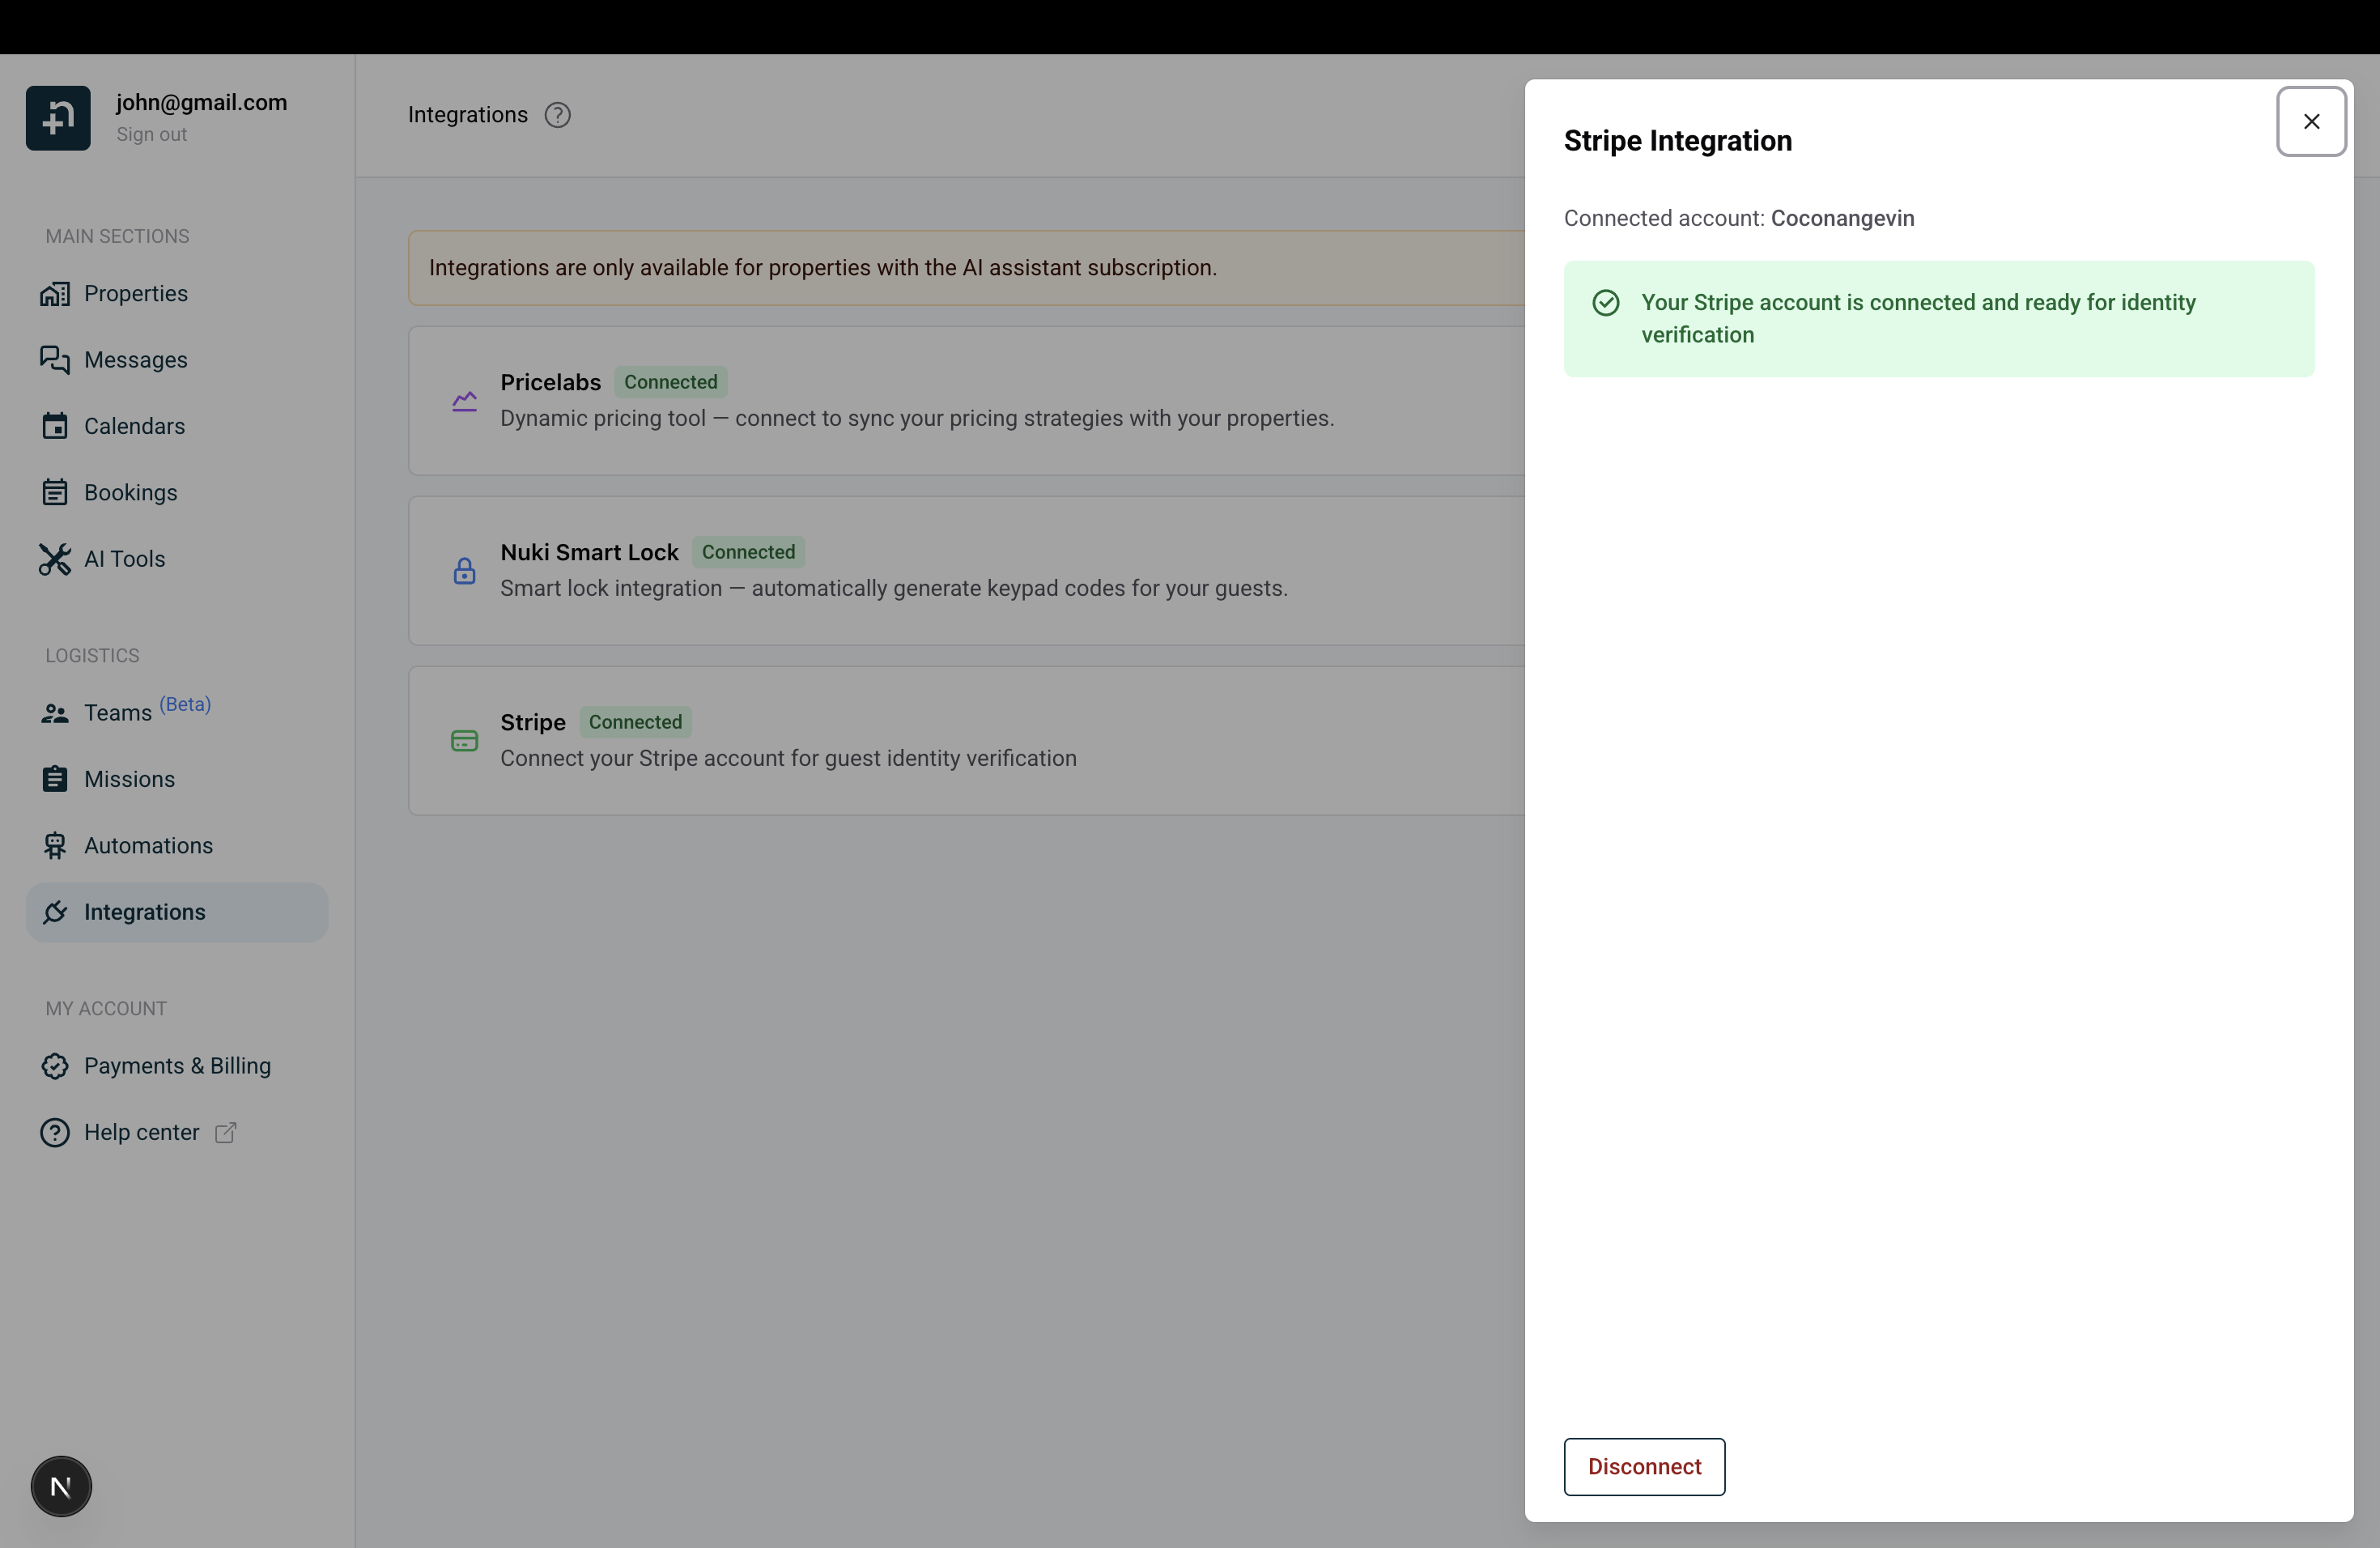
Once connected, you'll see a confirmation message: "Your Stripe account is connected and ready for identity verification".
The Integrations page with Stripe ready to be connected
Click "Connect Stripe Account" to start the authorization
Your Stripe account is connected and ready for identity verification
Step 2: Enable identity screening for your properties
Now that Stripe is connected, activate identity screening on the properties where you want to verify guests:
Click the property selector to choose which properties should require identity verification.
Select your properties and click "Apply".
You can also click the settings icon next to Identity Screening to open the configuration drawer, where you can manage your Stripe connection and access the screening history.
Select which properties should require identity verification
The Identity Screening configuration drawer
Step 3: Add the verification link to your booking confirmation
To send a verification link to your guests, include the {{identity_check_link}} variable in one of your guest message templates, typically the booking confirmation message:
Go to "Automations" and click "Manage messages" on the Guest Messages row.
Open or create a message template triggered by "Booking Confirmed".
In the message body, add the {{identity_check_link}} variable where you want the verification link to appear. You can type it directly or use the "Insert variable" button.
Write a clear instruction for your guest. For example: "IMPORTANT: you must complete your identity verification before you can access the accommodation. Please do it now here: {{identity_check_link}}"
Click "Save".
When the message is sent, {{identity_check_link}} will be automatically replaced with a unique verification link for each guest.
Add {{identity_check_link}} in your booking confirmation message
Step 4: Send check-in instructions only after verification
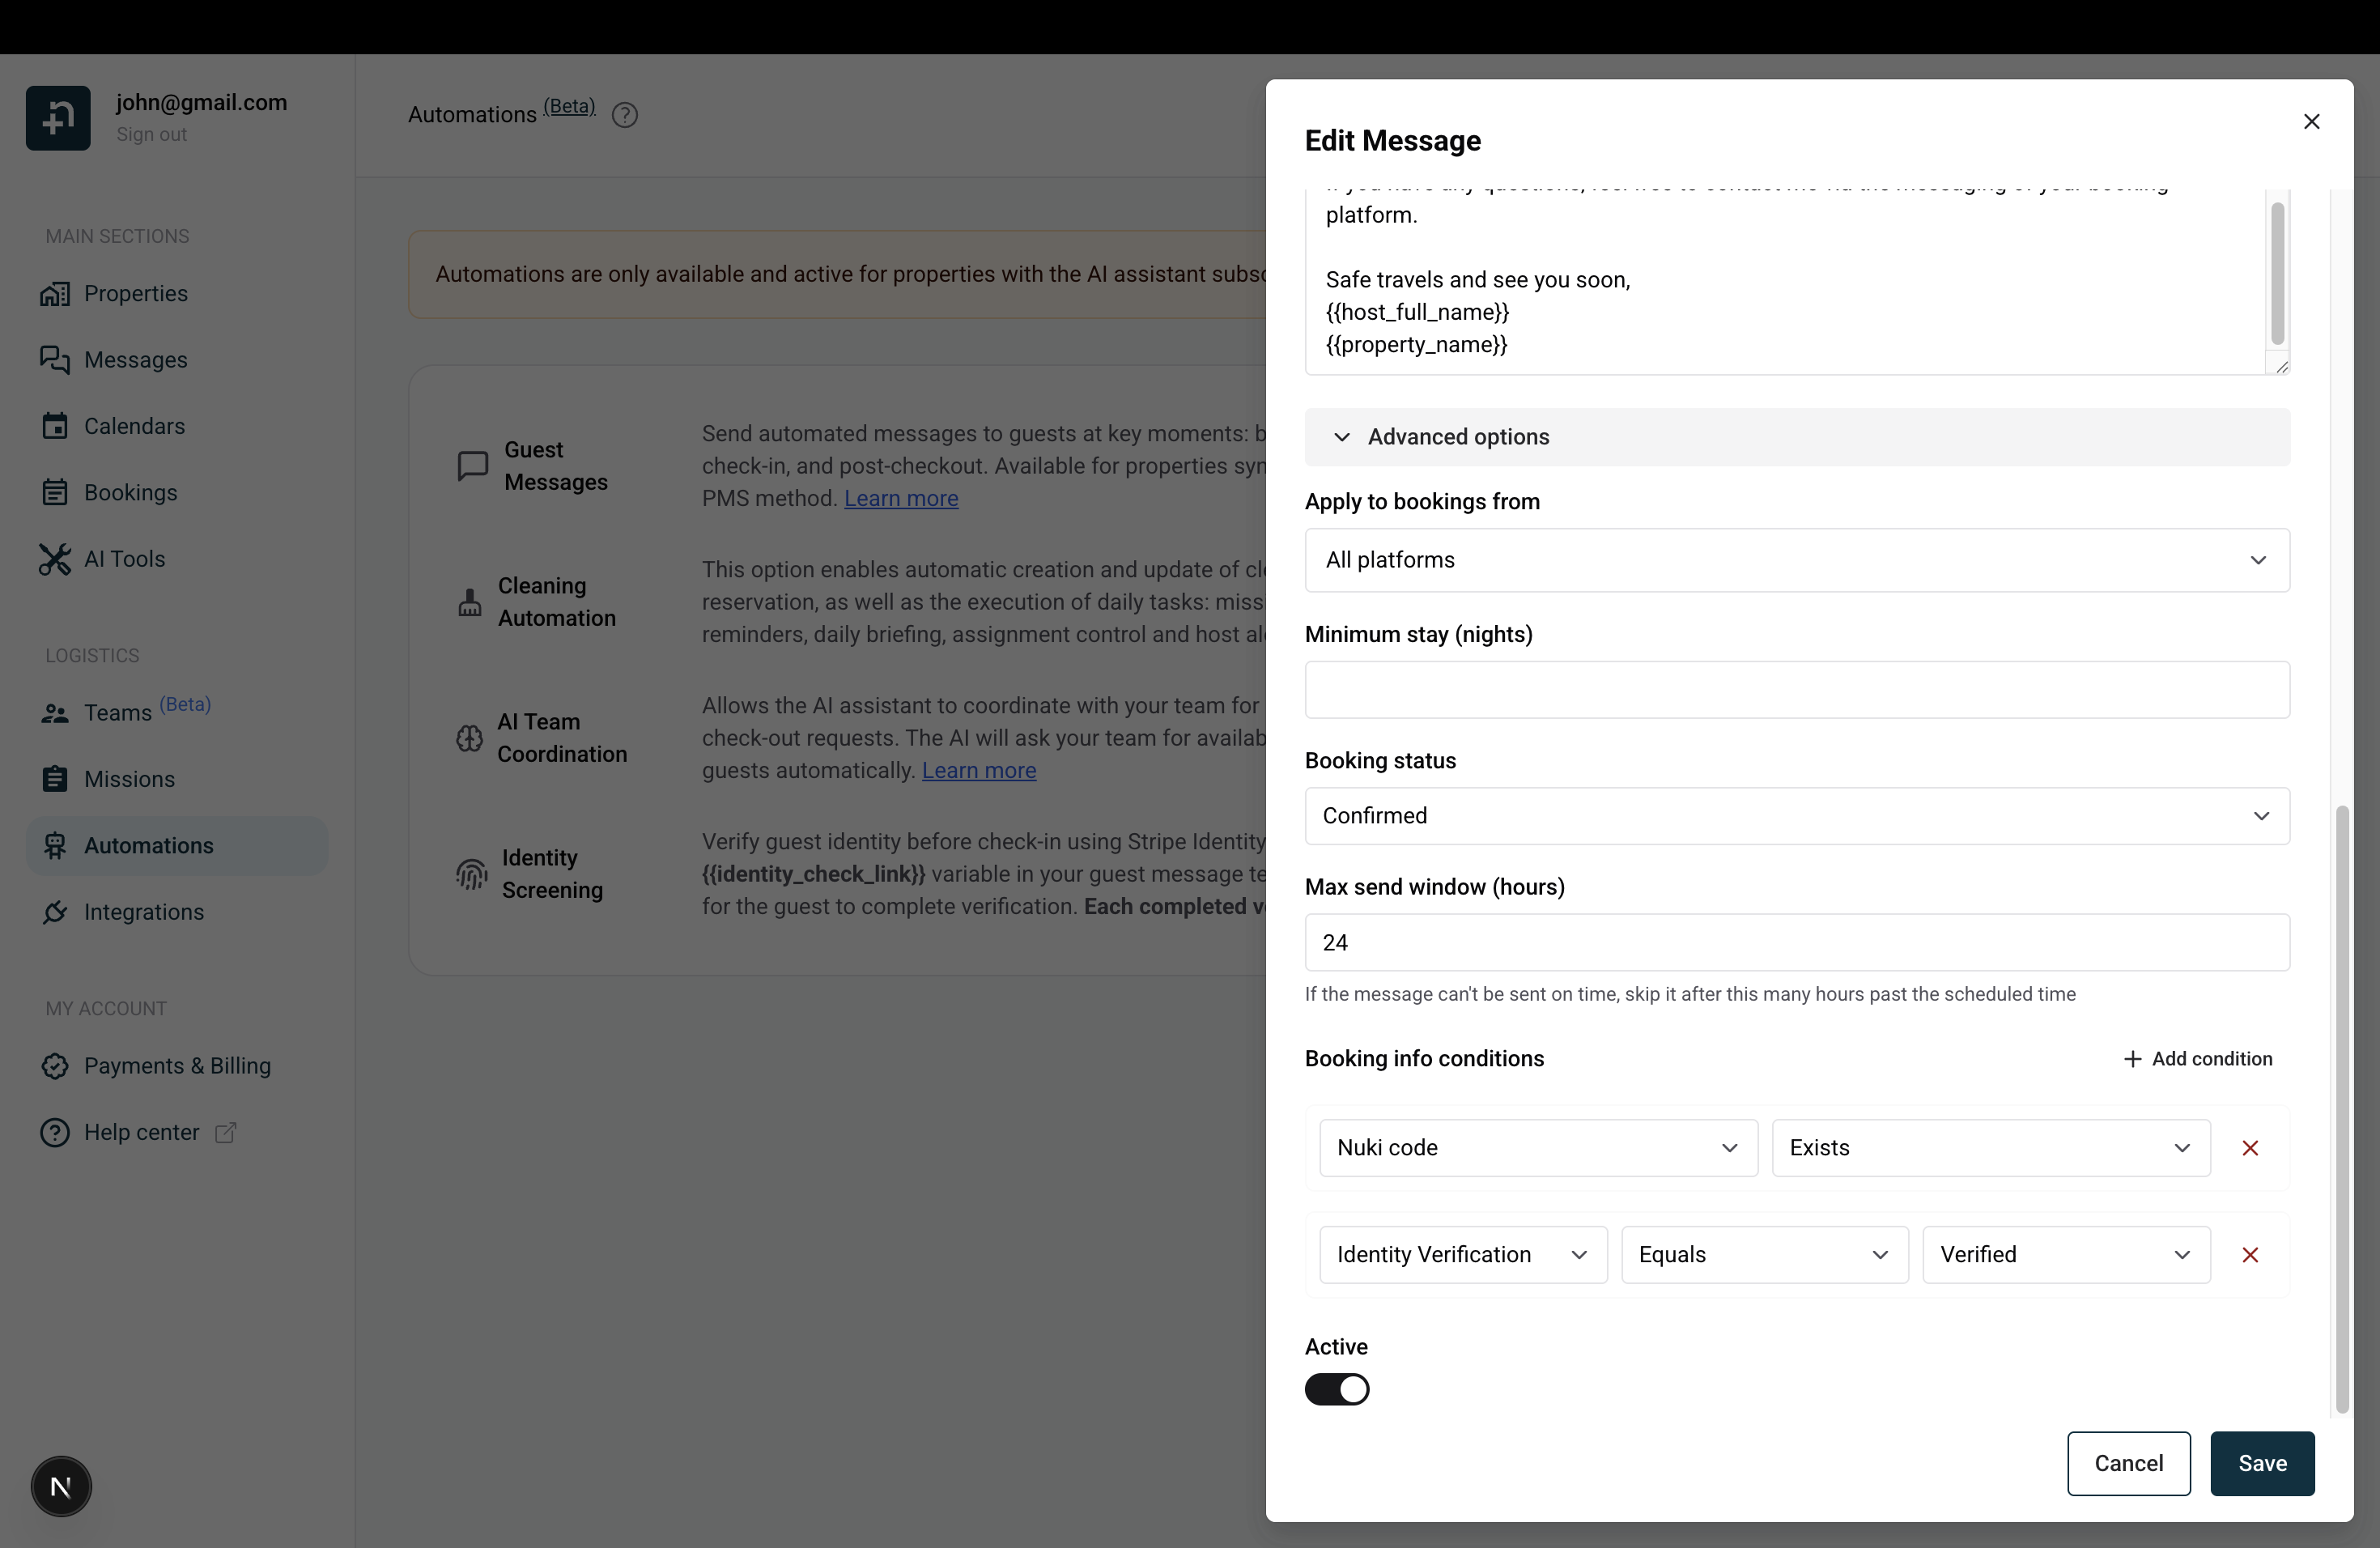
You can set up a condition on your check-in instructions message so it is only sent when the guest's identity has been verified:
Open your check-in instructions message template (or any message you want to restrict).
Scroll down to "Advanced options".
Set the "Booking status" to "Confirmed".
Under "Booking info conditions", click "+ Add condition".
Select "Identity Verification", set the operator to "Equals", and choose "Verified".
Click "Save".
With this setup, your check-in instructions will only be sent to guests who have successfully completed their identity verification. If a guest hasn't verified their identity, the message will be held until they do.
Set a condition so check-in instructions are only sent after identity verification
What your guest receives after verifying
When a guest successfully completes their identity verification, Nowistay automatically sends them a short confirmation message to let them know they are all set. It appears right inside the guest conversation, so there is nothing extra for you to send.
The confirmation is delivered on the same channel the booking came from, so it reaches the guest wherever they have been chatting with you:
Airbnb, Booking.com, and other connected booking platforms, for reservations made on those channels.
WhatsApp, when the conversation runs over WhatsApp.
Email, for direct bookings and any conversation handled by email.
The guest receives a friendly note along these lines: "Hi [name], good news. Your identity check is complete and verified, so you're all set. We'll send your access instructions before your arrival. See you soon!"
Because it lands in the same conversation, the guest can reply in the usual place and your AI co-host can keep the conversation going automatically.
Track verification results
You can monitor the status of all identity verifications from the Screening History:
Go to "Automations" and click the settings icon next to Identity Screening.
Click the history icon to open the Screening History.
You'll see a list of all verifications with their status (Verified or Failed), the guest name, property, and match score.
You can filter the history by property using the dropdown at the top.
Track all guest identity verifications and their results
Pricing
Each completed identity verification costs €2. Verification charges are included in a monthly invoice separate from your property subscriptions invoices. You can always check and download your invoices from your Payments dashboard.
Only completed verifications are billed; if a guest doesn't complete the verification process, there is no charge.
Need help?
If you have any questions about setting up identity verification with Nowistay, our team is here to help: contact us.
Ready to Put Your Rental on Autopilot?
Join 300+ property managers who save hours every week with AI-powered guest communication.